Using Axure Cloud with AI tools via MCP
The Axure MCP integration is currently in Alpha. Features and behavior may change as we continue to develop it.
The Axure MCP server lets you give any MCP-compatible AI tool access to content from your whiteboard and document files on Axure Cloud. Once set up, you can share links to your designs in a prompt and the AI tool will be able to read and interpret the content, using your Axure files as context for code generation, analysis, and more.
MCP stands for Model Context Protocol, an open standard for giving AI agents and tools access to external data sources. Any agent or tool that supports MCP can use Axure Cloud as a context source via the MCP server URL. The Share dialog includes setup instructions for Claude Code, VS Code, and Cursor.
The Axure MCP integration is only available for whiteboards and documents. It is not available for Axure RP prototypes.
How it works
When an AI tool is connected to the Axure MCP server, it gains read-only access to your whiteboard and document files. You can share a link to a file, or to a specific section or canvas object, and the AI tool will retrieve the content and use it as context.
The MCP server exposes two types of content from your files:
- Document content: The text from your document, returned as structured markdown including headings, tables, callouts, and other block-level content.
- Canvas content: Structured data and a rendered image of your whiteboard's canvas, including shapes, connectors, sticky notes, UI mockups, and other visual objects.
All access through MCP is currently read-only: the AI tool cannot modify your files.
Requirements
Before setting up the MCP server, make sure the following conditions are met:
- The file must be a whiteboard or document on Axure Cloud.
- The file's sharing settings must be set so that anyone with the link can view (or edit). Files that are not publicly accessible cannot be used with the MCP server.
To check or update a file's sharing settings, open the Share dialog and go to the Share this file tab.
Setting up the MCP server
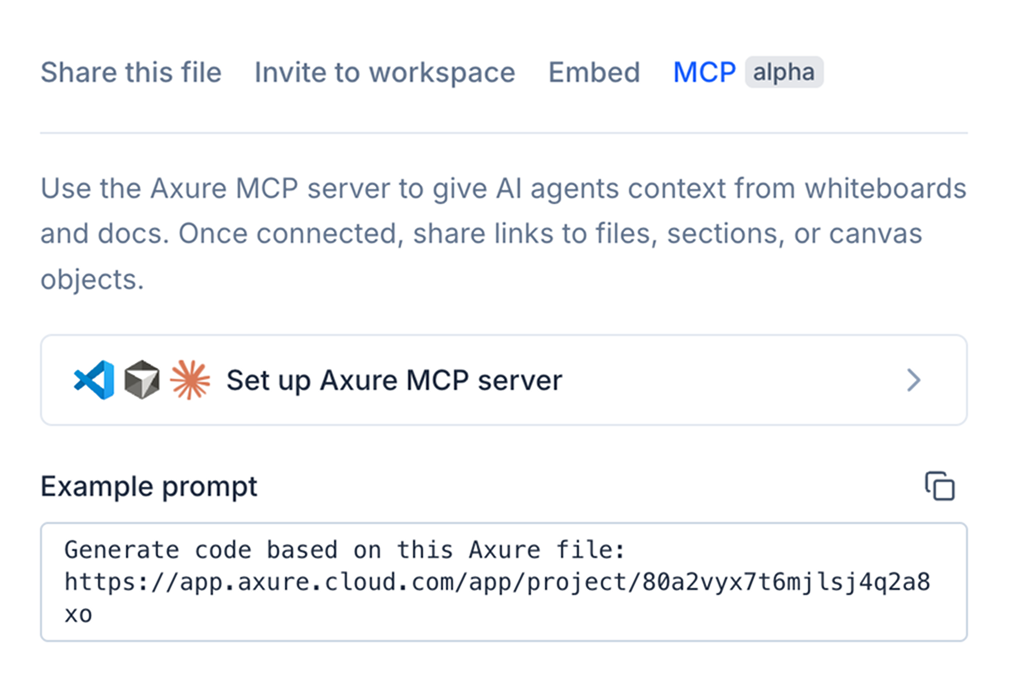
To get started, open the Share dialog for a whiteboard or document file. You'll find the MCP tab alongside the other sharing options.
Click Set up Axure MCP server to open the setup instructions.
If your file's sharing is not set to "anyone with the link," you'll see a notice in the MCP tab prompting you to update the share settings before proceeding.
The setup instructions vary slightly depending on which tool you're using. Choose the tab for your editor:
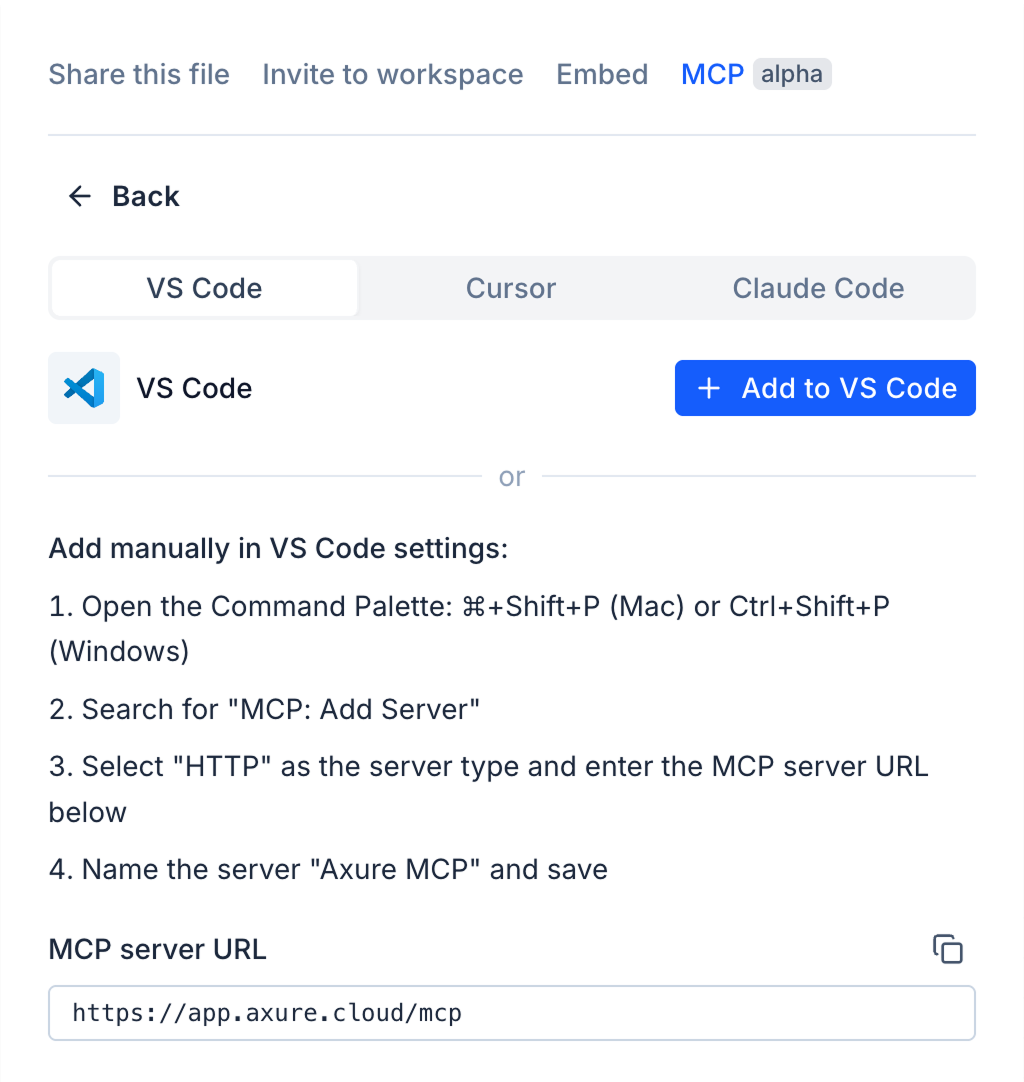
VS Code
- Click Add to VS Code to install with one click. VS Code will open and prompt you to confirm adding the Axure MCP server.
- Alternatively, set it up manually by copying the MCP server URL and adding it to your VS Code MCP configuration.
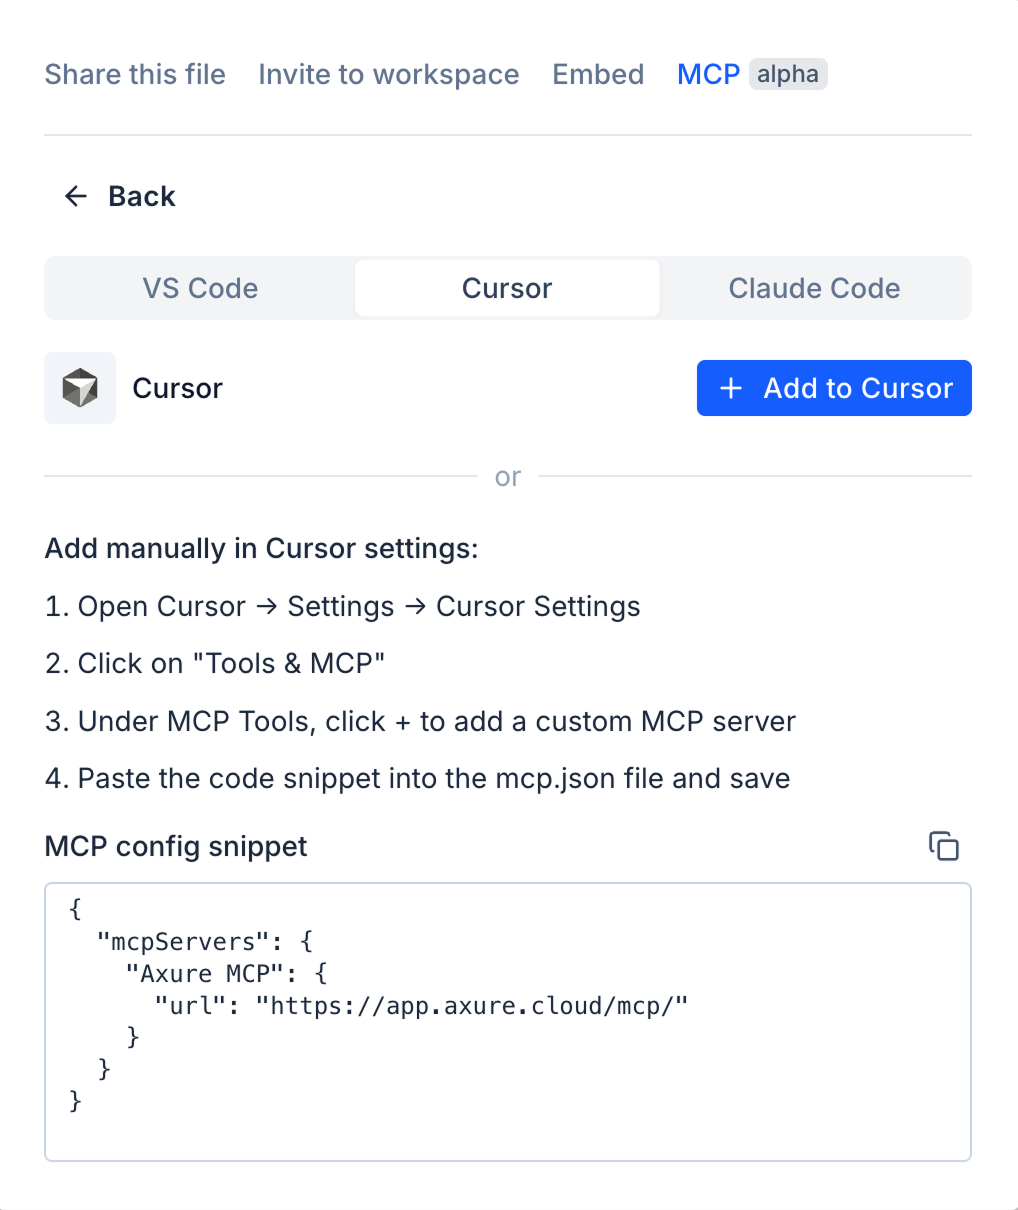
Cursor
- Click Add to Cursor to install with one click. Cursor will open and prompt you to confirm adding the Axure MCP server.
- Alternatively, set it up manually by copying the MCP config snippet and adding it to your Cursor MCP settings file.
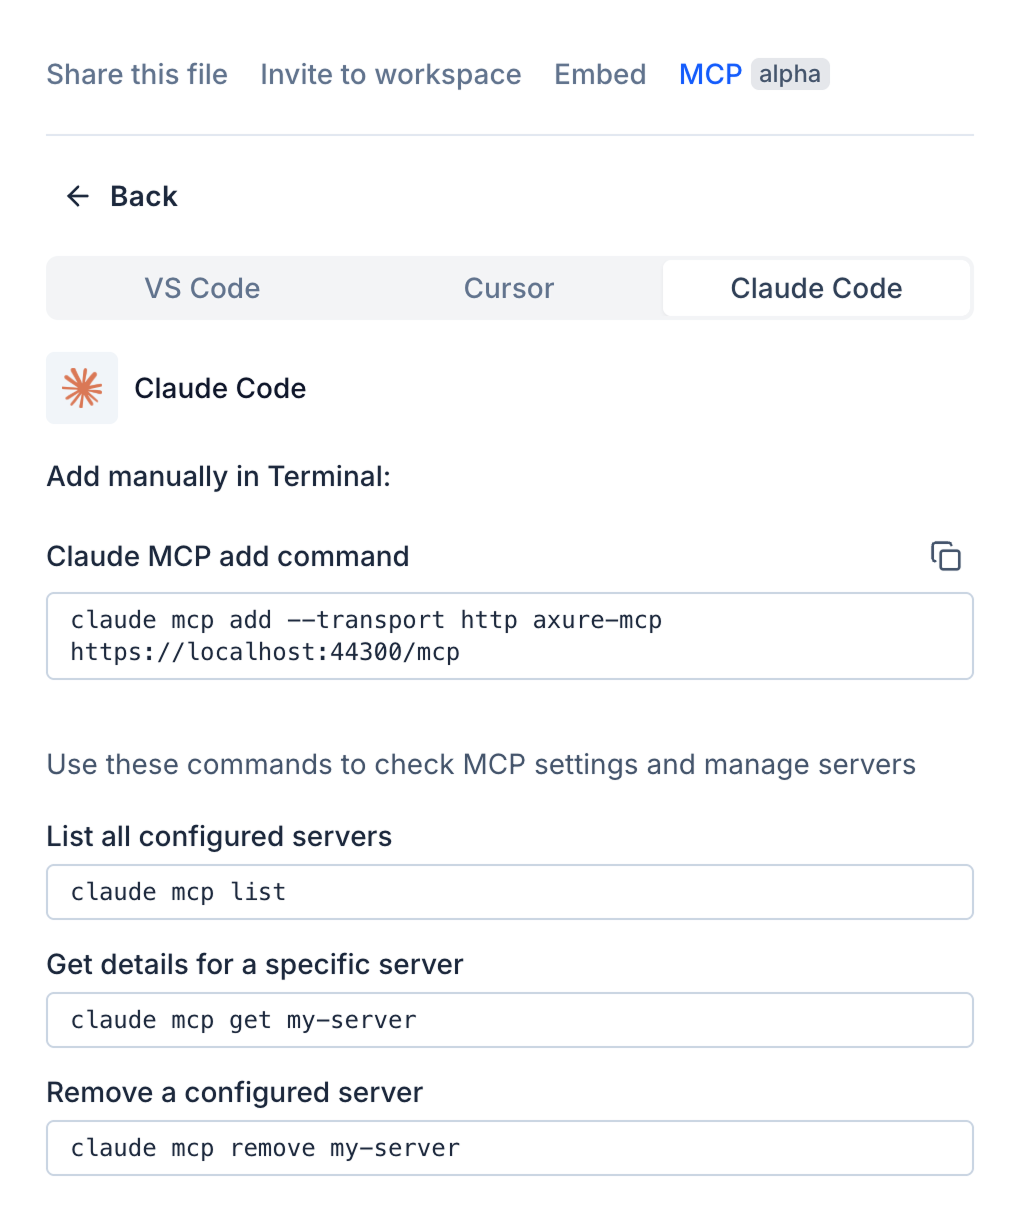
Claude Code
- Copy the
claude mcp addcommand shown in the setup panel. - Paste and run it in your terminal.
You can verify the server was added successfully by running claude mcp list.
Other MCP-compatible tools
Any AI agent or tool that supports MCP over streamable HTTP can connect to Axure Cloud using the following server URL:
https://app.axure.cloud/mcp
Refer to your tool's documentation for how to add an MCP server.
Using whiteboards and documents with AI tools
Once the MCP server is set up in your AI tool, you can start sharing Axure file links in your prompts. The AI tool will use the MCP server to retrieve content from the linked file and use it as context.
You can link to an entire file, or scope the link to a specific part:
- Entire file: Link to the file's main URL. The AI tool will access both the document and canvas content.
- Specific document section: Click the drag handle next to a block in the document and select Copy link
- Specific section on canvas: Right-click on the section on the canvas and select Copy link.
- Specific canvas object: Right-click on the object in the canvas and select Copy link.
Example prompts
Here are some prompts to get you started. Replace [your file URL] with the link to your Axure file.
Generate components
Review this Axure file: [your file URL]

Return production-ready React components that match the layout. Structure your response as:
1. Component list (name and one-line description of each)
2. Code for each component (semantic HTML, TypeScript props)
3. Interactive states and variants (note any you've inferred)

If a detail is unclear, state your assumption in [brackets] and continue.
Summarize user flows
Review this Axure file: [your file URL]

Return a markdown document with one section per user flow. For each, include:
- Entry point
- Steps (numbered list)
- Decision points (and what triggers each branch)
- Exit states

If a detail is unclear, state your assumption in [brackets] and continue.
Write a PRD
Review this Axure file: [your file URL]

Return a markdown product requirements document with these sections:
1. Problem statement (1 sentence)
2. Goals and success metrics (bullet list)
3. User stories (each on one line: As a [user] I want [action] so that [outcome])
4. Functional requirements (grouped by feature area)
5. Edge cases and error states
6. Open questions (bullet list)

If a detail is unclear, state your assumption in [brackets] and continue.
Audit UI copy
Review this Axure file: [your file URL]

Return a markdown table with these columns: Location | Current copy | Issue | Suggested rewrite

Cover all UI text: labels, headings, tooltips, CTAs, and empty states. Prioritize clarity, brevity, and consistent voice throughout.
Explore alternatives
Review this Axure file: [your file URL]

Return a markdown document with:
1. Core problem (1 sentence — infer from what's shown)
2. Three alternative approaches, each with:
   - Approach name and one-line description
   - How it differs from what's shown
   - Tradeoffs (what you gain, what you give up)