Axure Cloud for Business accounts and permissions
This document is a guide for managing Axure Cloud for Business organization members. The information presented covers private instances hosted on Axure servers as well as on-premises installations.
Sign in to an administrator account to access the controls described below.
Managing organization members
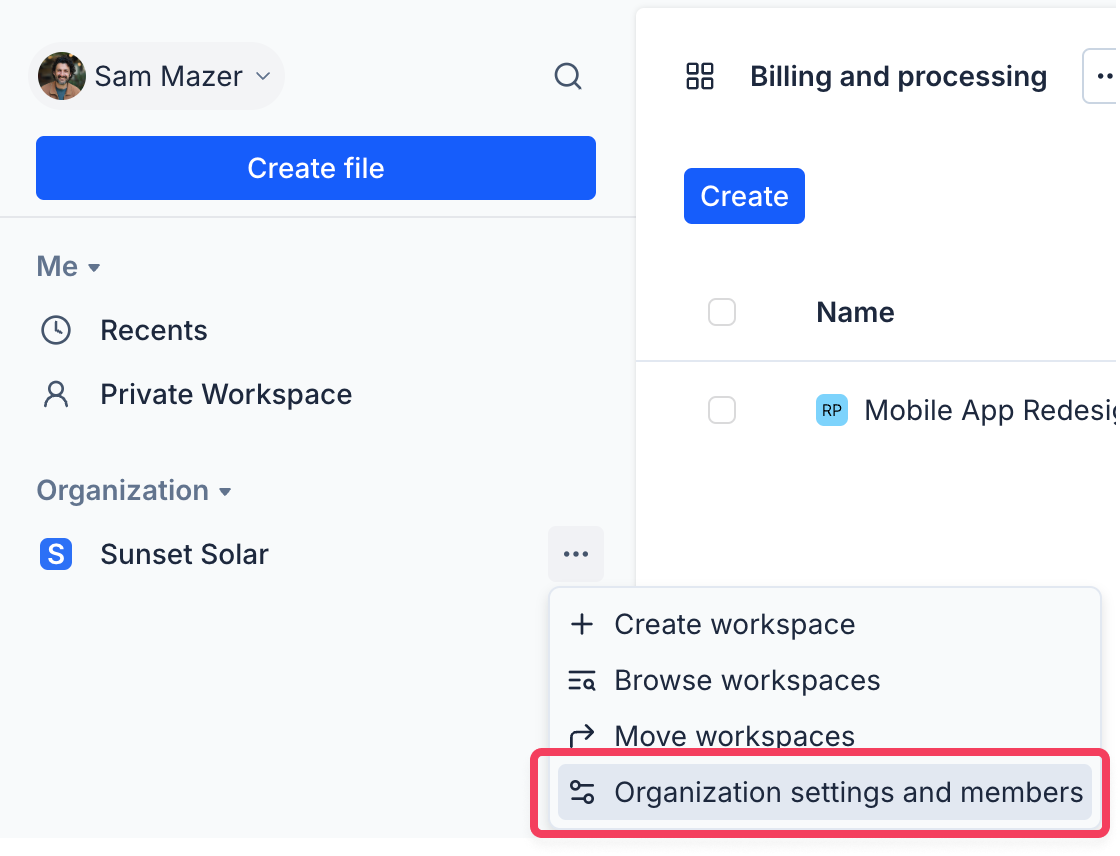
To manage member accounts, go to your sidebar and click the organization dropdown, then select Members from the menu.
Adding accounts
Before your teammates can access your Axure Cloud for Business private instance or on-premises server, you'll need to create user accounts for them. Users will still need to create a public Axure Cloud account, which is separate from their Axure Cloud for Business account, in order to activate their subscription in Axure RP.
Adding new accounts on Axure Cloud for Business will add users on a publishing trial basis. During a publishing trial, users can publish projects without requiring an Axure RP Enterprise subscription or an Axure Cloud for Business seat.
-
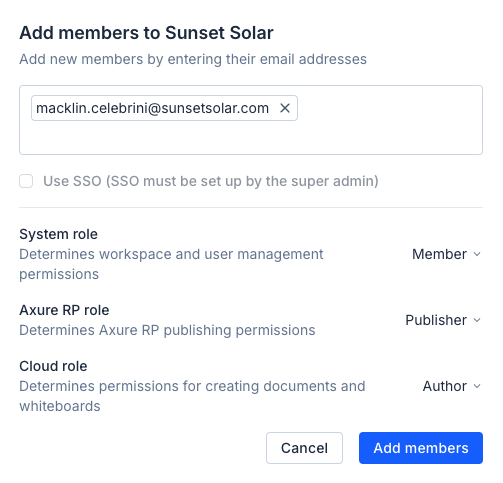
Click Add members at the top-right of the Members page to open the Add members dialog.
-
Enter the email address of one or more teammates you want to create user accounts for.
-
If you have configured Single Sign On (SAML), you can check the box for Use SSO to make the new user accounts sign in with their SAML credentials. (This can be enabled or disabled later.)
If you leave this box unchecked:
-
Private instance users will receive emails prompting them to create passwords to sign in to their accounts.
-
On-premises users' passwords are set by the administrator in the Password field of the Add members dialog.
You can optionally require users to choose new passwords upon login by checking the box for Require password reset on next login.
-
-
Finally, select the user roles you want to grant to the new members. (You can change a user's role later.)
Only the super administrator and technical admins can create other admin users.
Deactivating users
Deactivating a user prevents the user from signing in or publishing to the Axure Cloud for Business server.
-
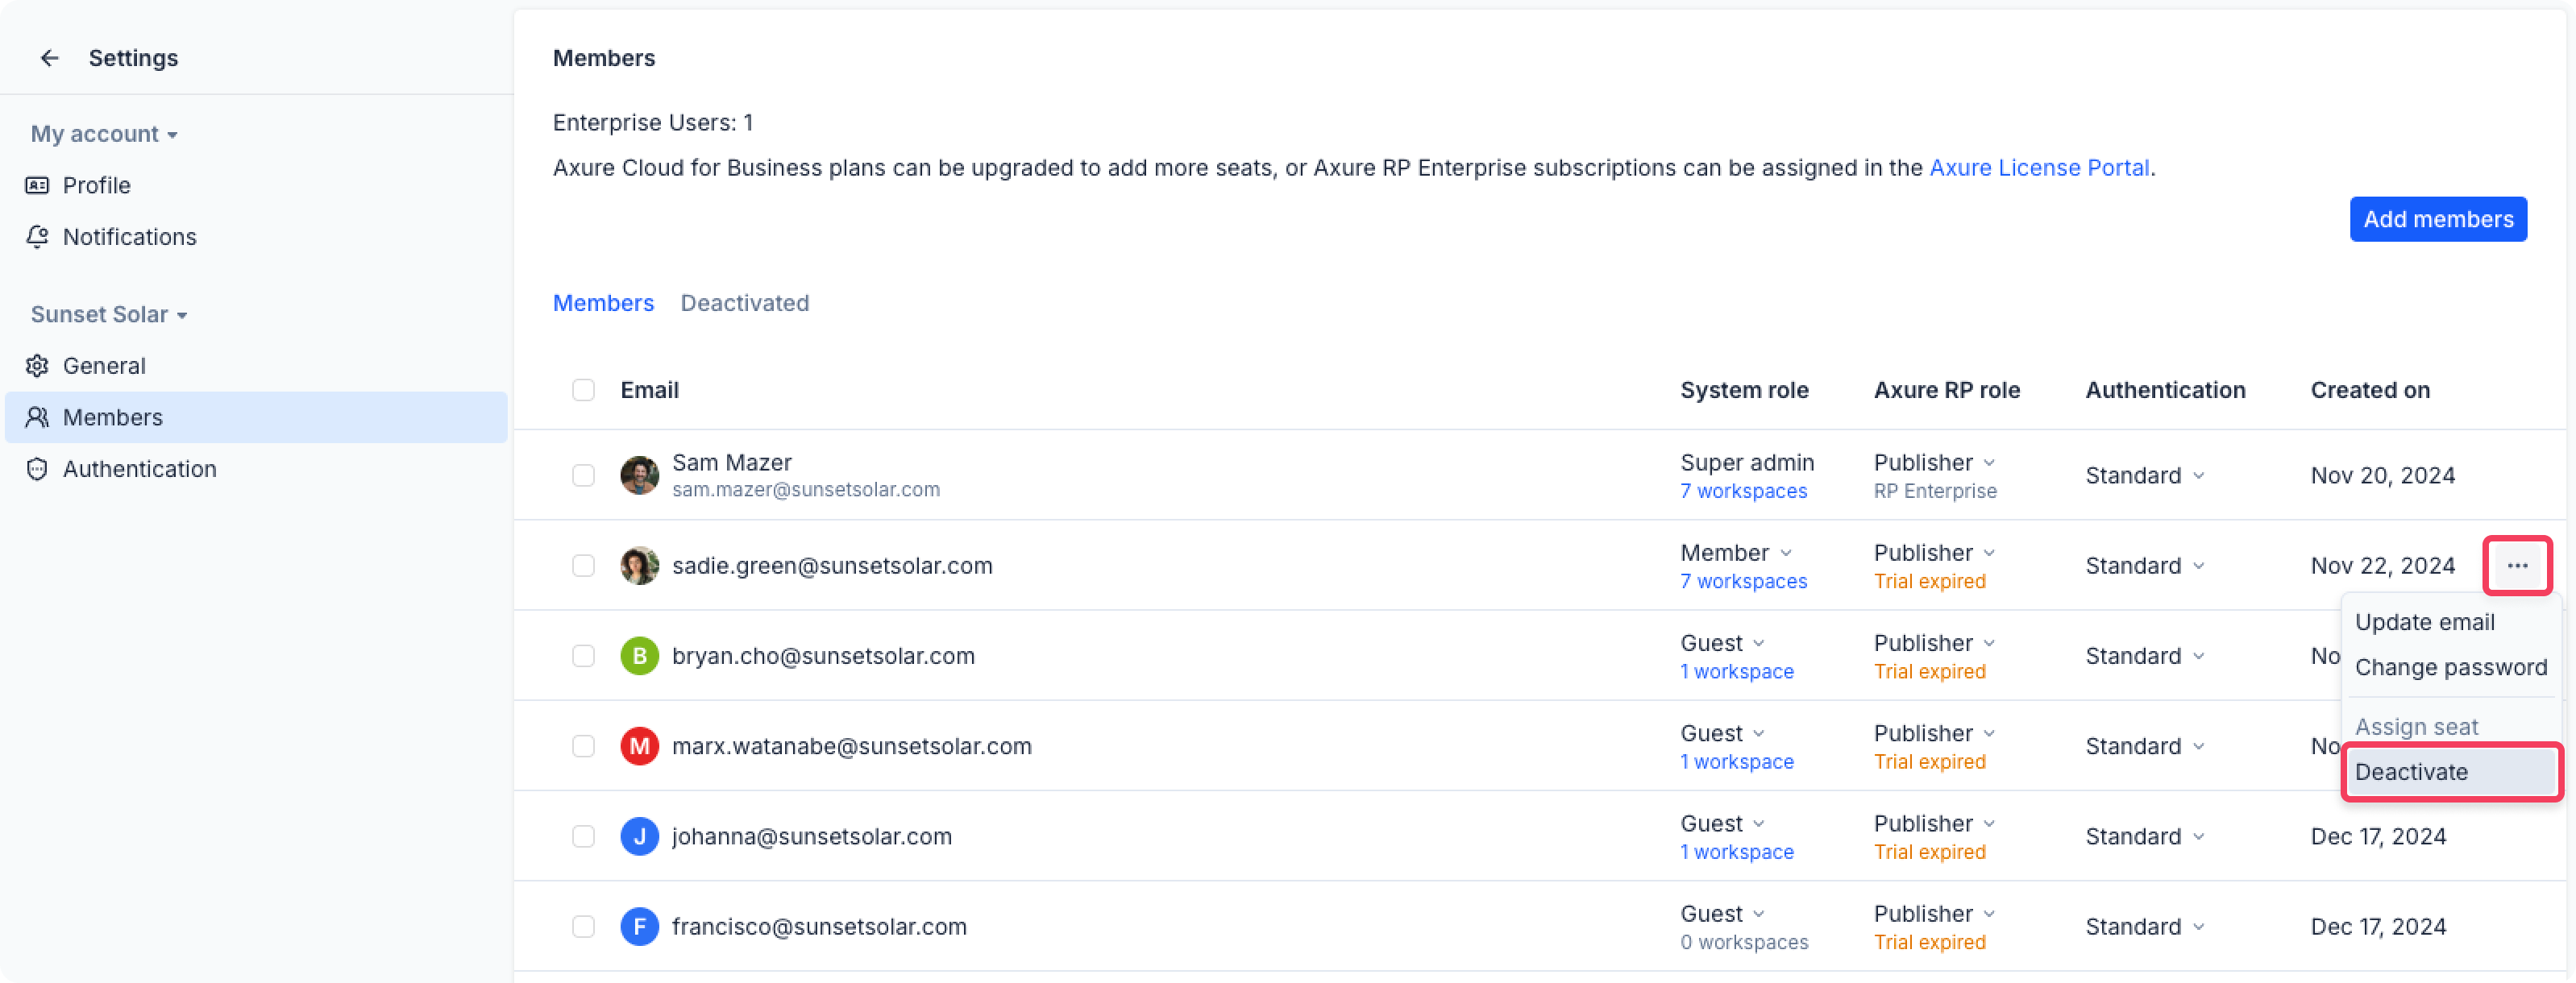
Locate the user you want to deactivate in the table on the Members page.
-
Click the Options button
•••in the far right column and select Deactivate. -
In the dialog that appears, click Deactivate to confirm the action.
You can reactivate deactivated accounts by selecting the Deactivated tab and activating through the ••• menu.
User roles
If you are using Axure Cloud for Business On-Premises and are still using version 2.0.0.426 or lower, view this page to see the former user access levels.
Axure RP role
| Viewer | Publisher | |
|---|---|---|
| View, inspect, and comment on projects | ||
| Create, publish, and edit projects |
Viewer
Viewers can:
- view, inspect, and comment on Axure RP projects and Axure Cloud clickthrough projects
Publisher
Publishers must occupy an Axure Cloud for Business seat or have an Axure RP Enterprise subscription.
Publishers can:
- view, inspect, and comment on Axure RP projects and Axure Cloud clickthrough projects
- create, publish, and edit Axure RP projects and Axure Cloud clickthrough projects
System role
| Guest | Member | Admin | Technical admin | Super admin | |
|---|---|---|---|---|---|
| Access workspaces they are invited to | |||||
| Create workspaces and invite collaborators | |||||
| Access all workspaces | |||||
| Create guest and member accounts | |||||
| Create admin accounts | |||||
| Create technical admin accounts |
Guest
Guest accounts can:
- be added to workspaces
- participate in project discussions
Member
Member accounts can do everything guests can do. In addition, they can:
- create new workspaces and invite other users to join them
- be the owner of a workspace
- move workspaces to Axure Cloud organizations
Member and guest accounts can both be set to View only or Can edit for workspaces that they are invited to join.
Admin
Admin accounts can do everything members can do. In addition, they can:
- create and manage guest, member, and other admin accounts
- add SAML/SSO to user accounts
- activate and disable user accounts
- view and self-invite to any workspace
Technical admin
Technical admin accounts are created for the purpose of handling the technical aspects of setting up and configuring the Axure Cloud for Business private instance or on-premises server.
Technical admins can:
- create and manage guest, member, admin, and other technical admin accounts
- activate and disable user accounts
- set up SAML/SSO
- add SAML/SSO to user accounts
- set up Active Directory and LDAP
Super admin
The super admin account is created during the Axure Cloud for Business setup process, and it manages all other user accounts on your private instance or on-premises server. There can be only one super admin account per server.
Cloud role
| Viewer | Author | |
|---|---|---|
| View whiteboards and documents | ||
| Create and edit whiteboards and documents |
Viewer
Viewers can open whiteboards and documents shared with them, but they cannot create new ones or make edits to existing ones.
Author
Authors can create new whiteboards and documents, as well as edit any existing whiteboards and documents they have access to within the organization.
Cloud Author seats can be purchased using these steps
Changing user permissions
Admins can manage user roles from the Members page in Axure Cloud. To access this page, click your avatar in the top-left corner and select Account settings from the dropdown menu. Then follow these steps:
-
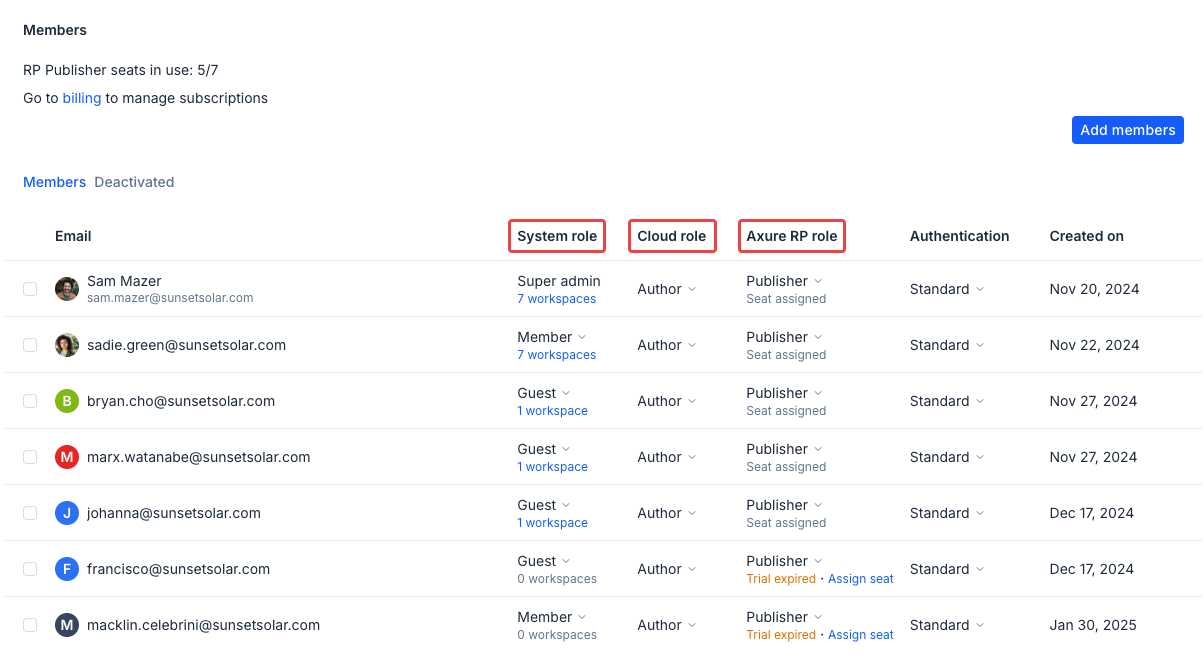
Locate the account you want to edit in the table on the Members page.
-
In the System role column, select a system role for the user: Guest, Member, or Admin. If you're a technical admin or super admin, you can also change a user's role to technical admin.
-
In the Axure RP role column, choose the user’s Axure RP role: either publisher or viewer.
-
In the Cloud role column, choose the user's Cloud role: either author or viewer.
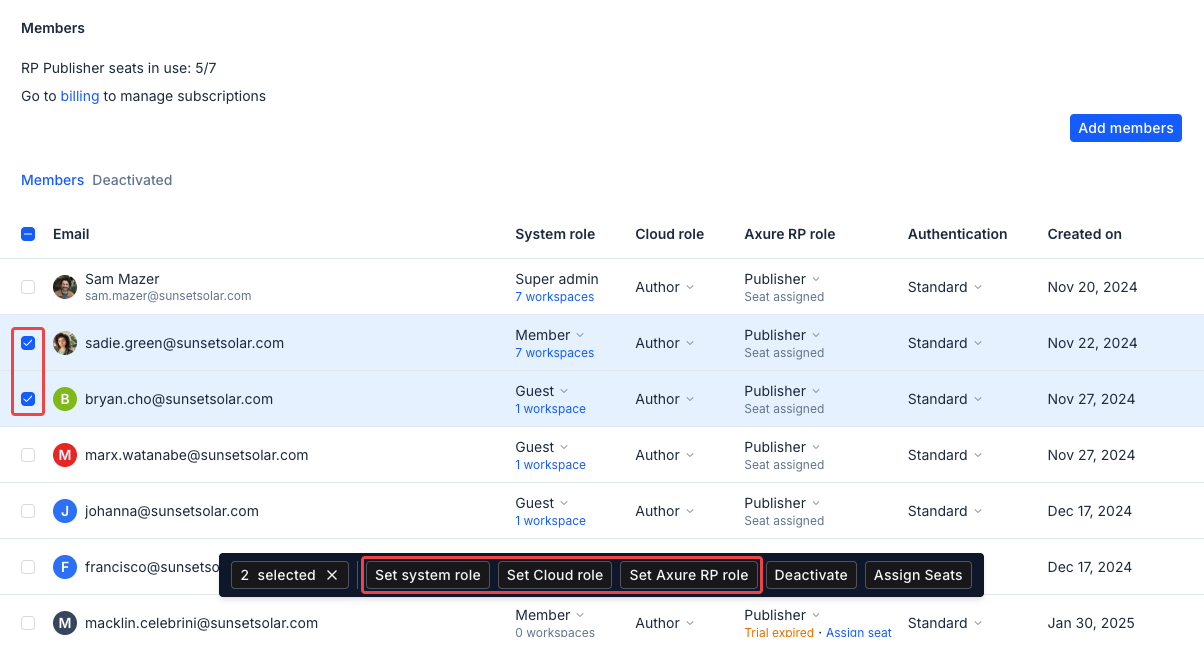
Additionally, you can make changes to multiple accounts at once by selecting the checkboxes on the left and using the Set role options at the bottom of the page.
Workspace organization access
Workspace owners and admins can designate workspaces in your organization to be invite-only. To do so:
-
Click the Invite button at the top of the workspace page to open the Invite to workspace dialog
-
Select Invite-only from the dropdown menu under the Organization access section.
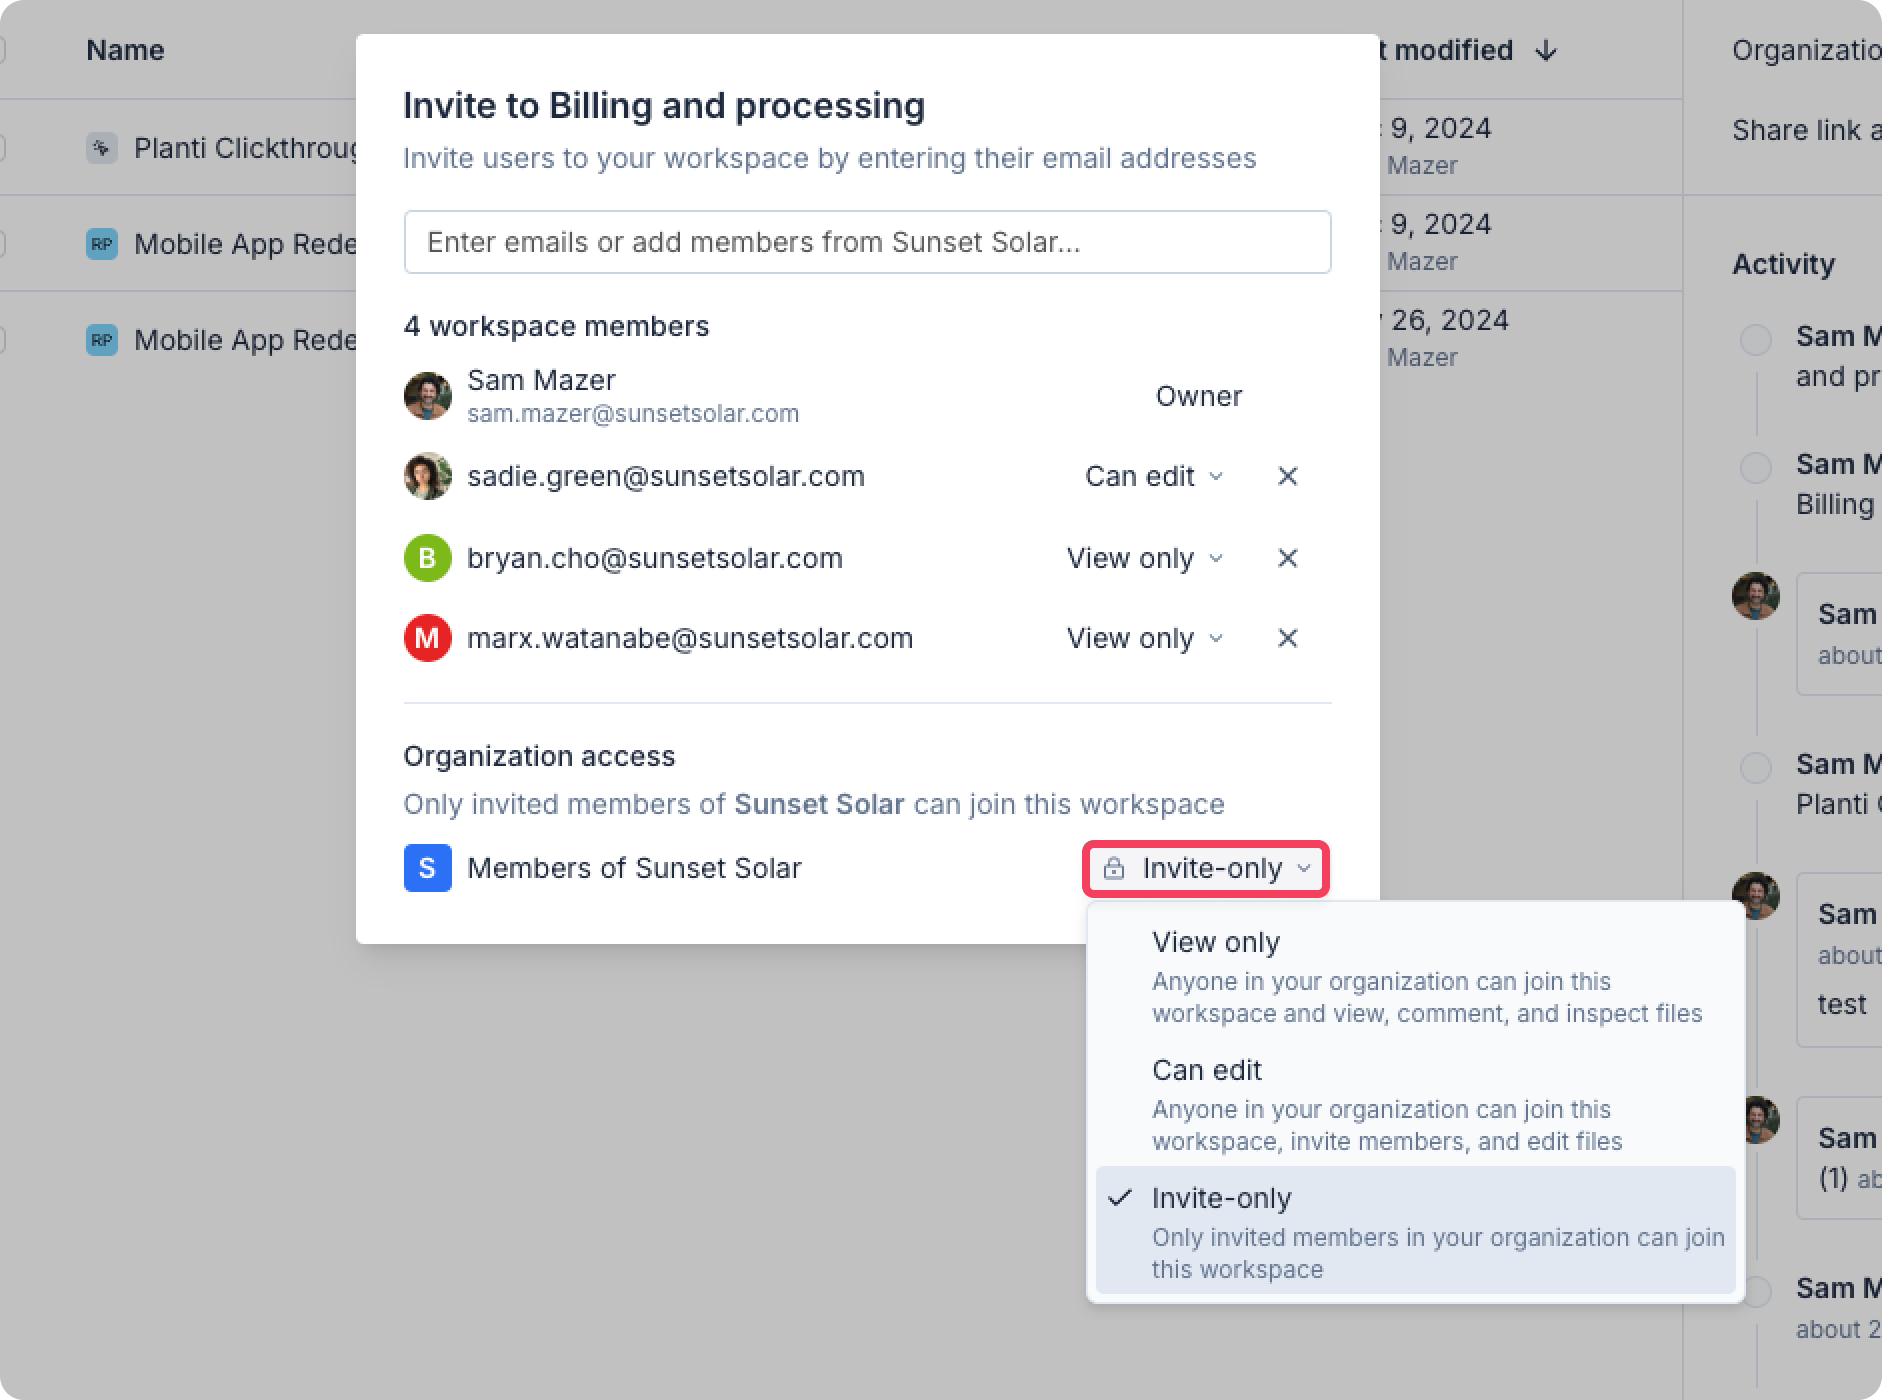
When a workspace is invite-only, users in your organization will see a lock icon next to the workspace name, indicating that they must be invited to join.
User sign-in options
Axure Cloud password
By default, users can sign in to your Axure Cloud for Business private instance or on-premises server with the password they choose at account creation.
Users can reset their passwords at any time by clicking their avatar at the top-rileftght of the UI and selecting Account settings.
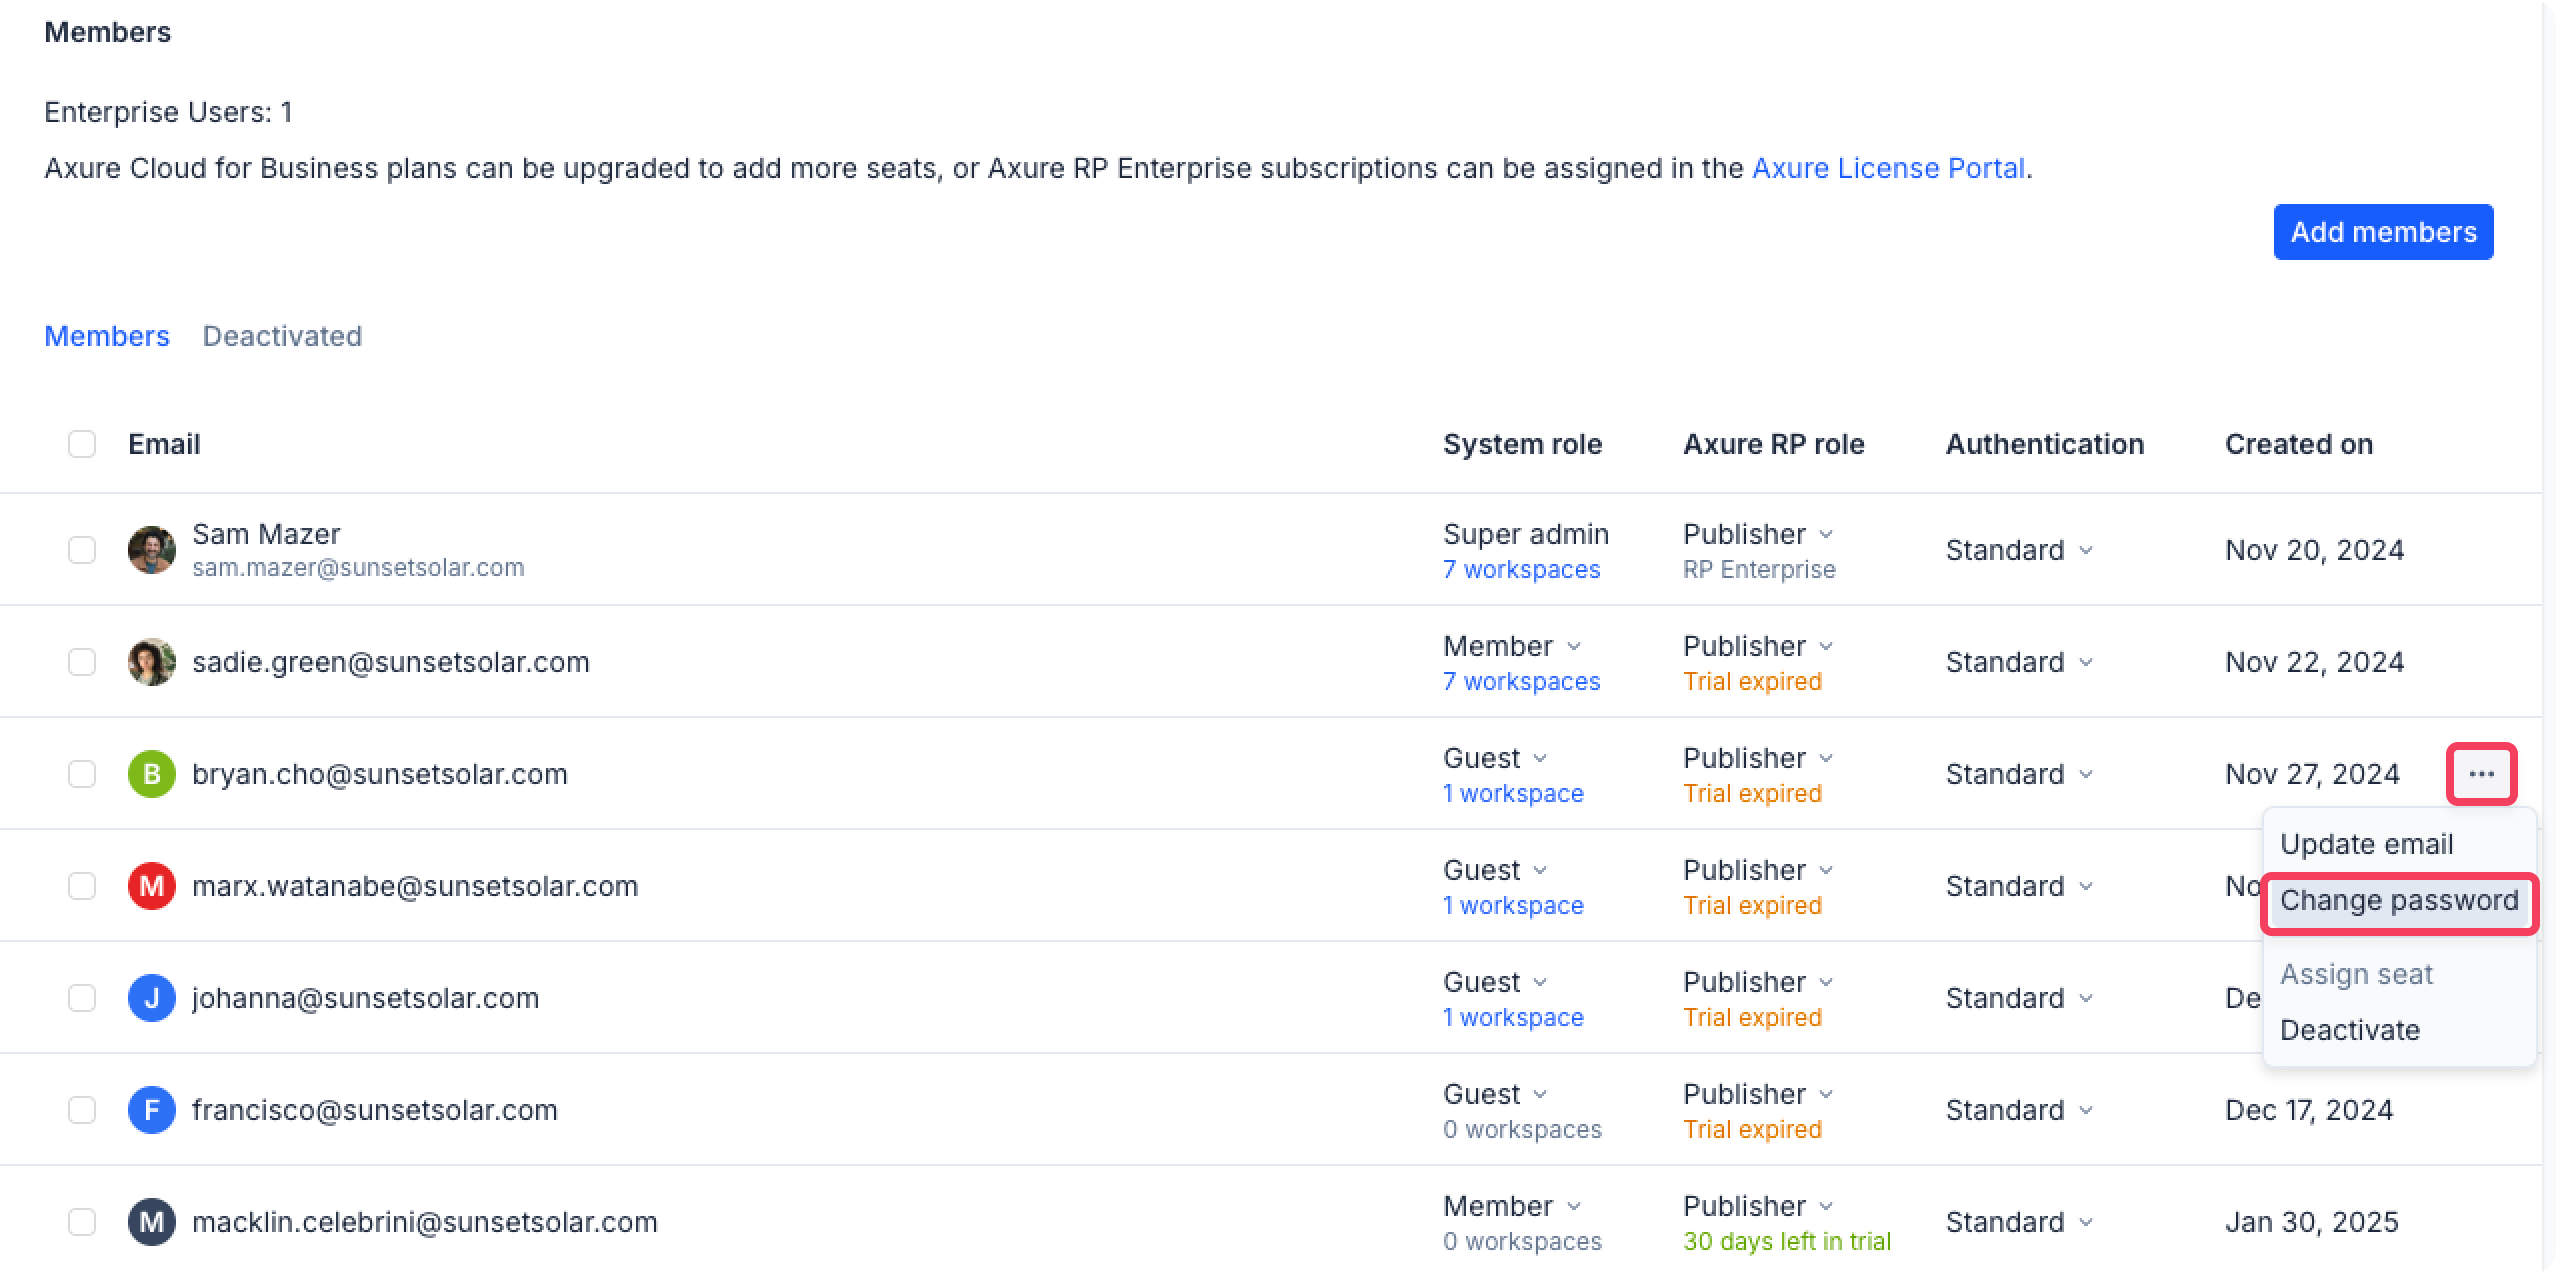
Administrators can change users' passwords by following these steps:
-
Locate the account you want to edit in the table on the Members page.
-
Click the
•••menu in the far right column and select Change Password.
-
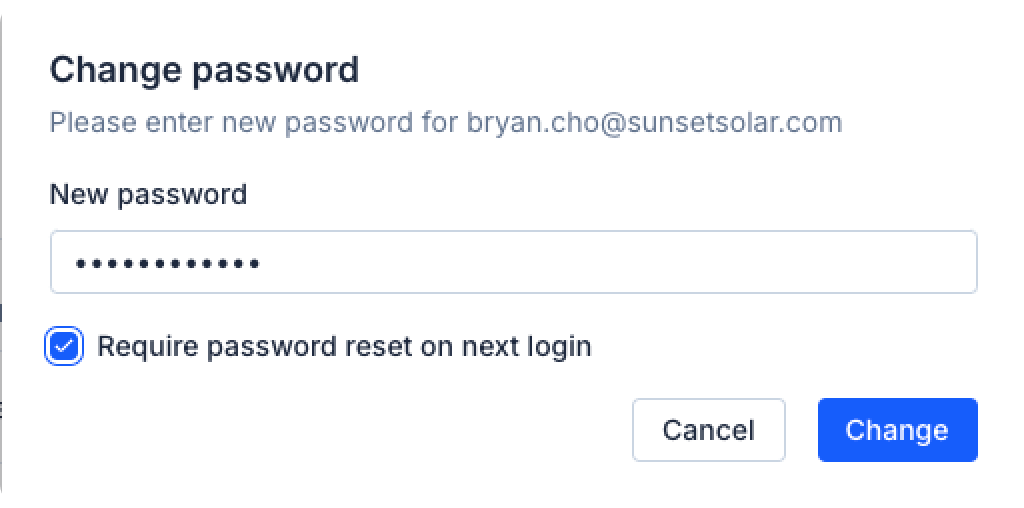
Enter a new password in the dialog that appears, and click Change.
You can optionally require the user to choose a new password upon login by checking the box for Require password reset on next login.
SAML
Axure Cloud for Business uses SAML 2.0.
If the user accounts will use SAML authentication, you'll first need to configure your Axure Cloud for Business private instance or on-premises server to use your identity provider. This must be done by the Super admin or a Technical Admin.
In the Account settings, switch to the Authentication tab, click Configure, and provide the required information.
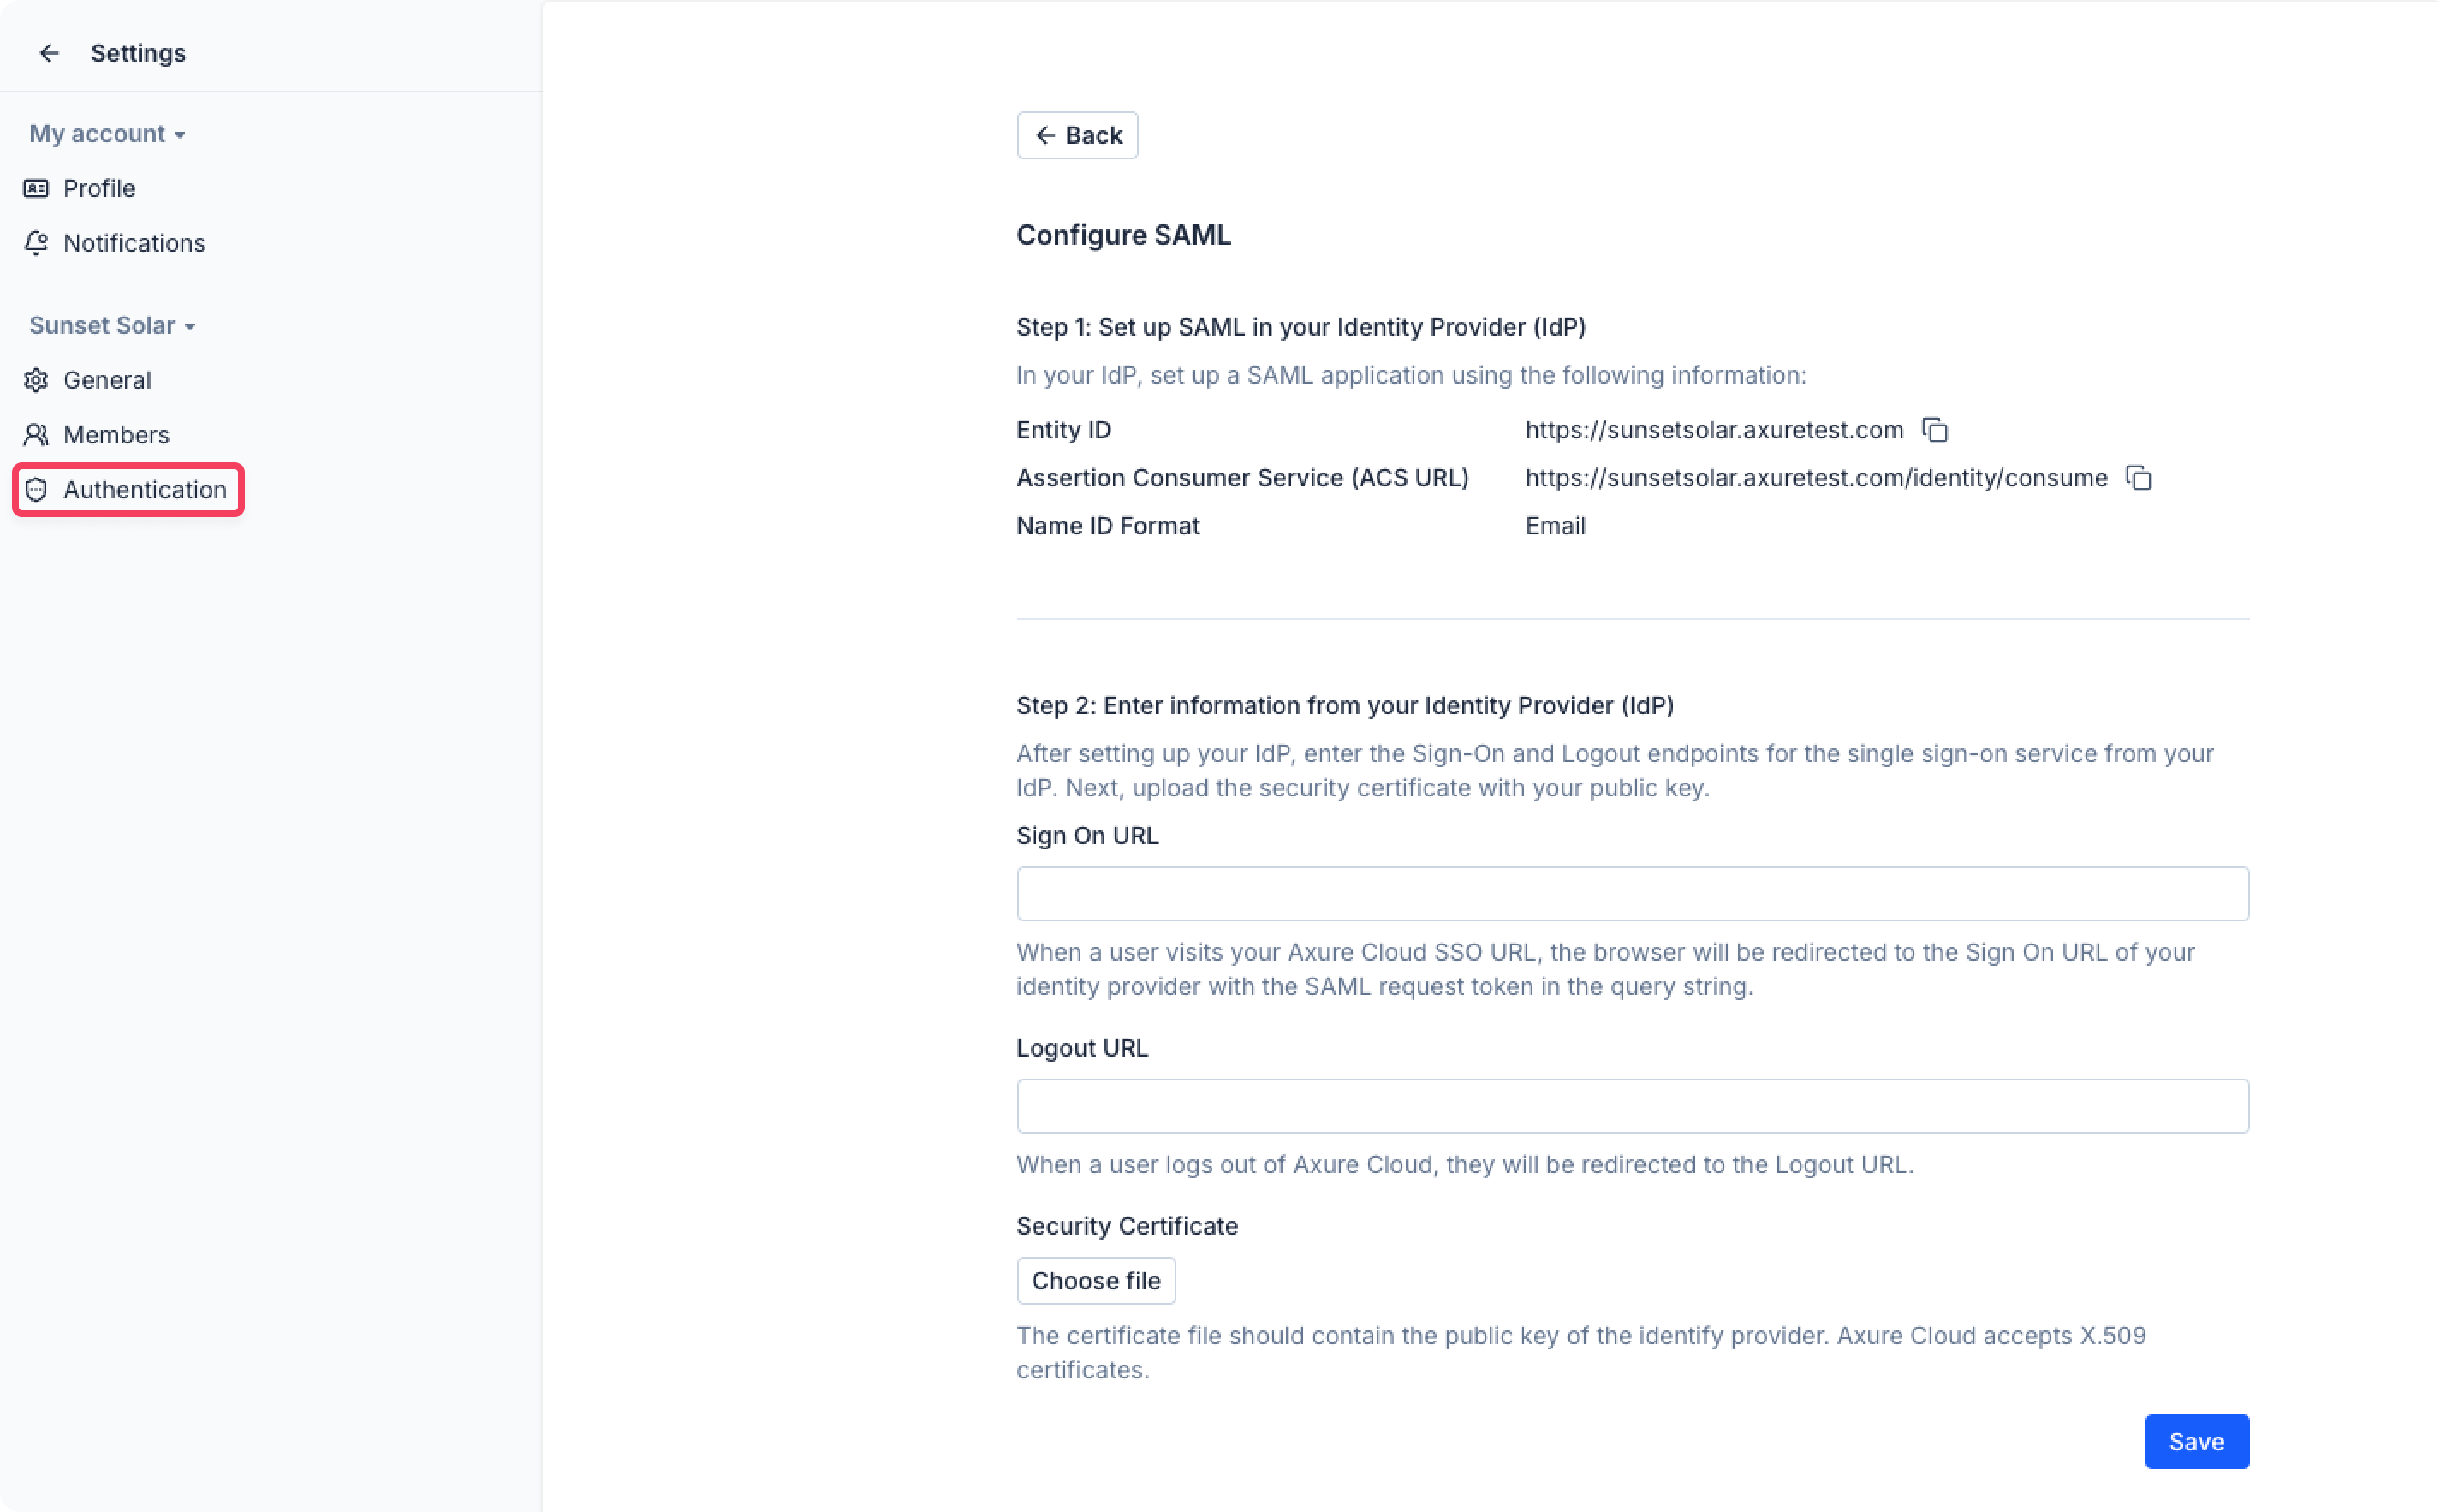
-
Sign On URL: This is the URL your users will be redirected to in order to sign in to your SAML identity provider. You can get the Sign On URL from your identity provider.
-
Logout URL: This is the URL your users will be redirected to after logging out of Axure Cloud for Business. It can be any URL you like, including the Sign On URL.
-
Security Certificate: This file contains information Axure Cloud for Business needs to process authentication responses from your SAML identity provider. You can generate the Security Certificate through your identity provider, and you will need the following information to do so:
-
Service Provider Entity ID:
If you have a private instance of Axure Cloud for Business hosted on Axure servers, the Entity ID is your instance's subdomain.
https://[domain].axure.cloudIf you have an on-premises installation of Axure Cloud for Business, the Entity ID is the IP address or hostname of your Axure Cloud for Business server.
-
Assertion Consumer Service (ACS) URL: This is the Entity ID followed by /identity/consume.
https://[domain].axure.cloud/identity/consume
-
SSO with Microsoft Active Directory Federation Service
For information on setting up single sign-on with Microsoft's Active Directory Federation Service (ADFS), click the link below:
Axure Cloud On-Premises SSO with ADFS (PDF download)
Adding and Removing SAML from User Accounts
If you originally set up a user account with an Axure Cloud password but want to convert it to use SAML authentication, you can do so by going to the Members page.
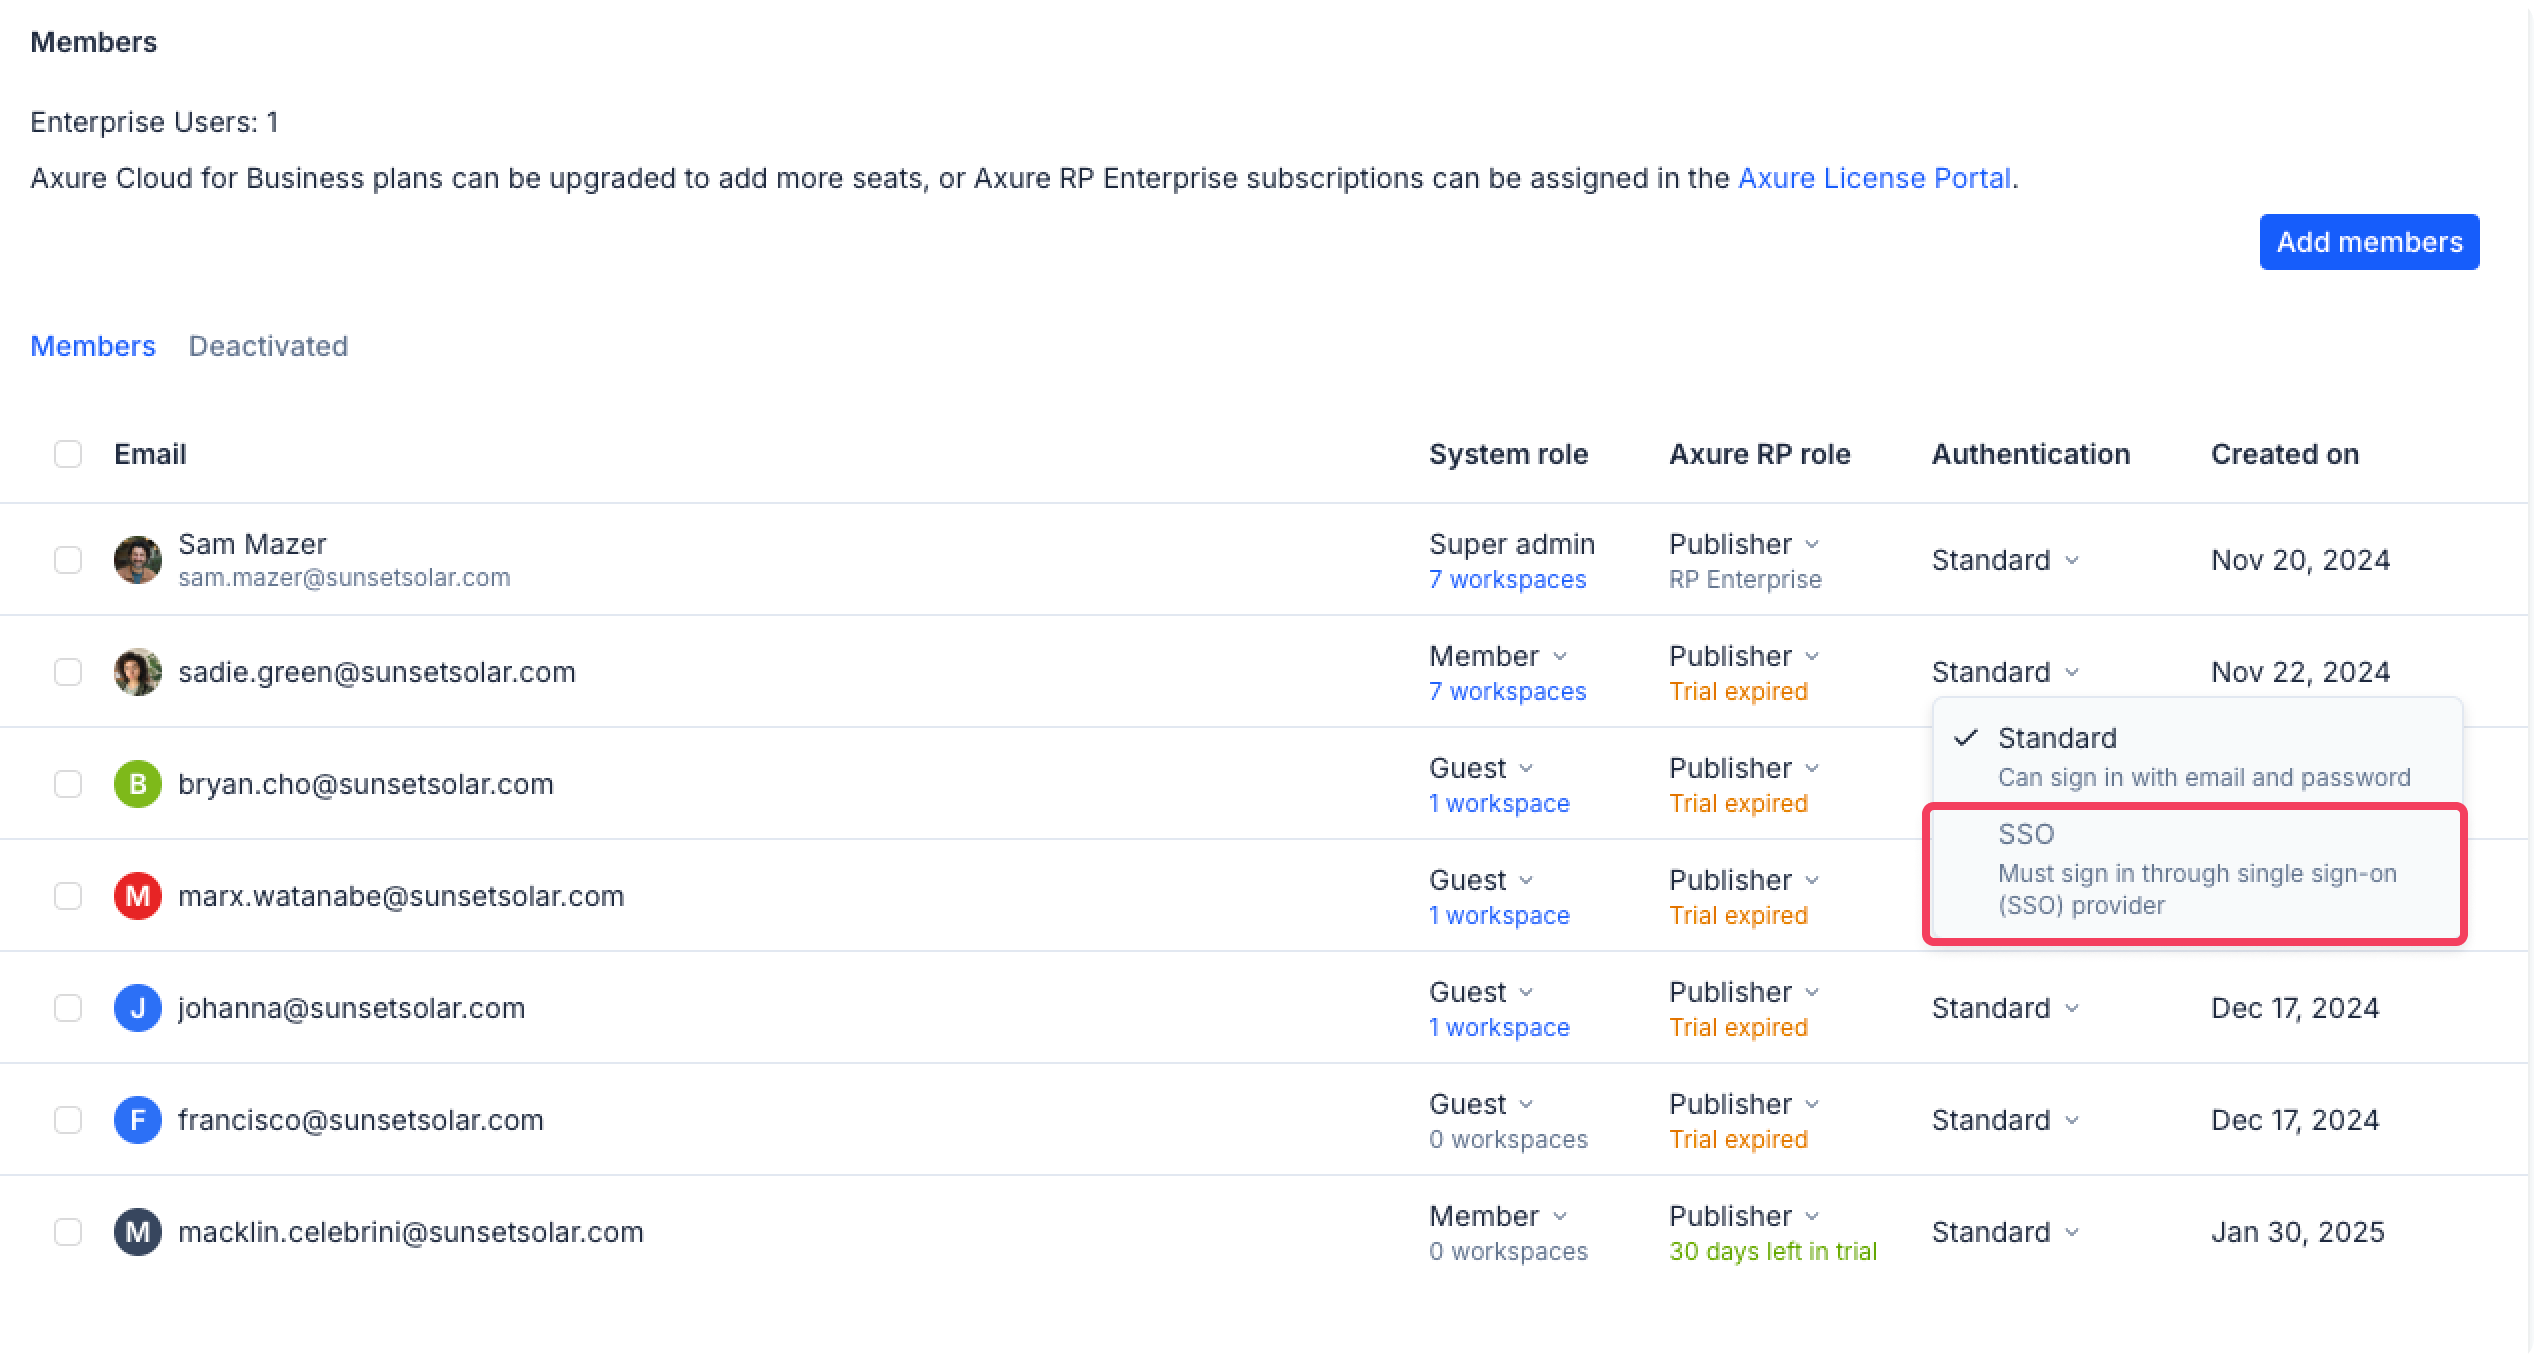
-
Locate the account you want to want to add SSO to in the table of accounts.
-
Under the Authentication column, you can switch the method from Standard to SSO. SSO must be configured via the Authentication tab.
Active Directory and LDAP
Active Directory and LDAP only work with Axure Cloud for Business on-premises servers.
If the user accounts will use Active Directory or LDAP authentication, you'll first need to configure your on-premises server to use your Active Directory or LDAP server. This must be done by the super administrator or a technical administrator.
In the admin settings, switch to the Active Directory / LDAP tab. Select the radio button for Built In, Active Directory, or LDAP, and complete the form below.
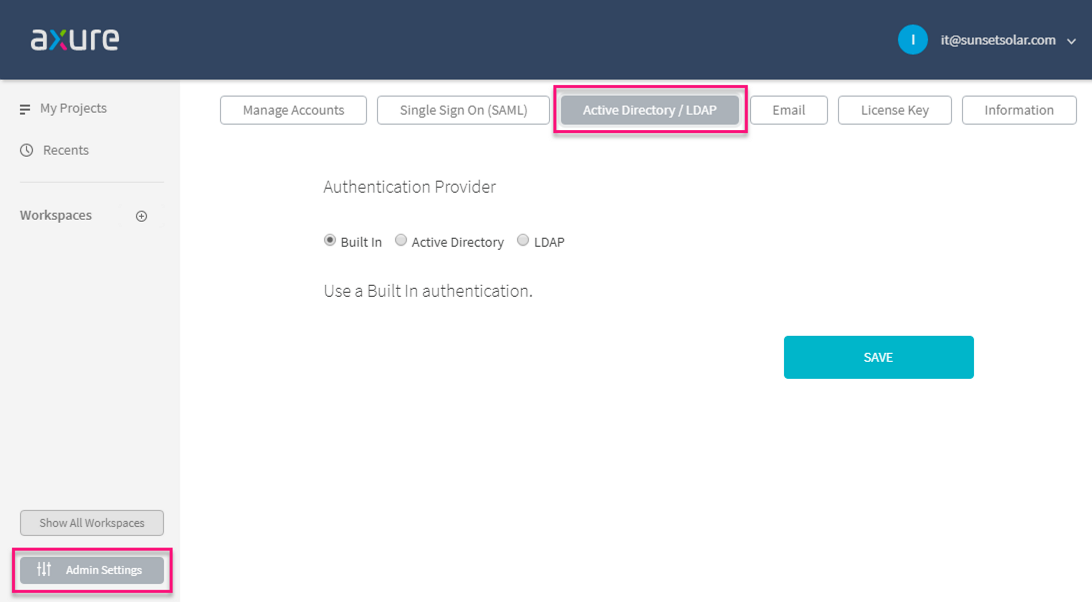
If Active Directory or LDAP authentication is enabled, SAML settings will be ignored.