SAML integration in Okta
Follow the steps in this guide to set up Axure Cloud for Business with Okta as your Identity Provider.
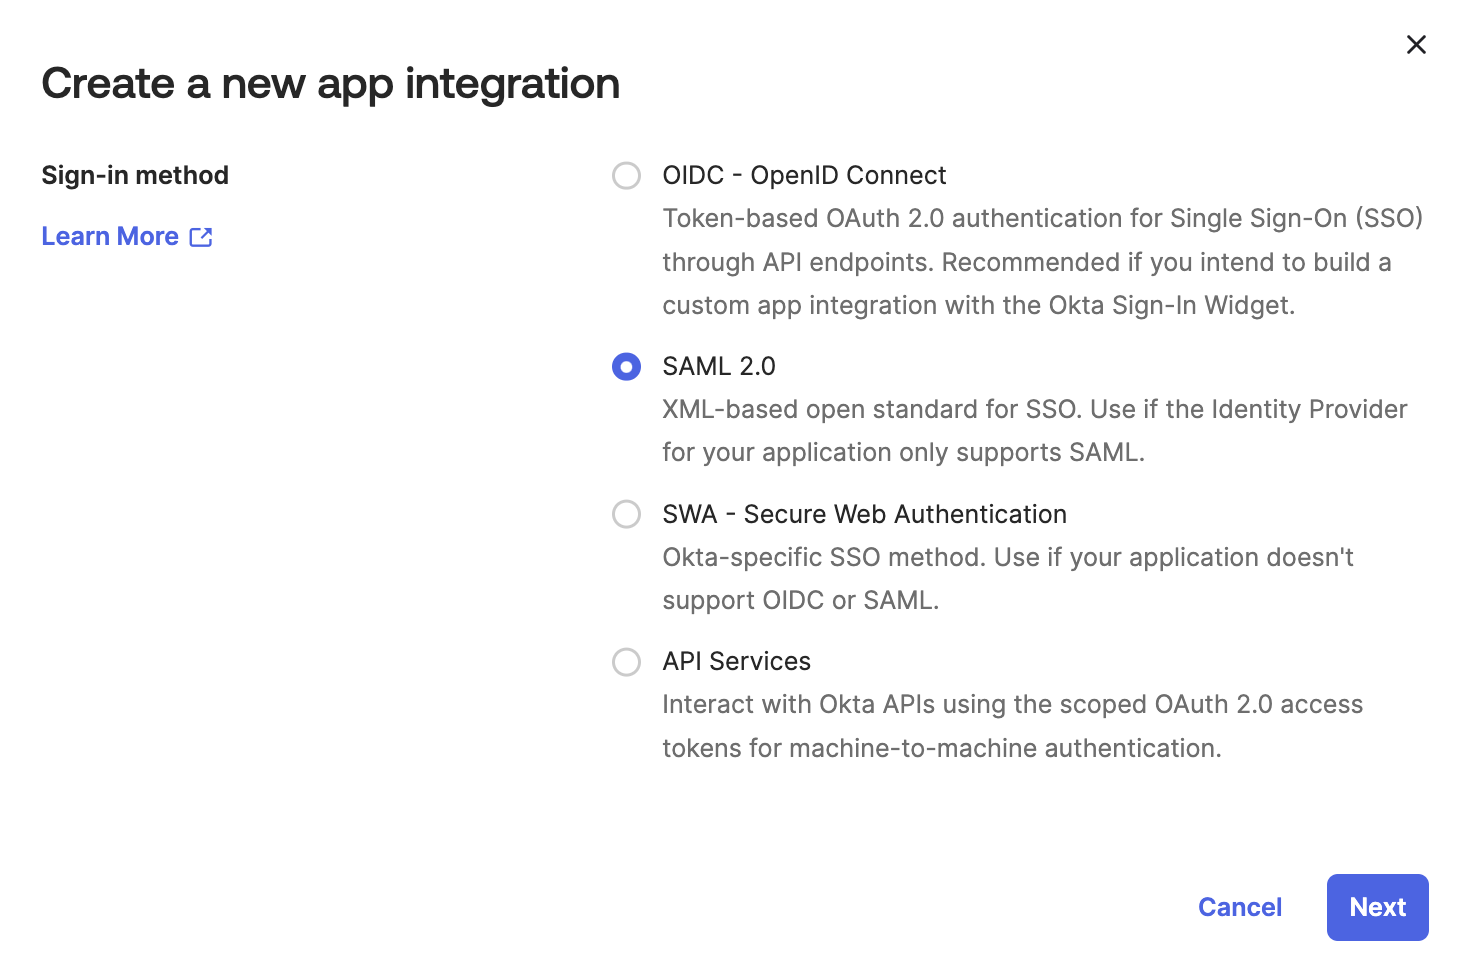
Create a new app integration
-
In the Admin Console, go to Applications → Applications.
-
Click the Create app integration button.
-
Select SAML 2.0 as the Sign-in method.
-
Click Next
- Give your app a name, then click Next.
Configure SAML settings
-
In the Single sign on URL field type your ACS URL:
-
If you have a private instance of Axure Cloud for Business hosted on Axure servers, the ACS URL is your instance's subdomain followed by /identity/consume:
https://[[domain]].axure.cloud/identity/consume. -
If you have an on-premises installation of Axure Cloud for Business, the ACS URL is the IP address or hostname of your Axure Cloud for Business server followed by /identity/consume.
-
-
In the Audience URI (SP Entity ID) field type your Entity ID:
-
If you have a private instance of Axure Cloud for Business hosted on Axure servers, the Entity ID is your instance's subdomain,
https://[[domain]].axure.cloud. -
If you have an on-premises installation of Axure Cloud for Business, the Entity ID is the IP address or hostname of your Axure Cloud for Business server.
-
-
Set the Name ID format to EmailAddress.

- Click Next, then click Finish.
View setup instructions
-
On the Application Overview page, click the Sign On tab.
-
Click the View SAML setup instructions button.

-
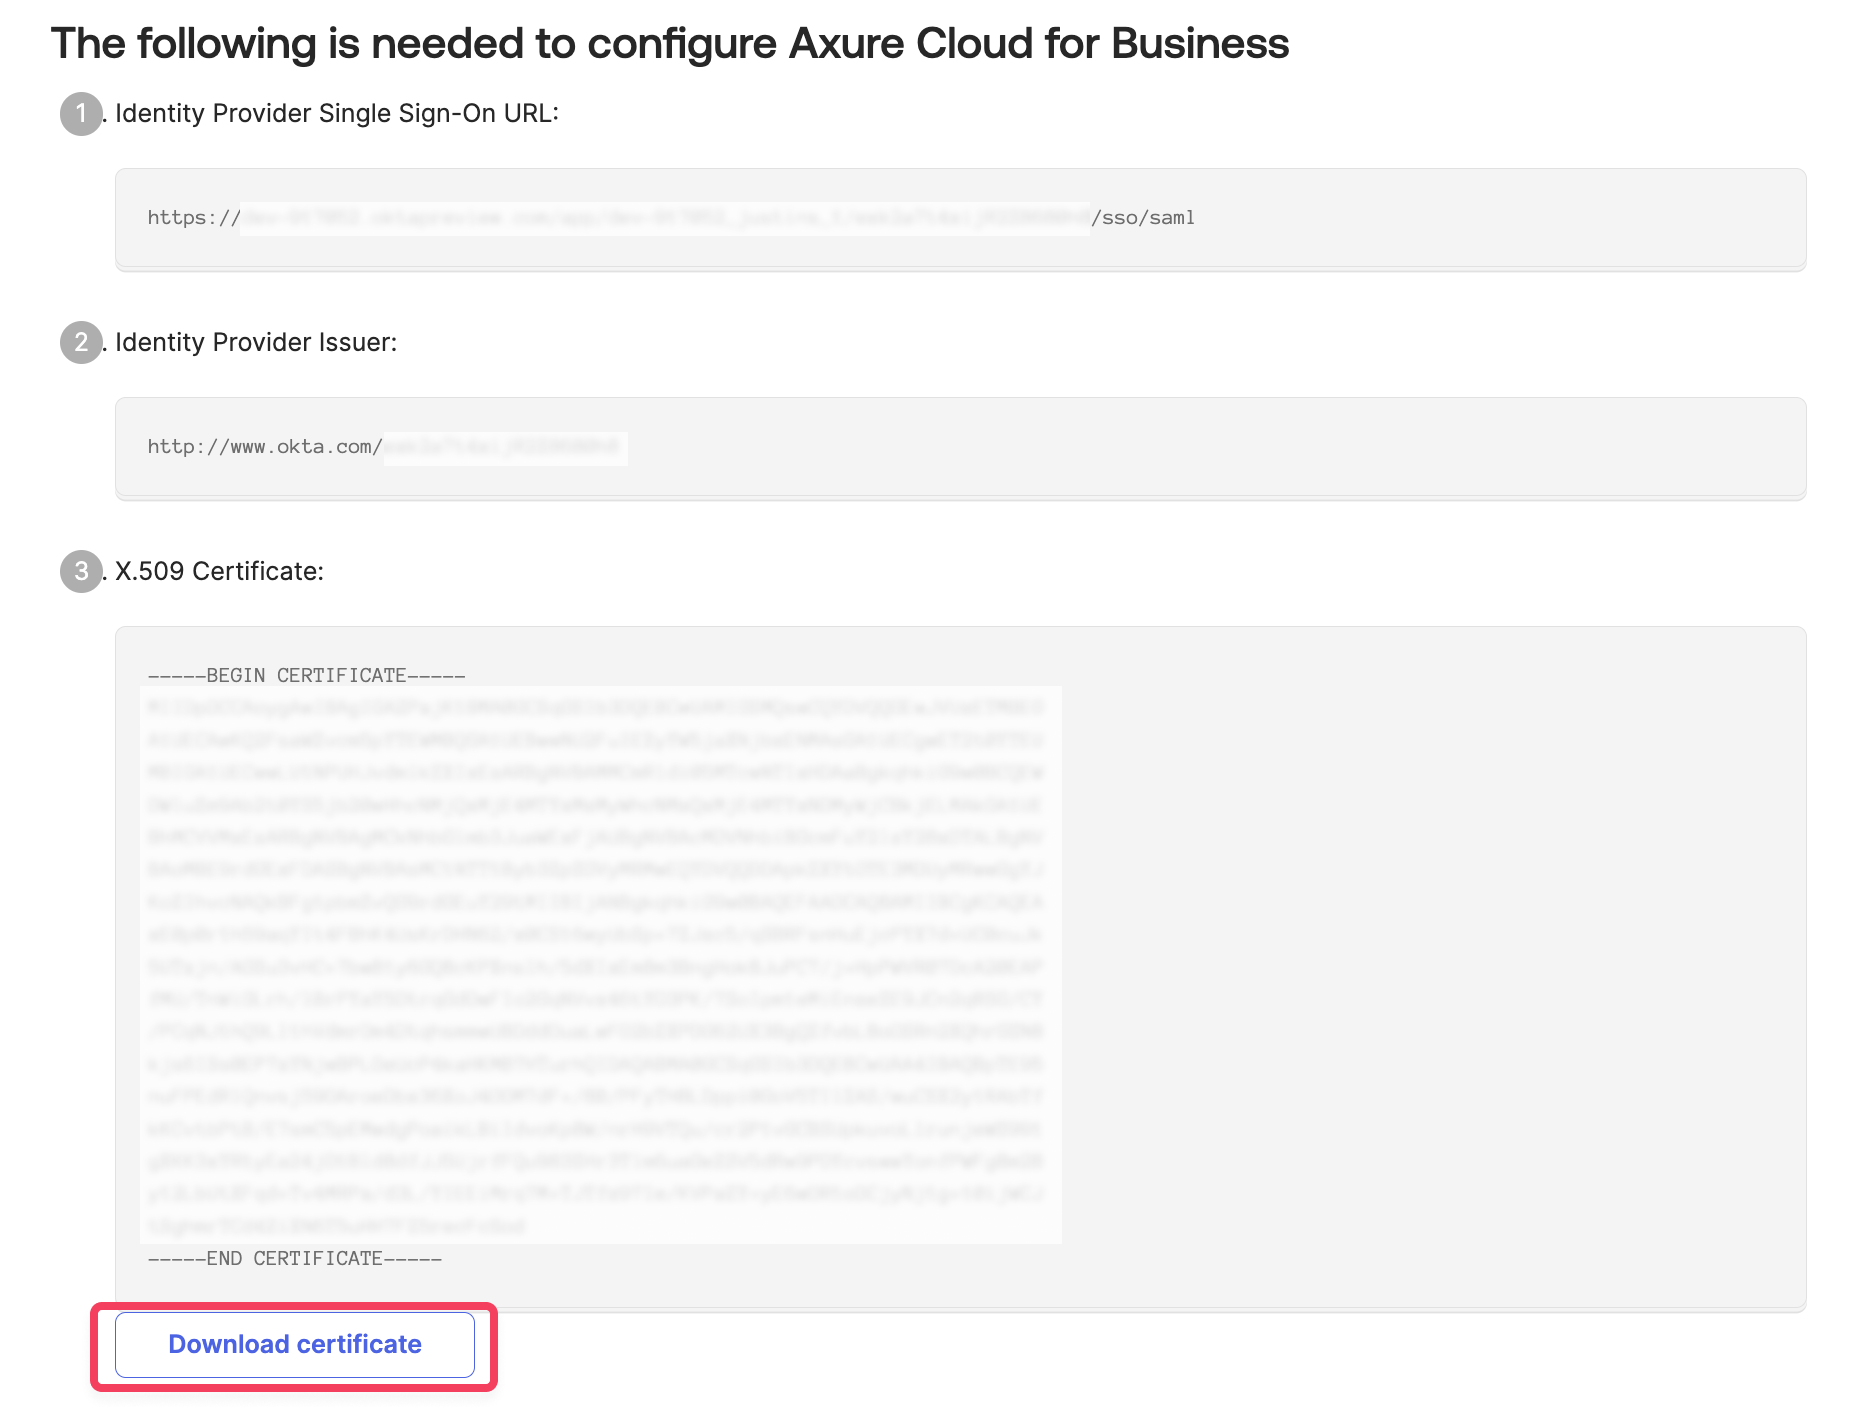
On the next page, note down the URL in the Identity Provider Single Sign-On URL field. You will need this in the next section.
-
Under X.509 Certificate, click the Download certificate button.
Configure SSO in Axure Cloud for Business
-
Sign in to Axure Cloud for Business as a technical admin or super admin.
-
Click the profile dropdown at the top of the application, then select Account settings.
-
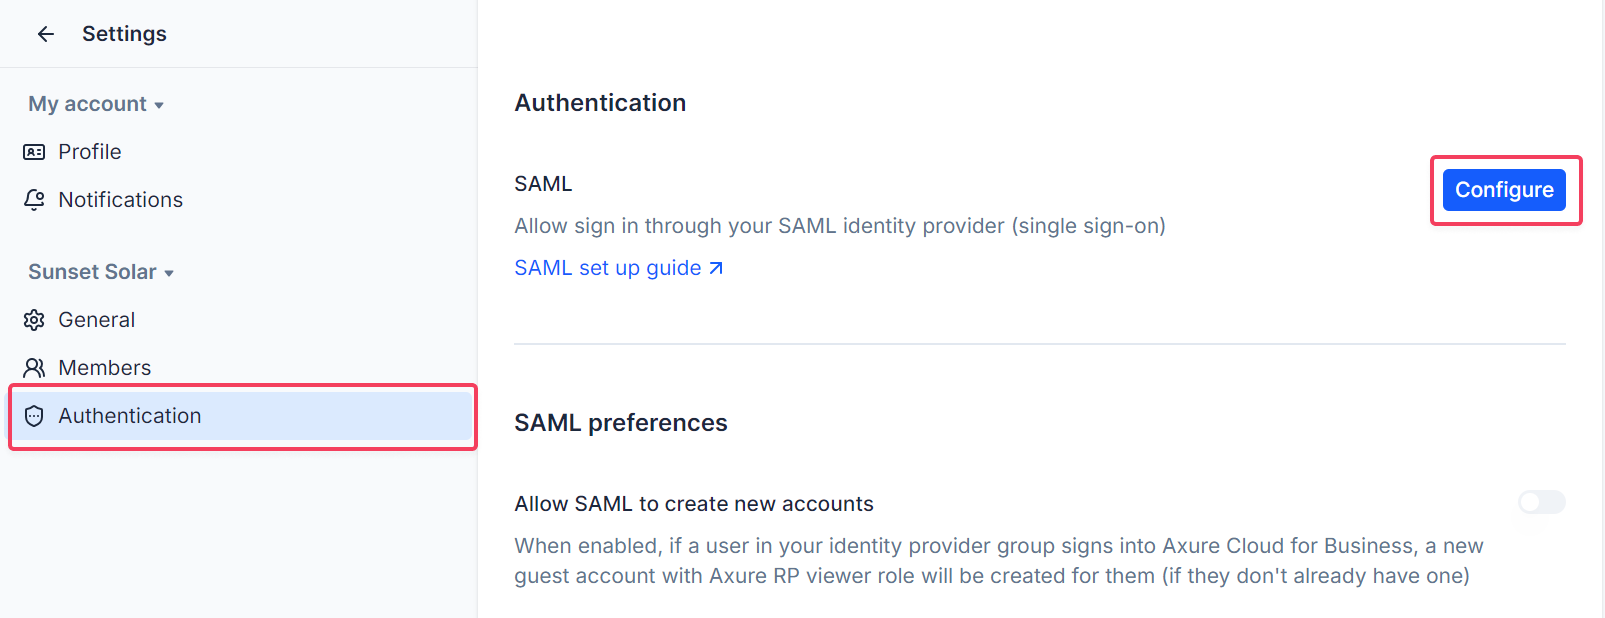
In the sidebar, click Authentication.
-
Click Configure.
-
In the Sign On URL field, enter the Identity Provider Single Sign-On URL from step 3 of the previous section.
-
Set the Logout URL to any URL you like. This is the URL your users will be redirected to after signing out of Axure Cloud for Business.
-
In the Security Certificate section, click the Choose file button, then upload the X.509 certificate downloaded from step 4 of the previous section.
-
Click Save.
Next steps
Add SSO to User Accounts in Axure Cloud for Business.