SAML integration in Microsoft Azure Active Directory
Follow the steps in this guide to set up Axure Cloud for Business with Microsoft Azure Active Directory as your Identity Provider.
Add Axure Cloud for Business application in Azure
-
Sign in to the Azure portal as a cloud application admin, or an application admin for your Azure AD tenant.
-
Open the Enterprise application service.
-
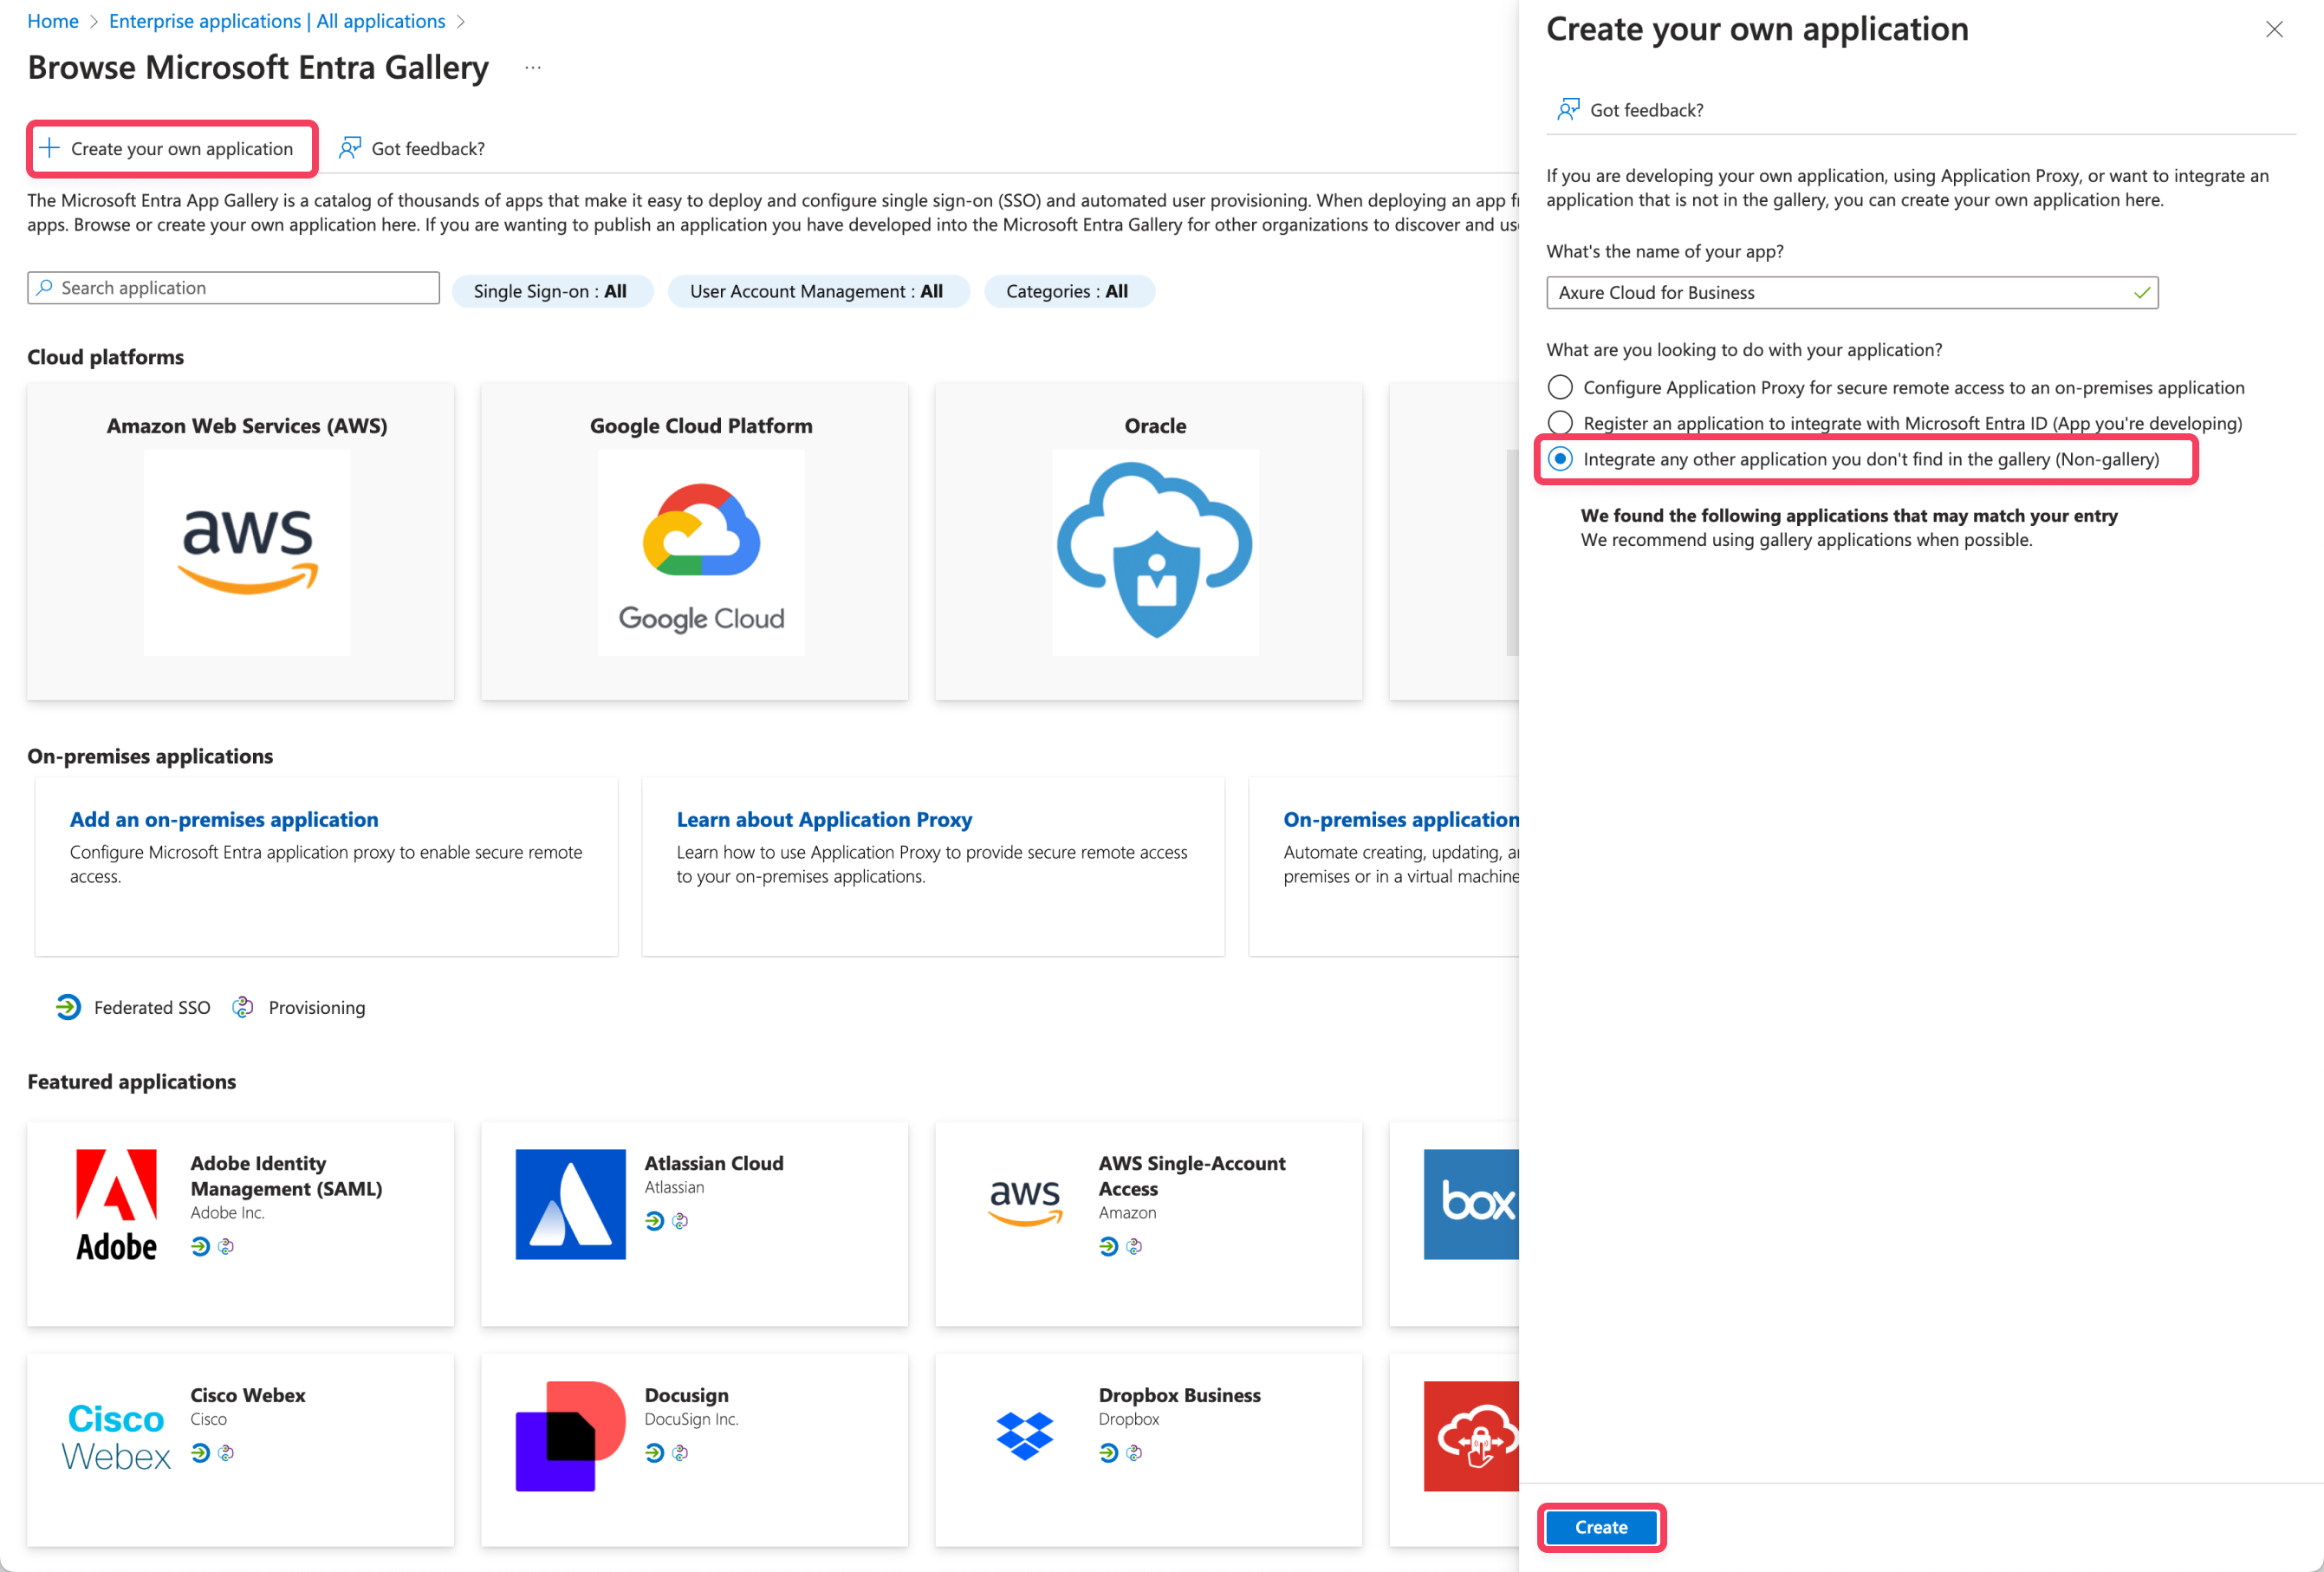
Click Create your own application.
-
In the pane that appears, enter a name for your application.
-
Select the option to integrate with a non-gallery application and click Create.
Set up single sign-on
-
On the application's Overview page, locate the Set up single sign on card and click Get started.
-
Select the SAML single sign-on method.

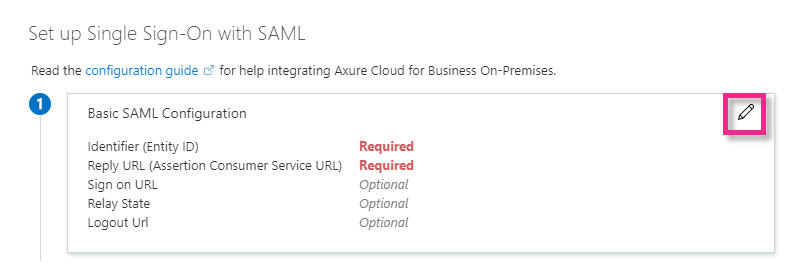
- On the Set up Single Sign-On with SAML page, select the Edit icon in the upper-right corner of the Basic SAML Configuration section.
-
In the Identifier (Entity ID) field, type the Entity ID for your Axure Cloud for Business instance.
-
If you have a private instance of Axure Cloud for Business hosted on Axure servers, the Entity ID is your instance's subdomain:
https://[domain].axure.cloud. -
If you have an on-premises installation of Axure Cloud for Business, the Entity ID is the IP address or hostname of your Axure Cloud for Business server.
-
-
In the Reply URL (Assertion Consumer Service URL) field, type the Entity ID followed by: /identity/consume:
https://[domain].axure.cloud/identity/consume. -
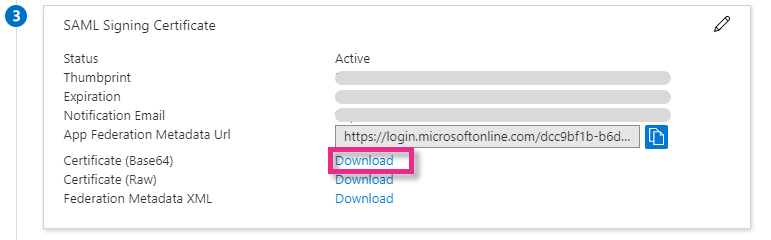
In the SAML Signing Certificate section, click the Download link next to Certificate (Base64).
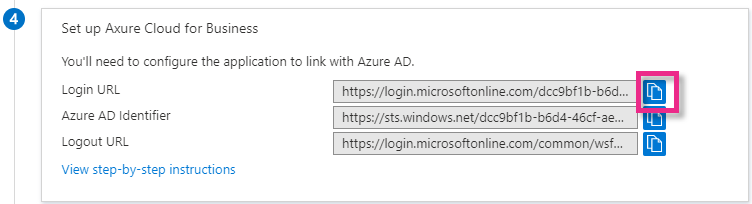
- In the Set up Axure Cloud for Business section, copy the Login URL. You will need this in the next section.
Configure SSO in Axure Cloud for Business
-
Sign in to Axure Cloud for Business as a technical admin or super admin.
-
Click the profile dropdown at the top of the application, then select Account settings.
-
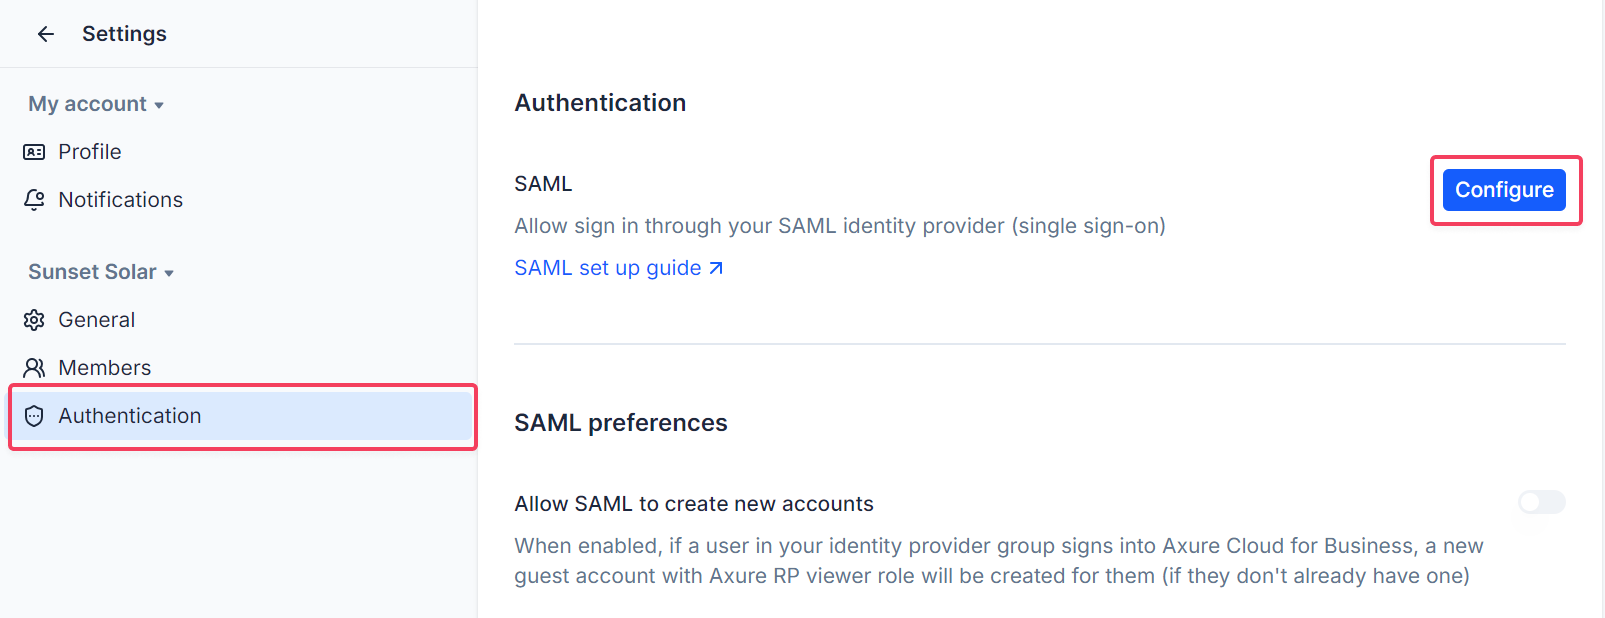
In the sidebar, click Authentication.
-
Click Configure.
-
In the Sign On URL field, enter the Login URL from step 7 of the previous section.
-
Set the Logout URL to any URL you like. This is the URL your users will be redirected to after signing out of Axure Cloud for Business.
-
In the Security Certificate section, click the Choose file button, then upload the certificate downloaded from step 6 of the previous section.
-
Click Save.
Next steps
Add SSO to User Accounts in Axure Cloud for Business.