Creating an Axure Cloud for Business private instance
Axure Cloud for Business private instances provide all the sharing capabilities and features of Axure Cloud with added user management controls on your own custom domain. Follow the steps below to get started.
For information on installing Axure Cloud for Business behind your company's firewall, please refer to our guide on installing Axure Cloud for Business On-Premises.
Setting up your private instance
-
Go to app.axure.cloud/app/asec/create and enter a custom domain name for your private instance. The instance will be accessible at
[domain].axure.cloud.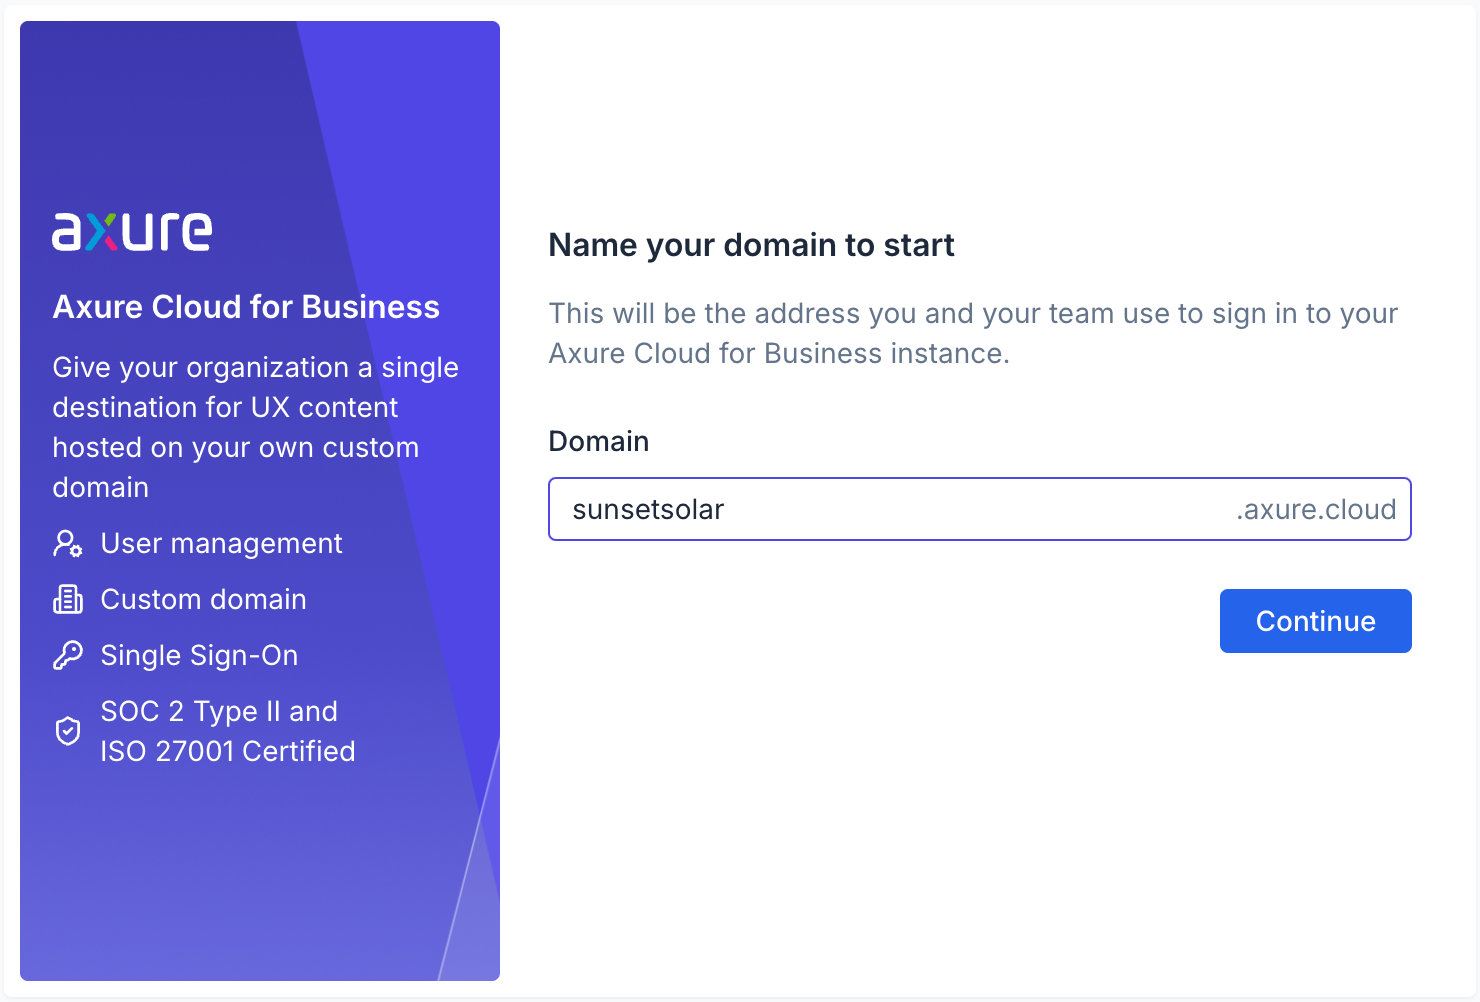
Some domain names are protected and cannot be chosen on this screen. If you receive an error message stating that your domain name is protected, contact us at support@axure.com to proceed.
-
Create a super admin account. Your private instance can have only one super admin.
-
You should now be signed in to your Axure Cloud for Business private instance as the super administrator. Click Add Users at the bottom of the welcome message to begin adding users to your private instance.
Users can publish to your private instance by following the steps in the Axure Cloud for Business User Guide.
Licensing your private instance
You and your team can use your private instance for free for the first 30 days. After this initial trial period, pricing is based on the number of Axure RP publishers active on the private instance.
-
Sign in to the Axure license portal and go to Buy → Axure Cloud for Business. Alternatively, go to your private instance settings and navigate to the Billing page. From there, click Add subscription → Buy a new subscription to open the Axure License Portal.
-
Enter the number of RP Publisher seats based on your team size, and then proceed with the purchase.
-
On the purchase confirmation screen, click Assign Domain.
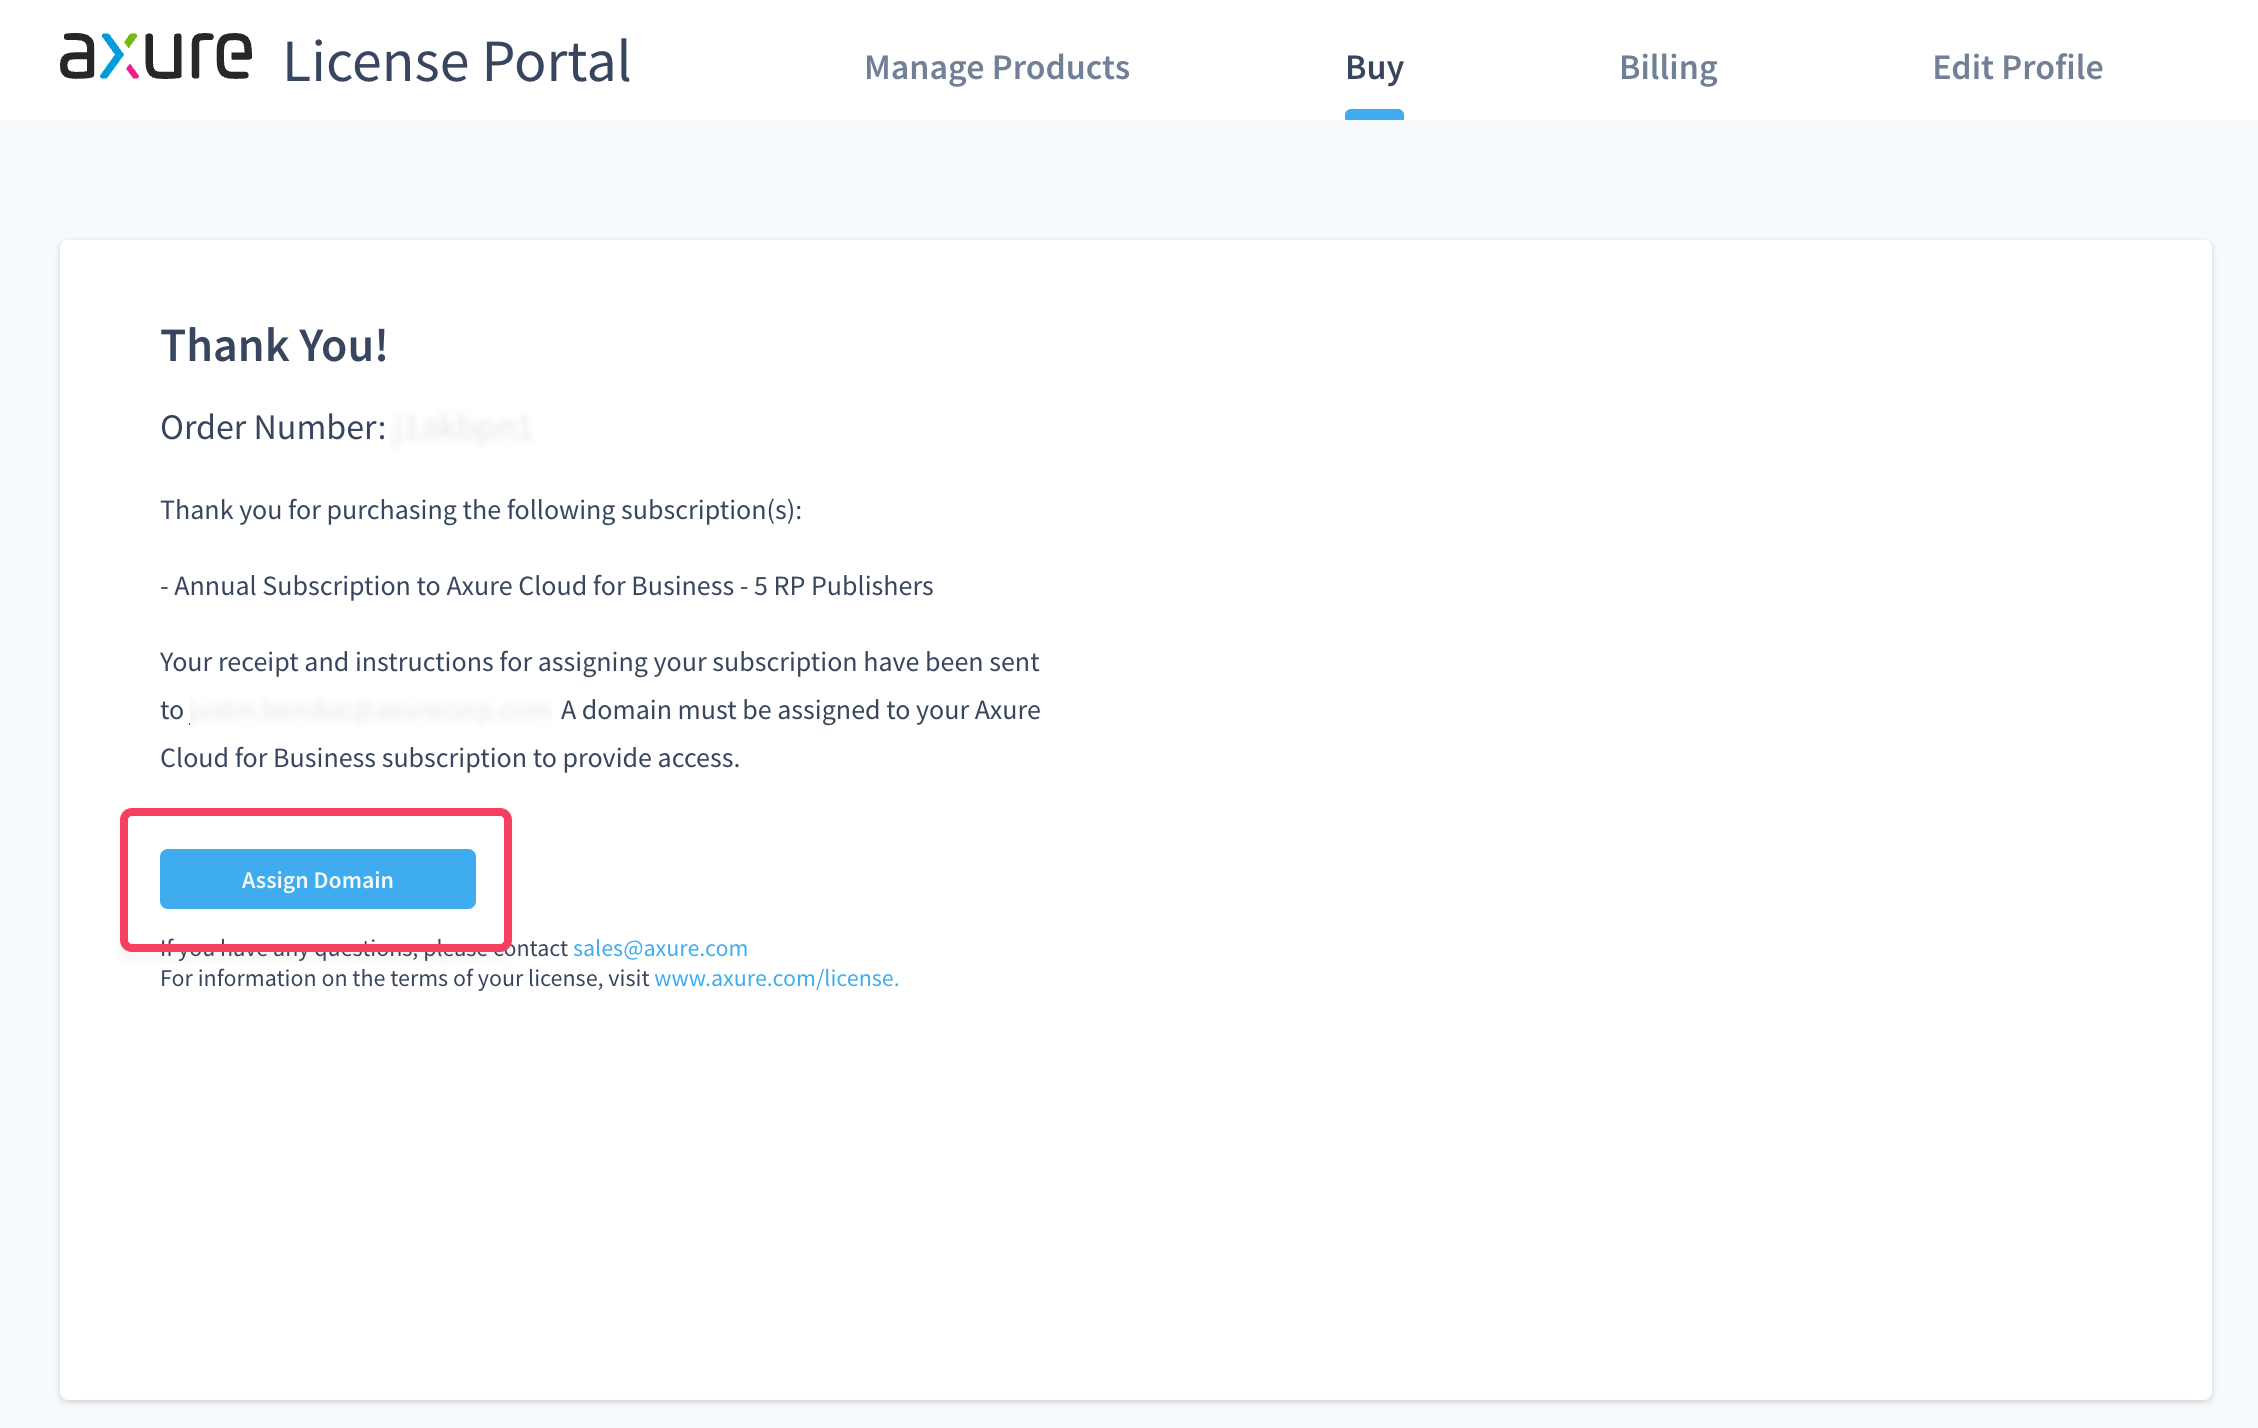
You'll be taken to the Manage Products screen.
-
In the dialog that appears, enter the domain you chose for the private instance in step 1 of the previous section. Then click Assign subscription.
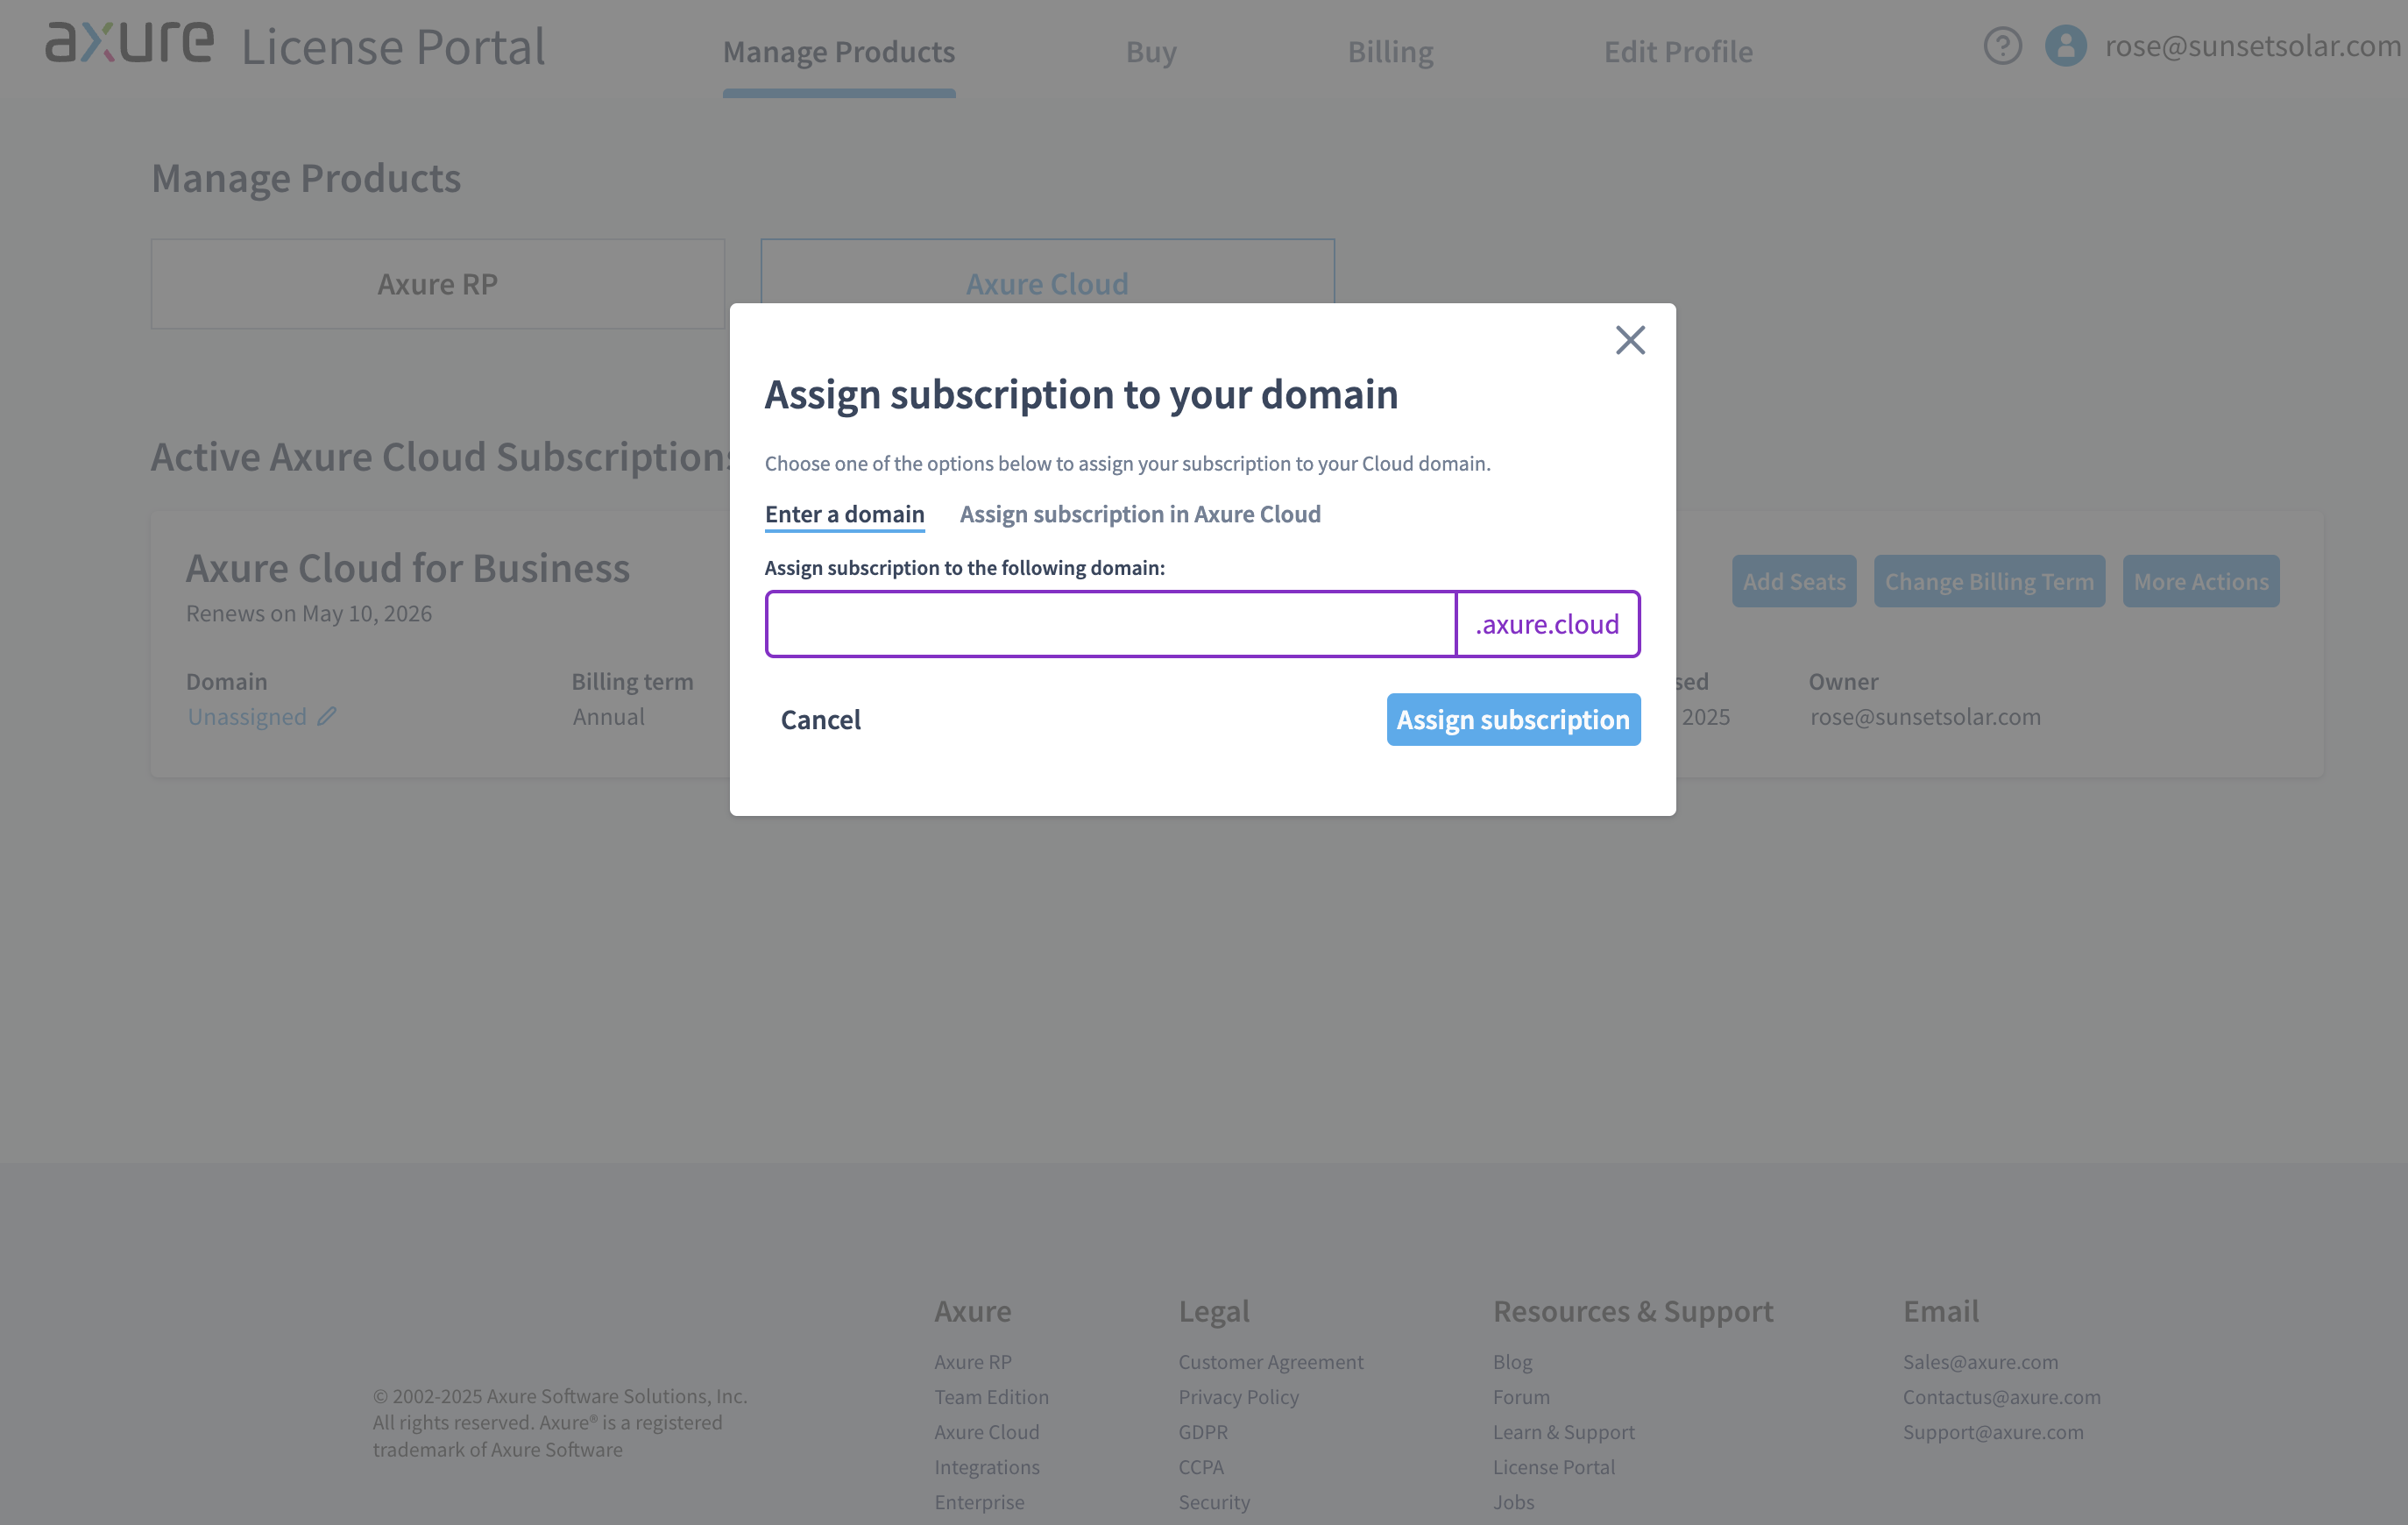
Alternatively, you can select the Assign subscription in Axure Cloud tab and click Copy subscription code.
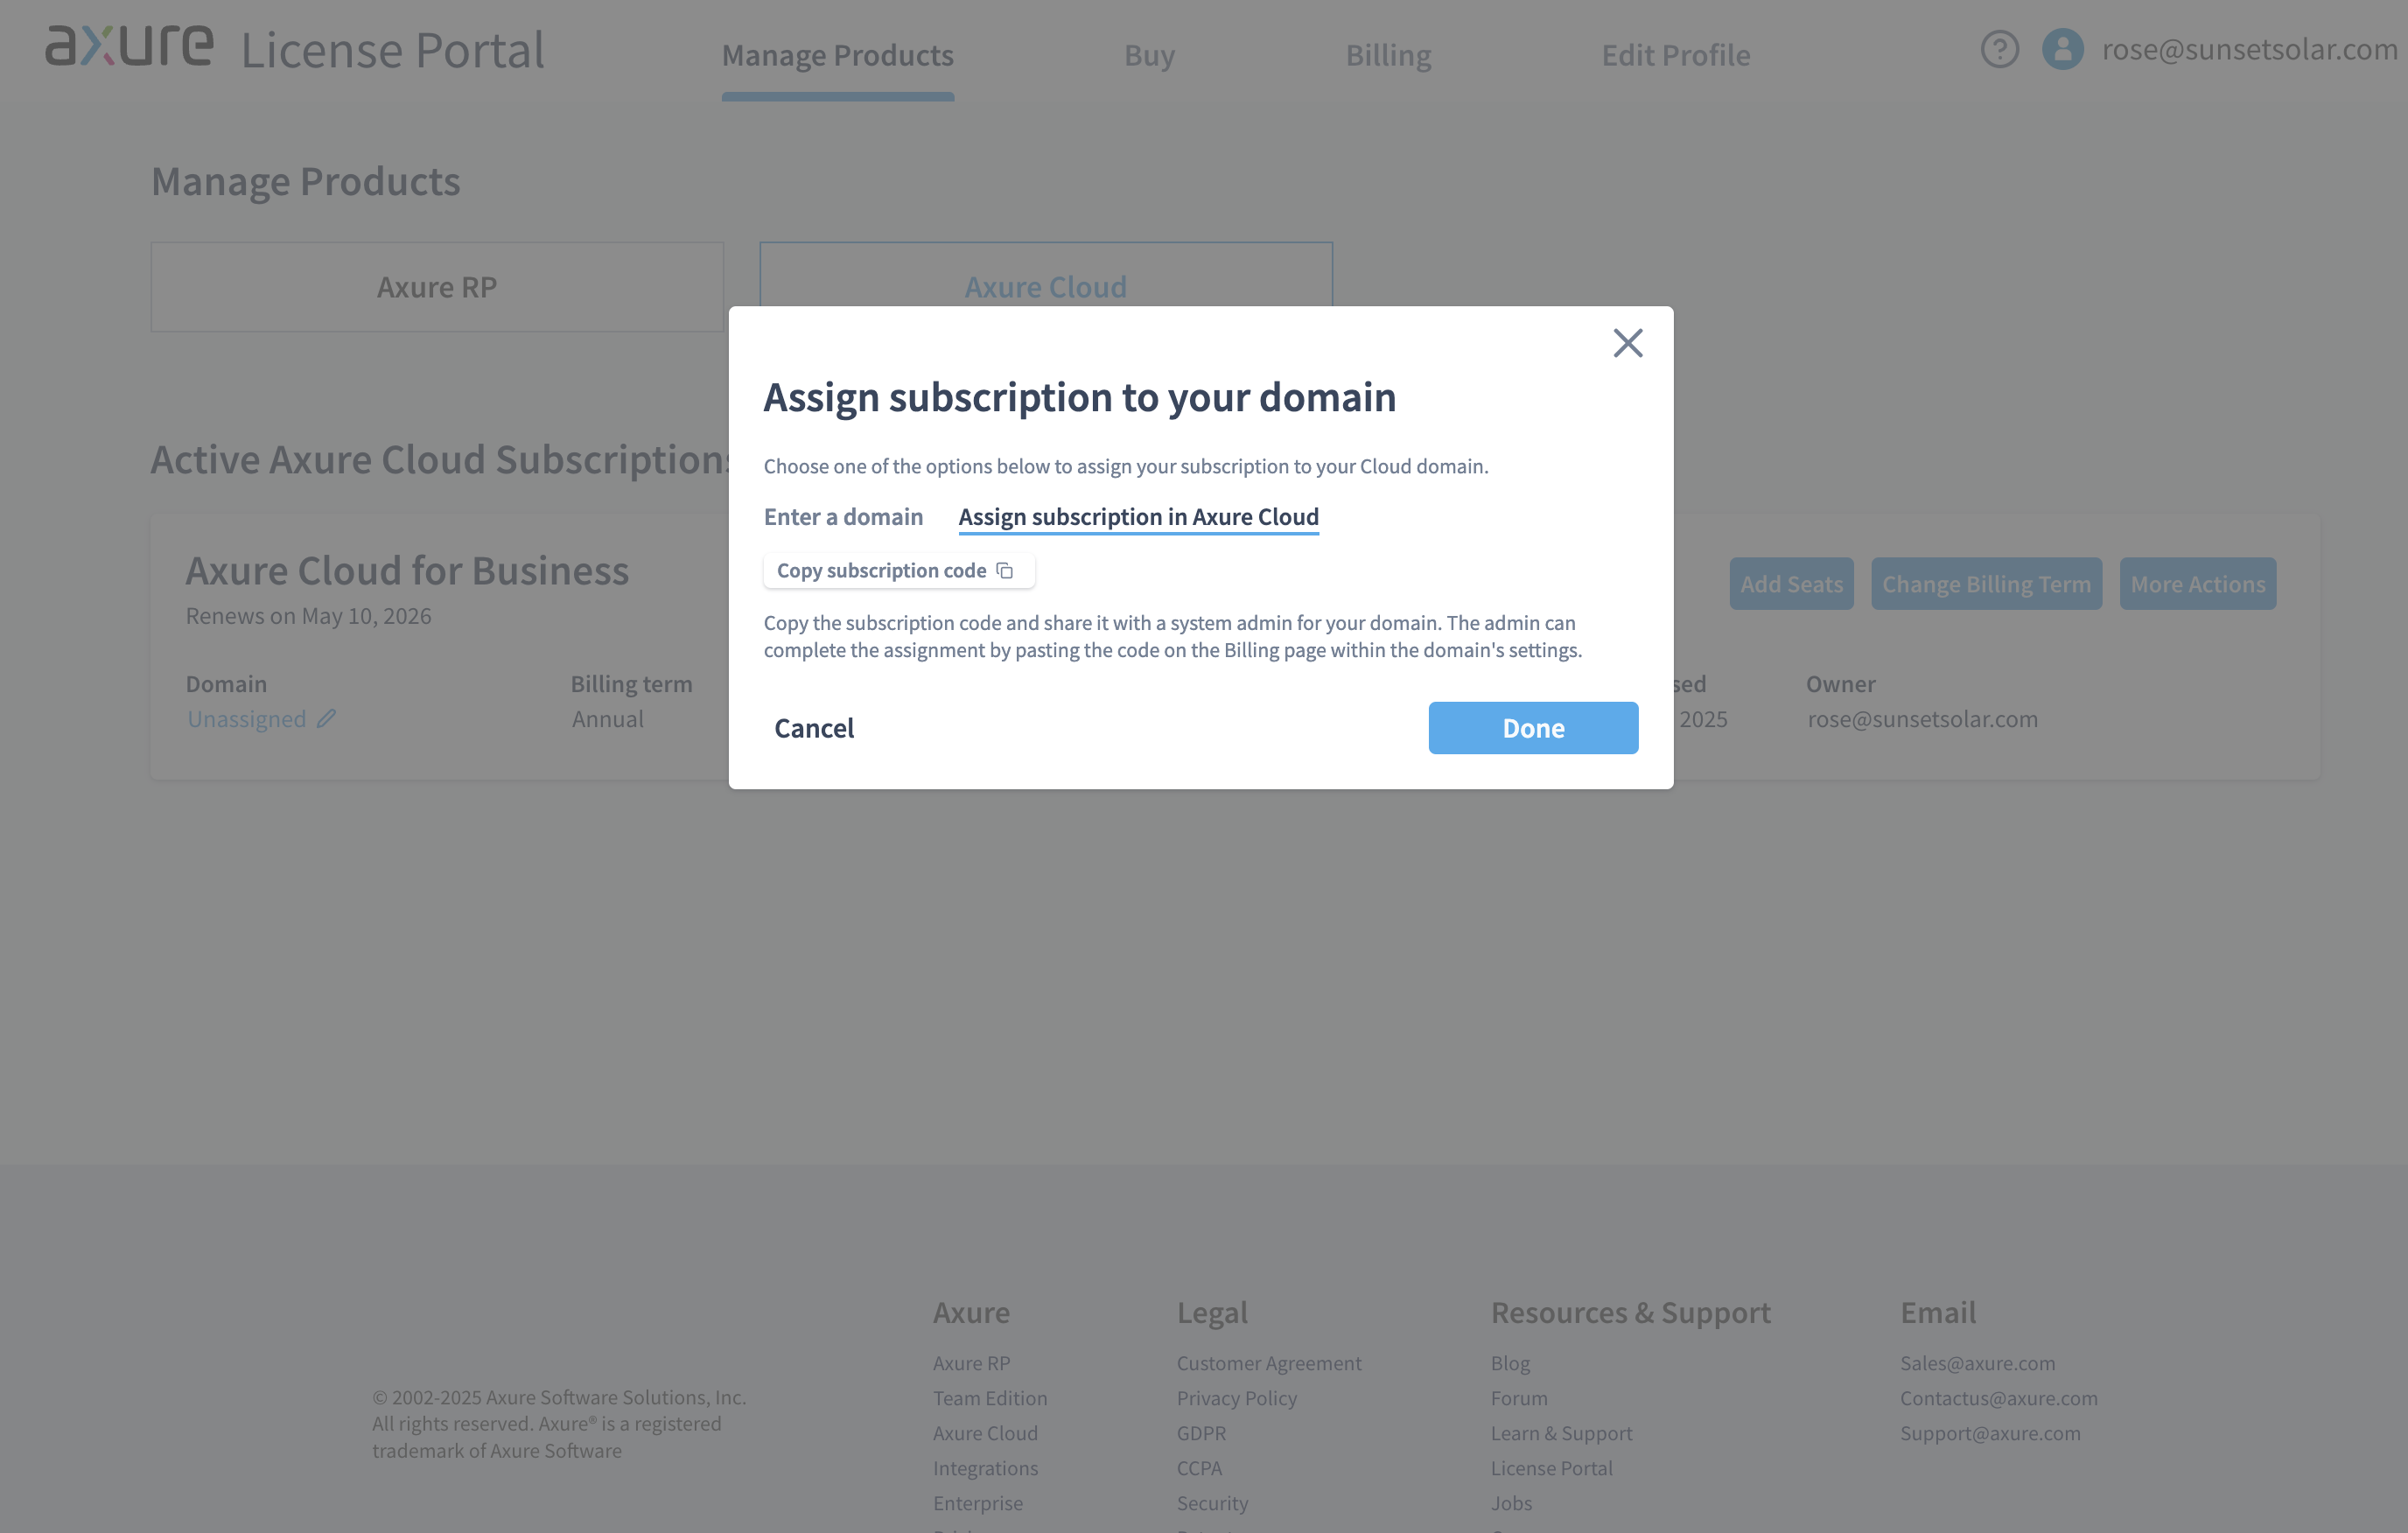
Share this code with an administrator for your Axure Cloud instance, who can complete the assignment by going to the private instance's Billing page, clicking Add subscription > Assign subscription, and entering the code.