Clickthrough
Axure Cloud Clickthrough projects provide a space for you to share visual assets with your team and stakeholders. These can include image files as well as frames/artboards from Figma, Sketch, and Adobe XD.
Once your assets are published to Axure Cloud, you can use the Build feature to create interactive prototypes from them right in Axure Cloud. You can also use Inspect to extract CSS, content, and layout information from designs.
Creating Clickthrough projects using images
-
Sign in to app.axure.cloud or the Axure Cloud desktop app.
-
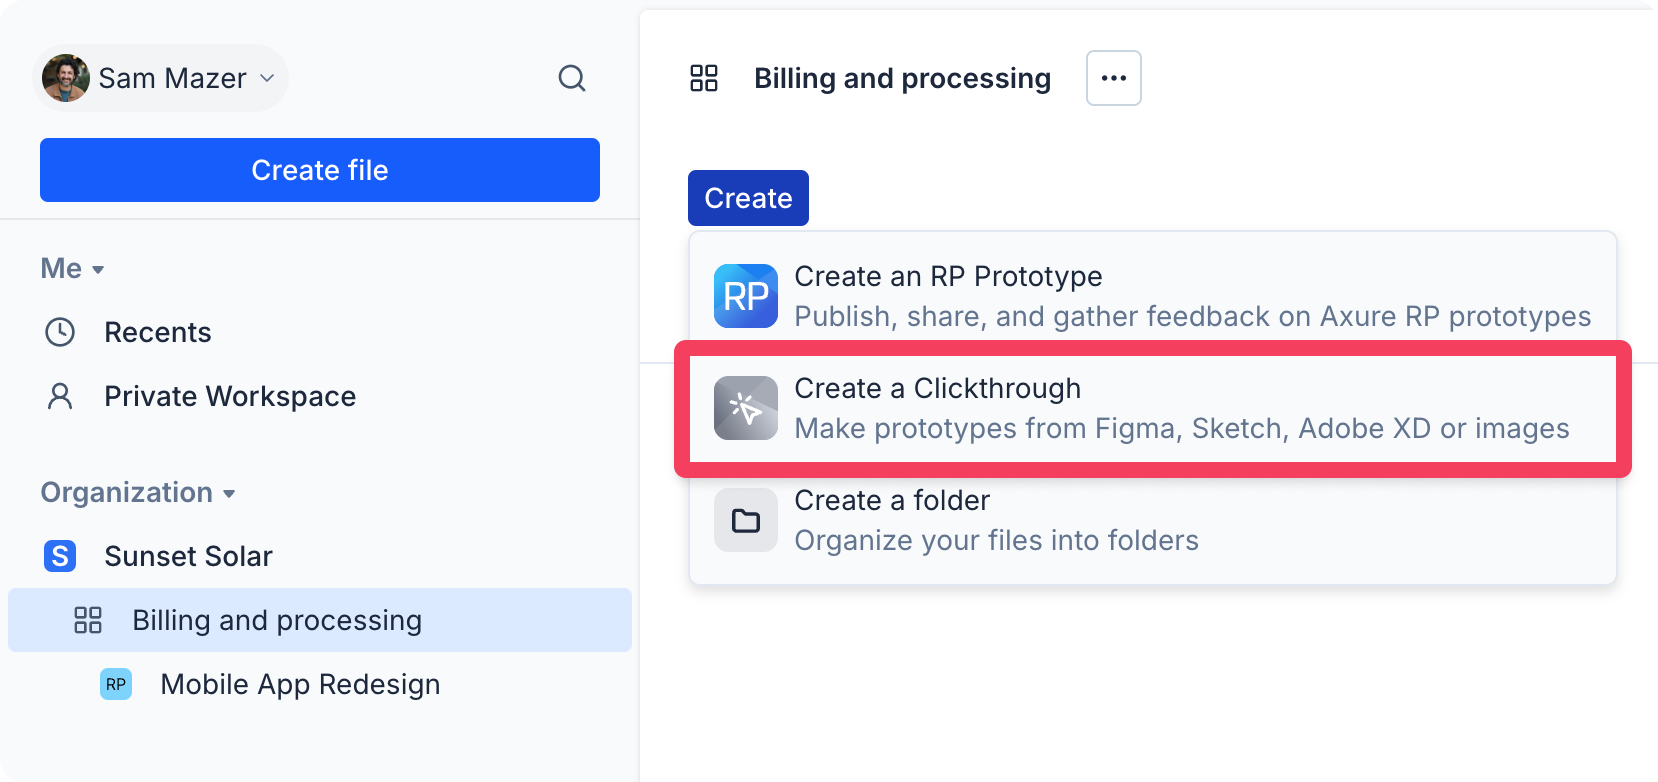
Select the workspace you want to add the new clickthrough project to, and then click Create → Create a Clickthrough at the top-left of the workspace.
-
On the next screen, click Create from images to upload images, or click on one of the 3rd party application tabs.
-
Click Choose file to add your visual assets to the project.
Adding images
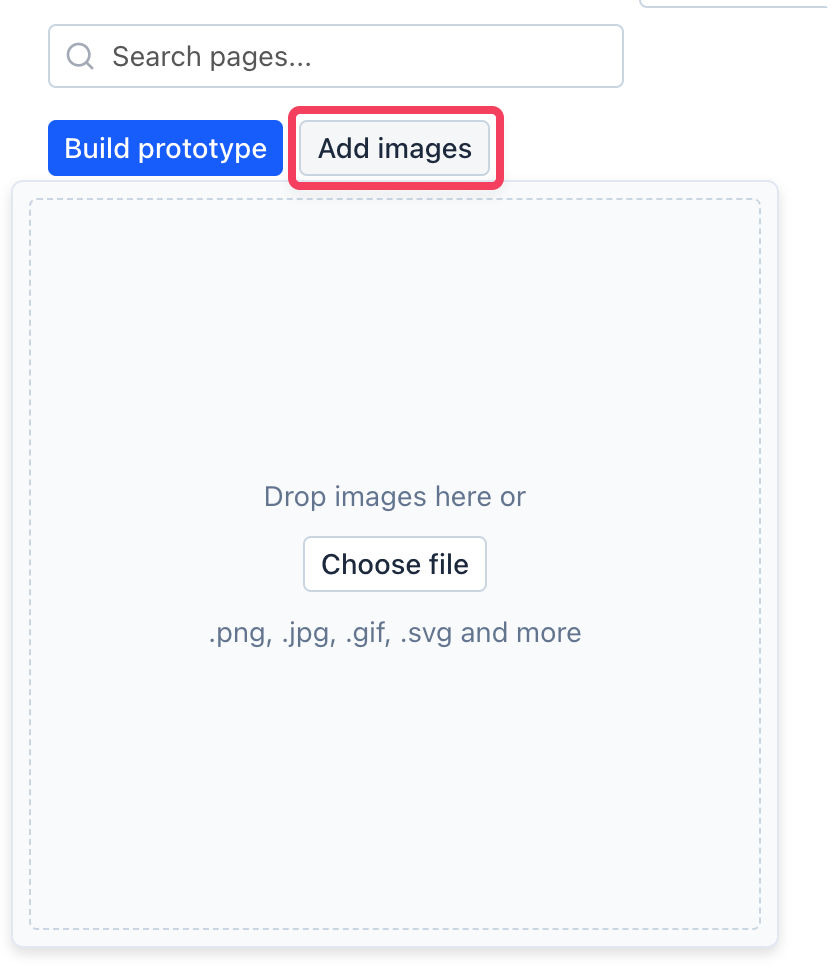
Click the Add images button on the project's Overview screen to add PNG, JPG, GIF, and SVG files to the project.
You can drag-and-drop files directly onto the upload area or click Choose file to browse your computer's file explorer.
To create clickthrough projects from other sources, check out Publishing from Figma, Publishing from Sketch, and Publishing from Adobe XD.
Removing assets
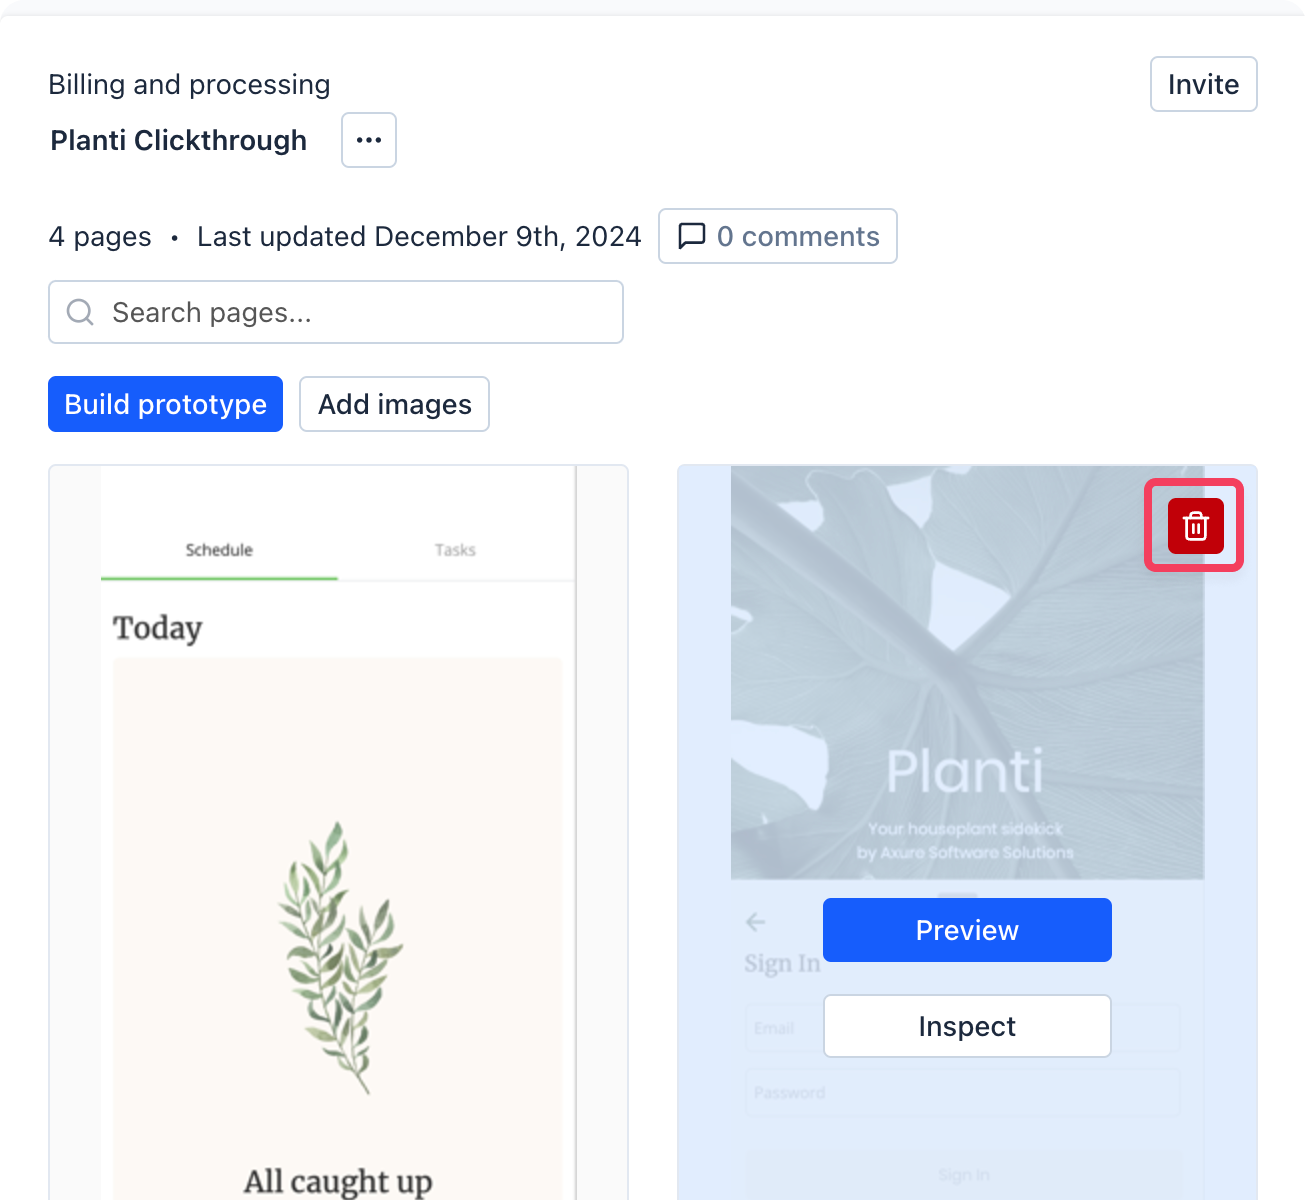
To remove an image file or artboard asset from a Clickthrough project, hover over its tile on the project's Overview screen and click the delete button 🗑️ at the top-right.
Publishing from Figma
You can publish your Figma frames directly to Axure Cloud Clickthrough projects with the Axure Cloud desktop app.
-
Download and install the Axure Cloud desktop app.
-
Install the Axure plugin for Figma.
-
In Figma, select the frames you want to publish to Axure Cloud.
-
Go to Plugins → Axure → Export Selection to Axure Cloud. This will open the Axure Cloud app.

-
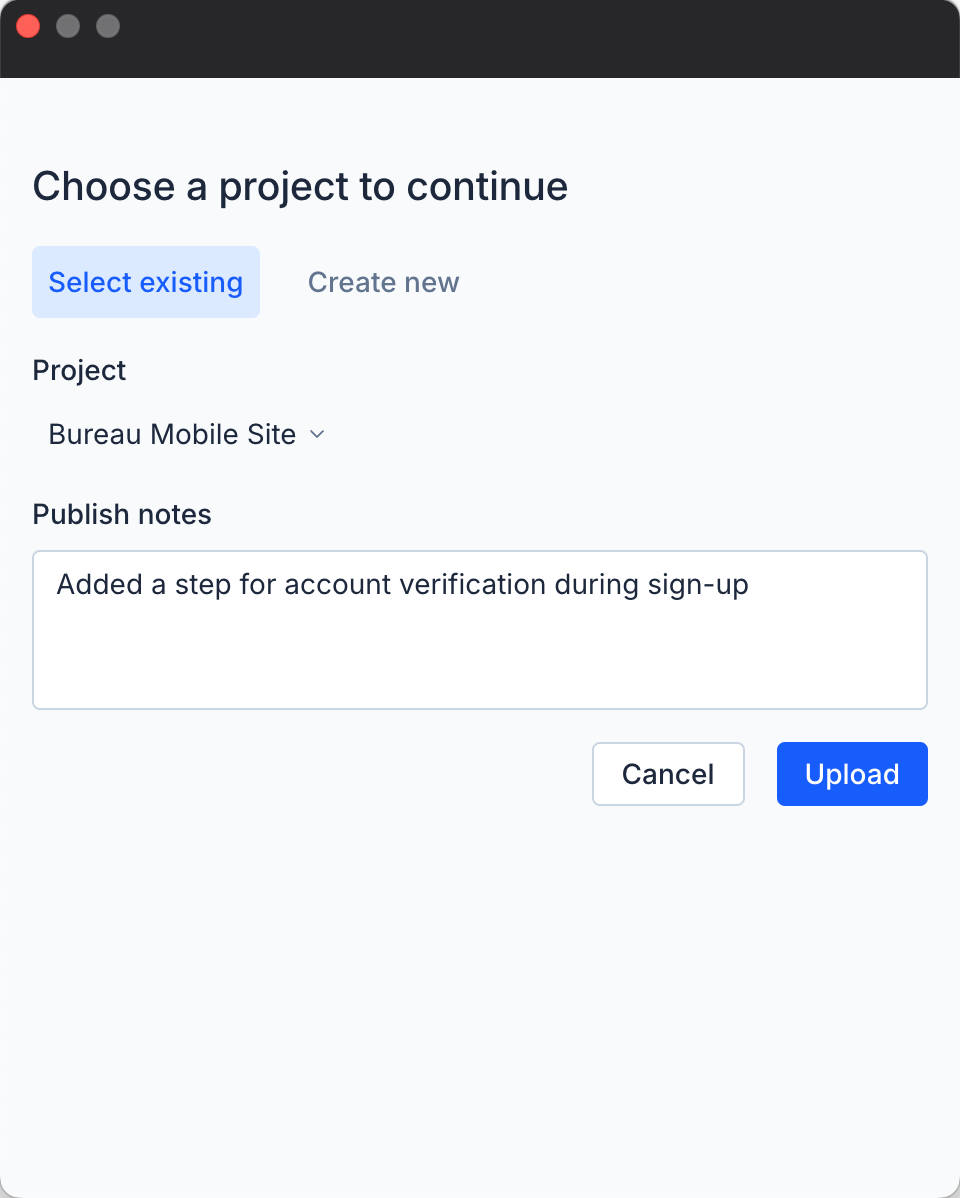
In the Axure Cloud app, select the project you want to publish your Figma assets to.
Alternatively, click the Create new tab, then name your new project.
-
Click Upload to publish your Figma assets.
Once the upload is complete, you'll be taken to the project's Overview screen, where a thumbnail for each frame will be displayed.
Publishing from Sketch
You can publish your Sketch artboards directly to Axure Cloud Clickthrough projects with the Axure Cloud desktop app.
-
Download and install the Axure Cloud desktop app.
-
Launch the app and install the Axure plugin for Sketch.
-
In Sketch, select the artboards you want to publish to Axure Cloud.
-
In the top menu, go to Plugins → Axure → Export Selection to Axure Cloud. This will open the Axure Cloud app.
-
In the Axure Cloud app, select the project you want to publish your Sketch assets to.
Alternatively, click the Create new tab, then name your new project.
-
Click Upload to publish your Sketch assets.
Once the upload is complete, you'll be taken to the project's Overview screen, where a thumbnail for each artboard will be displayed.
Publishing from Adobe XD
You can publish your Adobe XD artboards directly to Axure Cloud Clickthrough projects with the Axure Cloud desktop app.
-
Download and install the Axure Cloud desktop app.
-
Install the Axure plugin for XD.
-
In XD, select the artboards you want to publish to Axure Cloud.
-
In the top menu, go to Plugins → Axure → Export Selection to Axure Cloud. This will open the Axure Cloud app.
-
In the Axure Cloud app, select the project you want to publish your Adobe XD assets to.
Alternatively, click the Create new tab, then name your new project.
-
Click Upload to publish your Adobe XD assets.
Once the upload is complete, you'll be taken to the project's Overview screen, where a thumbnail for each artboard will be displayed.
Sharing Clickthrough projects
After creating a Clickthrough project on Axure Cloud, you have two options for sharing it with others: You can invite other Axure Cloud users to the project's workspace or enable the share link, which allows public access to the project.
Inviting others to the project's workspace
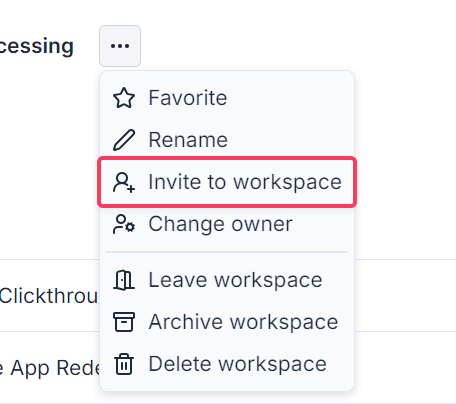
- Click Invite to workspace under the menu dropdown or Invite on the top-right hand corner of the workspace.
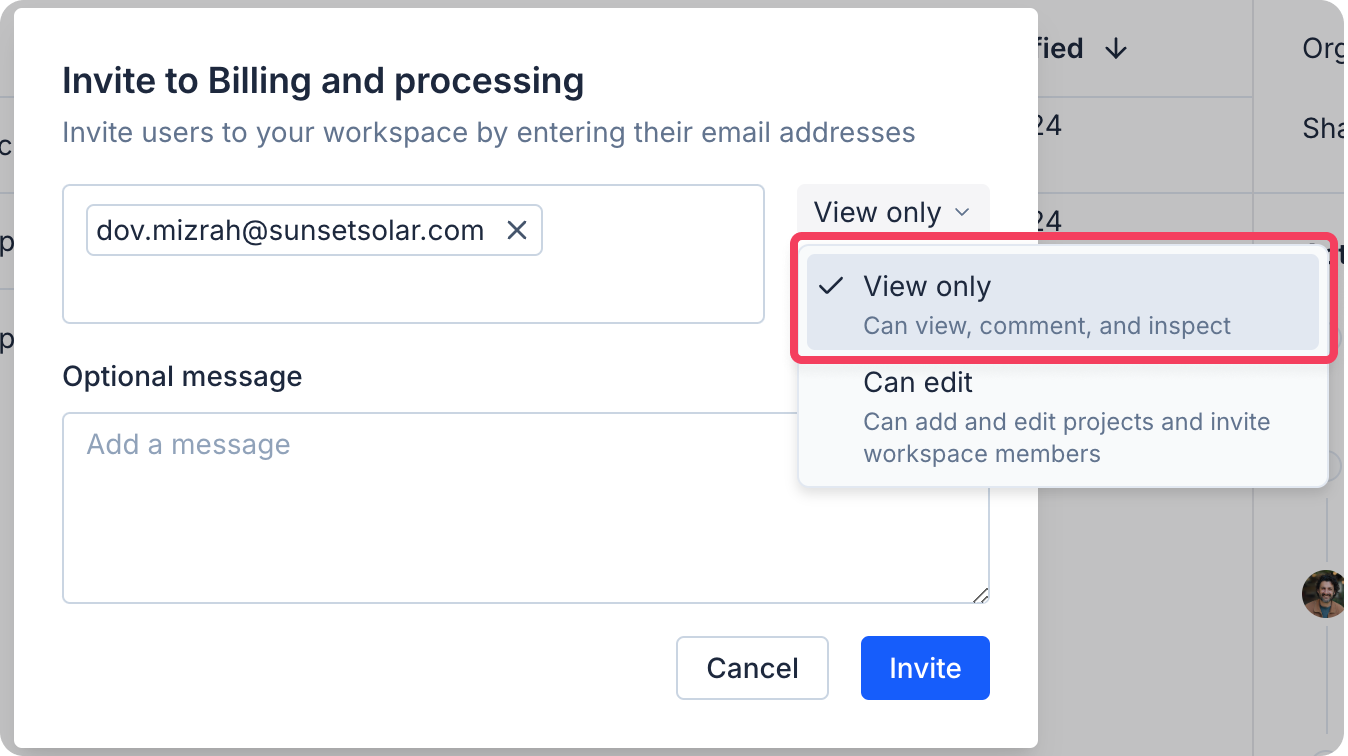
When inviting individuals, choose View only permissions if they need access to view and inspect the project's assets without making changes.
Enabling the share link
To get a publicly sharable link to the project:
-
Click on your project's name to open its overview.
-
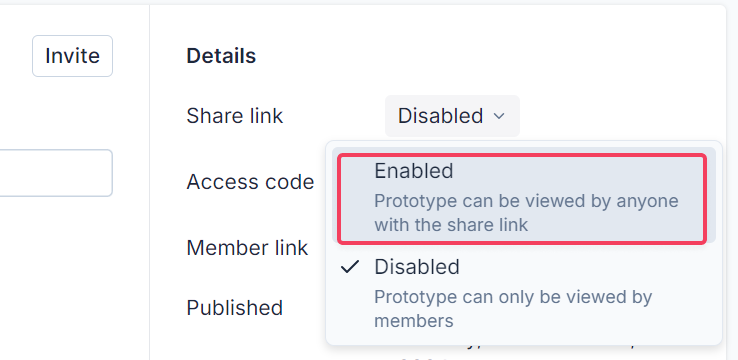
In the details pane on the right, click on the Disabled dropdown and select Enabled.
You can also add or edit the access code by clicking on the Edit button
✏️.
The share link does not grant access to the Build feature.
Building prototypes
You can create interactive prototypes from Figma frames, Sketch artboards, Adobe XD artboards, and other image assets right in your web browser or in the Axure Cloud desktop app.
To get started, click Build Prototype at the top of a Clickthrough project's Overview screen.
Adding hotspots
- Click-and-drag on a screen to add a hotspot.
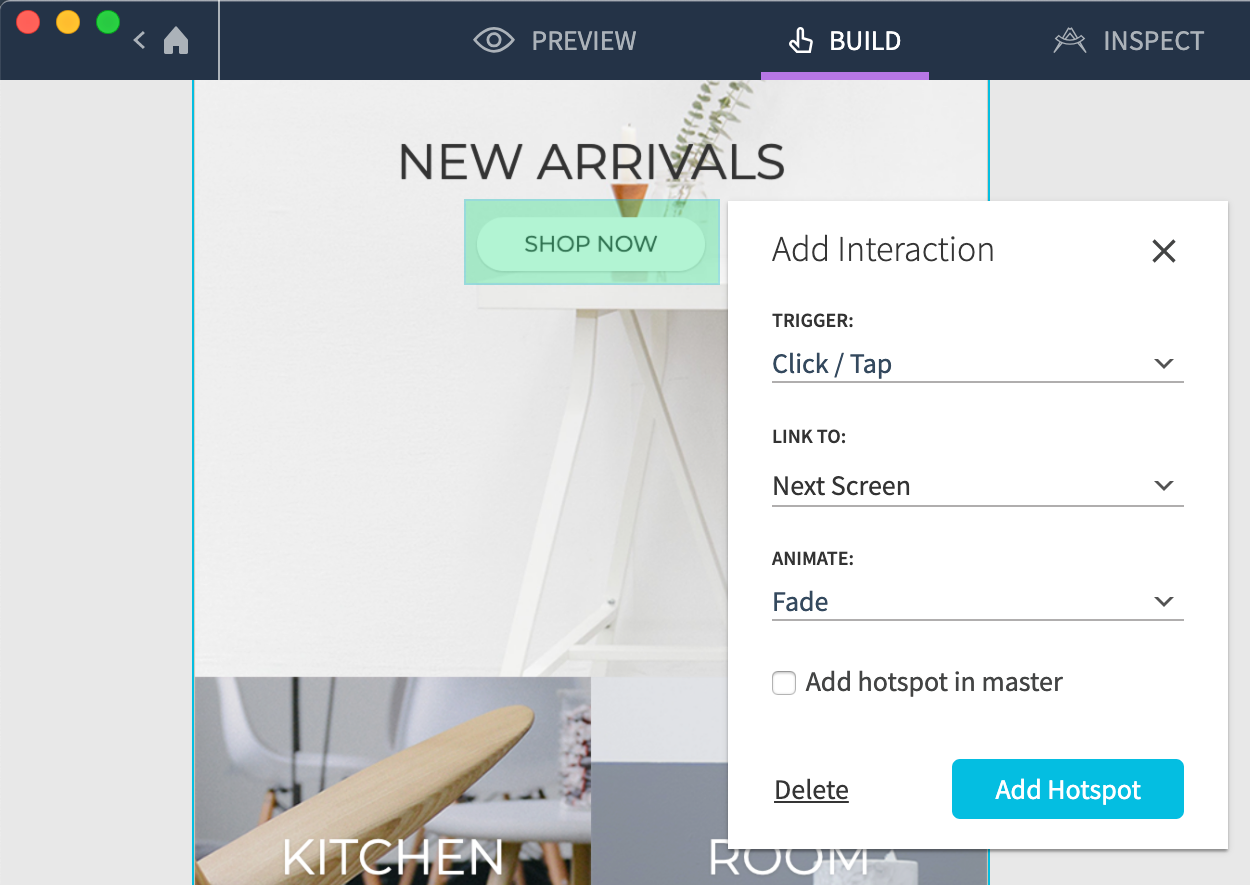
-
In the Add interaction dialog that appears, select the trigger that you want to activate the hotspot:
- Click / Tap
- Double Click / Double Tap
- Swipe Right, Left, Up, or Down
-
In the Link to dropdown, choose where the hotspot should link to:
- Previous or next Screen in the order of screens in the project
- Previous screen in history (works like a web browser's Back button)
- External URL
- A specific screen in the project
-
Click Add hotspot.
To delete a hotspot, select it and click Delete at the bottom-left of the dialog that appears.
- Click Preview at the top of the page to test out your new hotspot.
Hotspot masters
When creating or editing a hotspot, you can check the box for Add hotspot in master to add it to a new or existing master. Hotspot masters are global groups of hotspots that you can add to multiple screens.
When you edit a master hotspot on one screen, its behavior is updated on every other screen to which you've added the master.
By default, positioning for master hotspots is set relative to the top of the artboard. To instead have it set relative to the bottom of the artboard — for example, when creating footer links — check the box for Position relative to bottom.

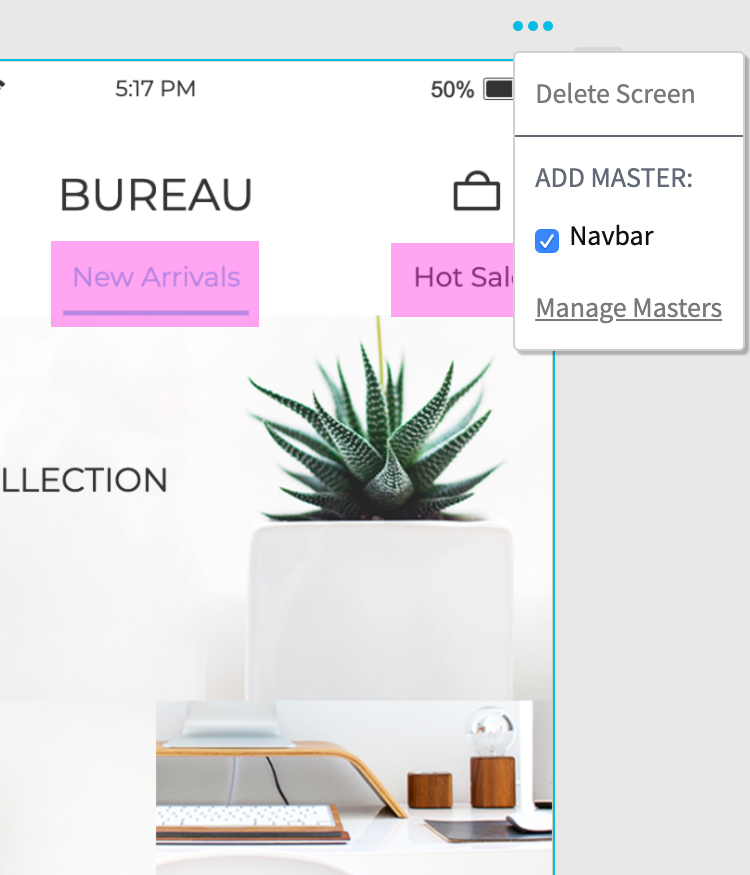
To add a master to a screen, click the ellipsis menu at the top-right of the screen and check the box next to the master's name. Uncheck the box to remove the master from the screen.
To delete or duplicate a master, click the ellipsis menu at the top-right of any screen and click Manage Masters. This dialog will also show the number of screens to which each master has been added.
Fixed headers and footers
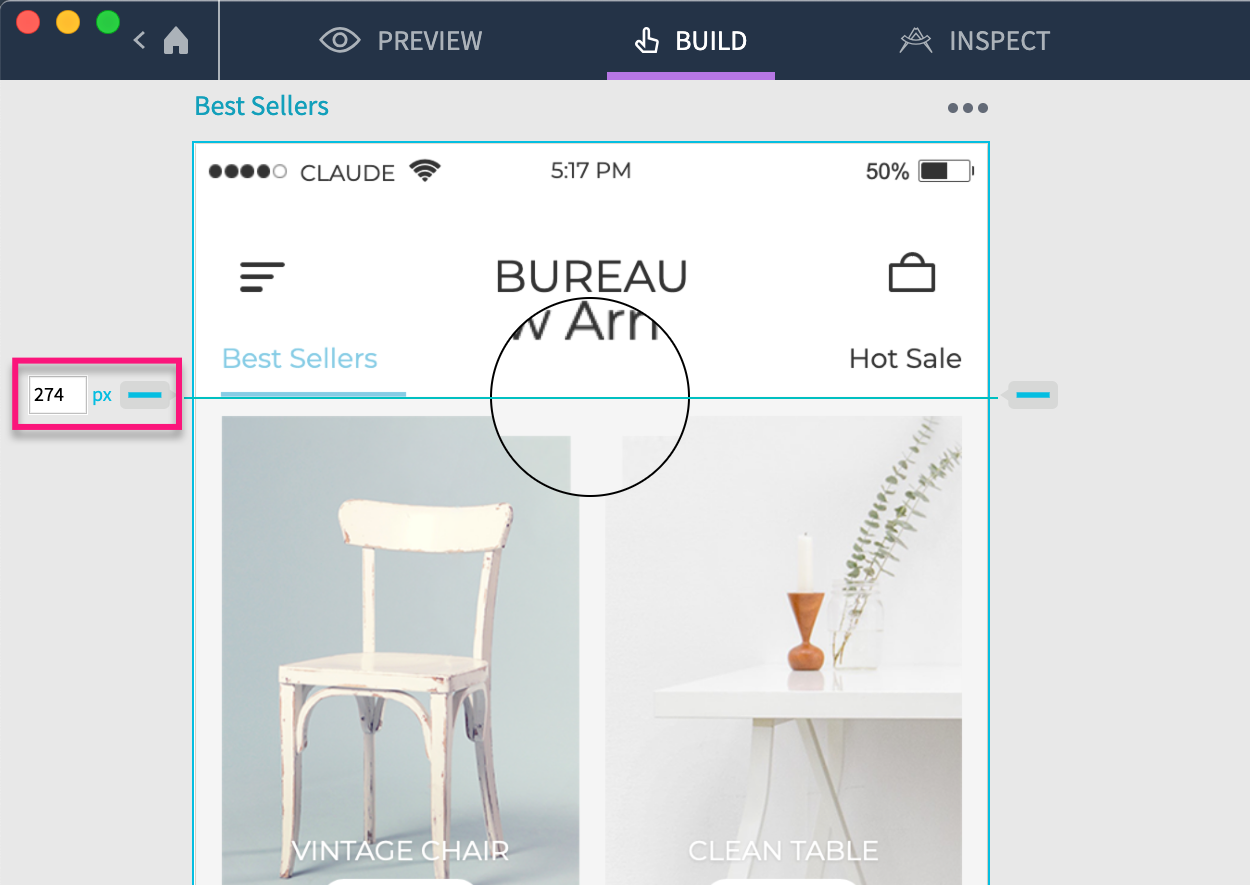
You can define fixed header and footer regions for screens by dragging the handles at the top and bottom of the screen. While you drag, a magnified region will appear to help you set the region's boundary with pixel-precision.
Fixed header and footer regions will remain in place when you scroll the rest of the screen.
A screen is scrollable when its height exceeds the device height defined in the Clickthrough project's Project Settings.