Tooltips tutorial
In this tutorial, you'll learn how to create tooltips that appear when you hover your cursor over an element on the page. We'll explore two ways to do this: Axure RP's built-in tooltip feature, which creates browser-styled tooltips, and the Mouse Hover event, which you can use to show a custom tooltip that you've created with widgets.
The built-in tooltip feature
1. Widget setup
-
Open a new RP file and double-click Page 1 in the Pages pane to open it on the canvas.
-
Drag a placeholder widget onto the canvas from the Libraries pane.
2. Add tooltip text
-
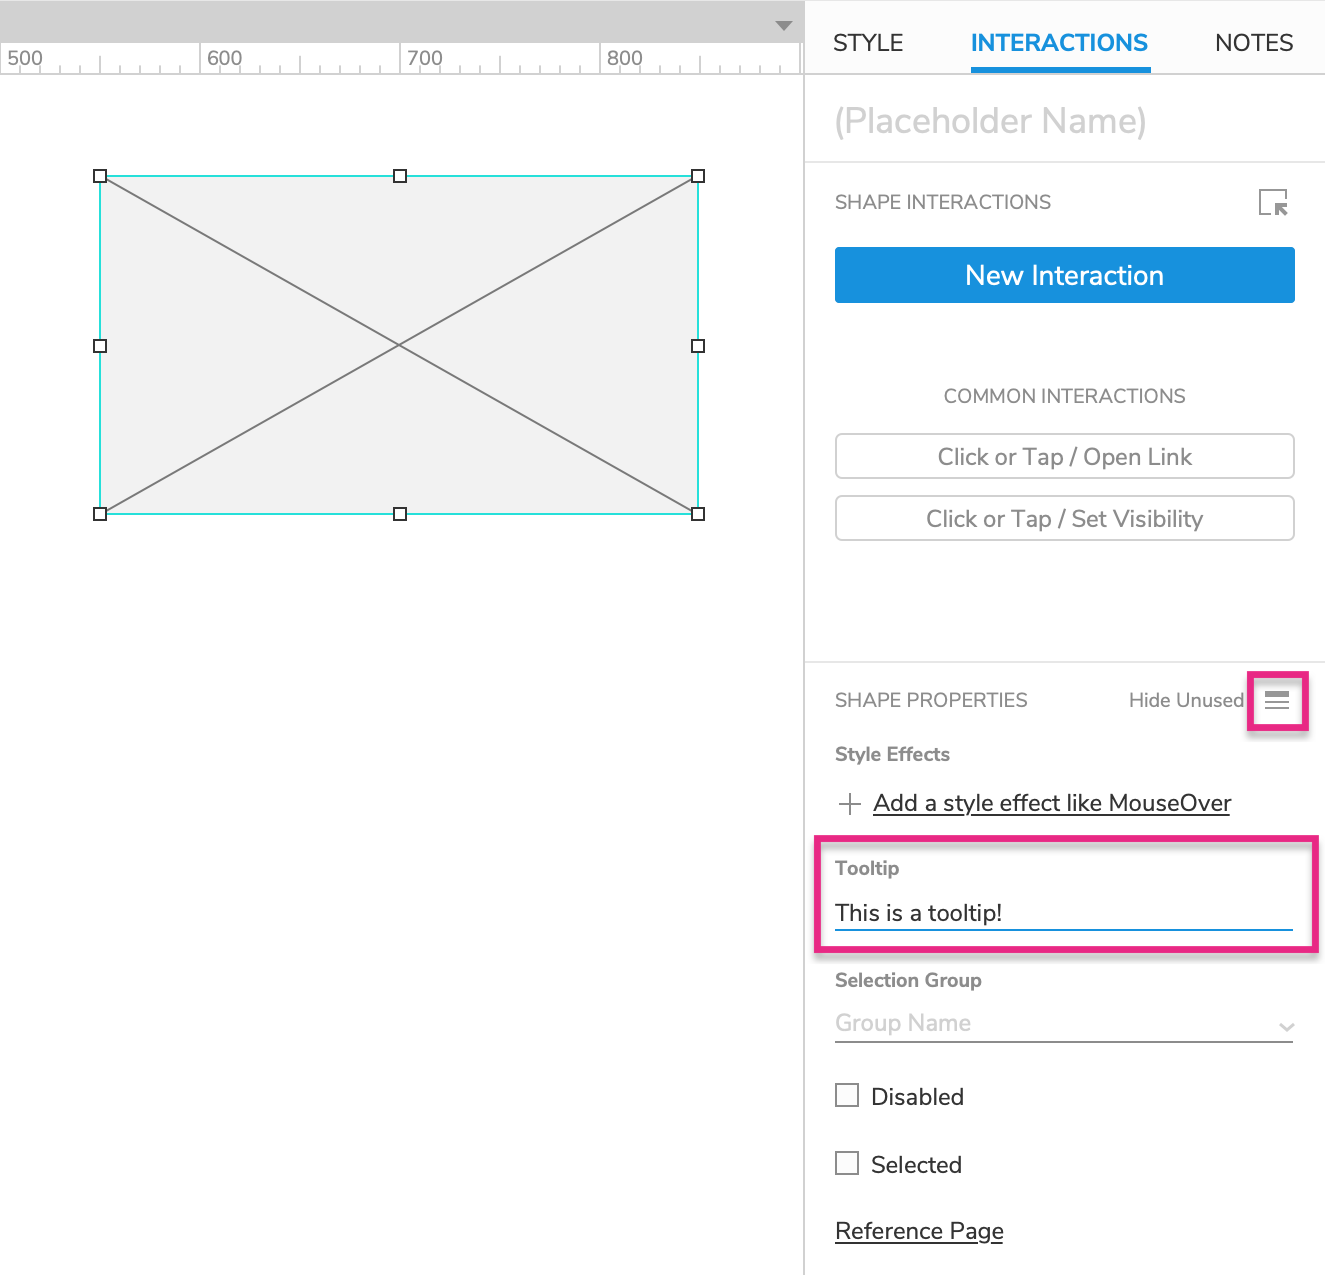
Select the placeholder and switch to the Interactions pane.
-
Click Show All in the lower portion of the pane to show all the placeholder's interactive properties.
-
In the Tooltip field, enter
This is a tooltip!.
3. Preview the page
-
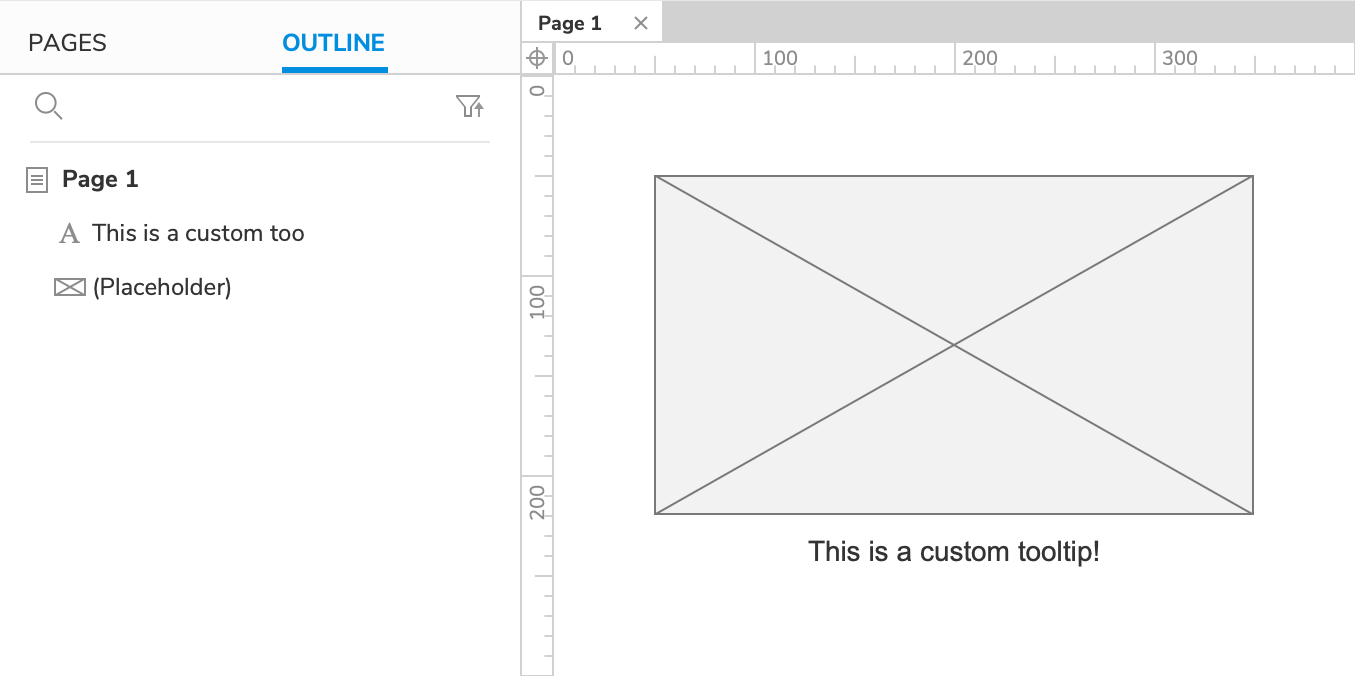
Preview the page and hover your cursor over the placeholder to show the tooltip.
-
Mouse off of the placeholder, and the tooltip will disappear again.
The styling of tooltips created this way is controlled entirely by the web browser. If you need your tooltips to look different, create a custom tooltip by following the steps in the next section.
Custom tooltip shown with mouse hover
1. Widget setup
-
Open a new RP file and double-click Page 1 in the Pages pane to open it on the canvas.
-
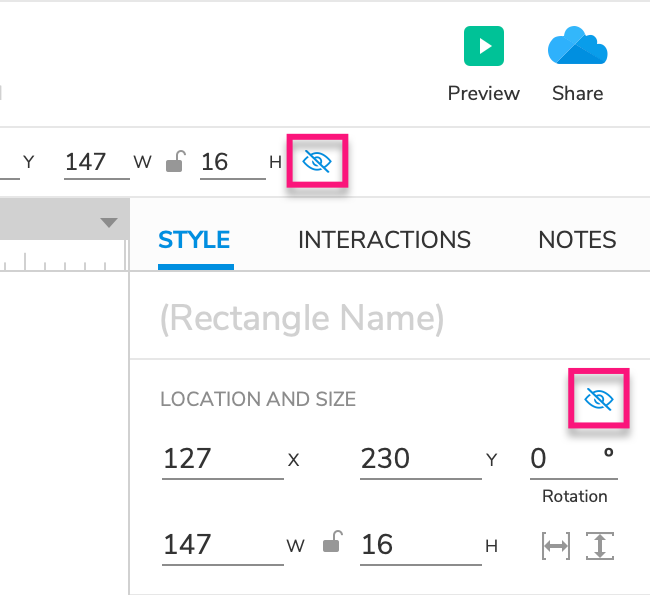
Drag a placeholder widget and a label widget onto the canvas from the Libraries pane.
-
Set the text on the label widget to
This is a custom tooltip!.
- Hide the label widget by selecting it and clicking the Hidden icon in the Style pane or the style toolbar.
2. Show the tooltip with the placeholder's mouse hover event

-
Select the placeholder and click New interaction in the Interactions pane.
-
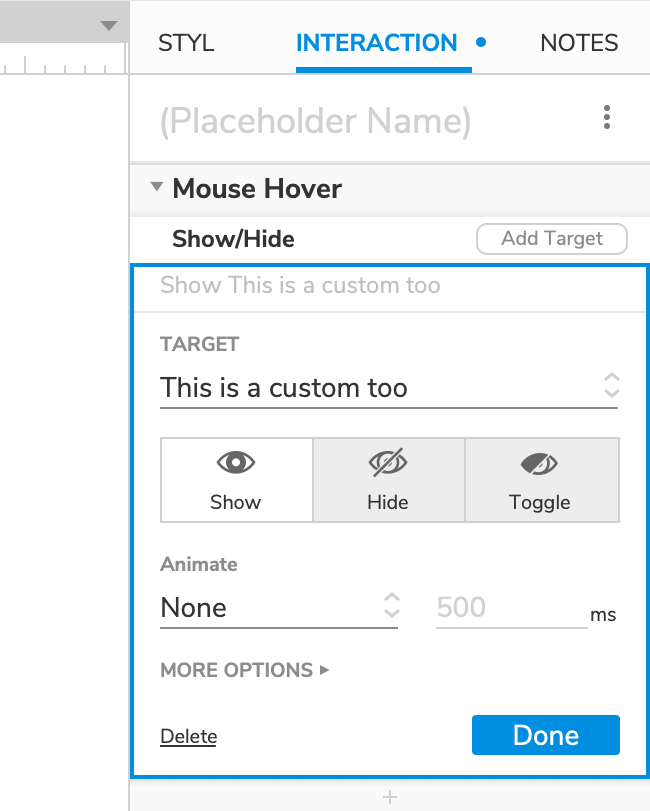
Select the Mouse hover event in the list that appears, and then select the Show/hide action.
-
Select the label widget in the Target dropdown and leave Show selected below it.
-
Click OK to save the action.
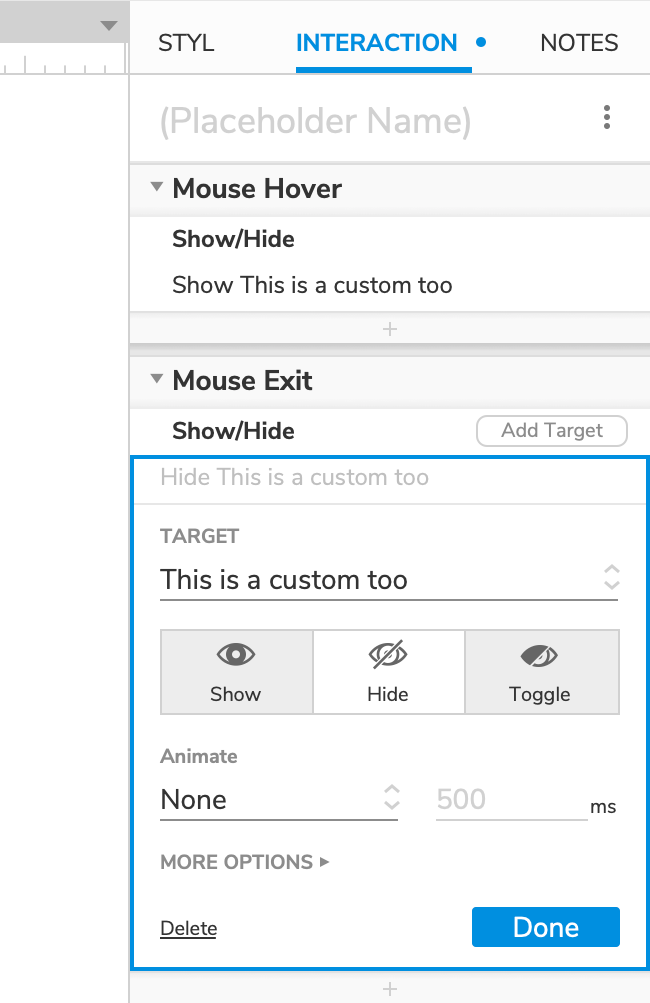
3. Hide the tooltip with the placeholder's mouse exit event
-
With the placeholder still selected, click New interaction again.
-
Select the Mouse Exit event, and then select the Show/Hide action.
-
Target the label widget again, and select Hide below it.
-
Click OK to save the action.
4. Preview the interaction
-
Preview the page and hover your cursor over the placeholder. After about a second, the custom tooltip should appear.
-
Mouse off of the placeholder, and the tooltip will disappear again.
Additional information and tips
Show/hide custom tooltip with animations
To show or hide a custom tooltip with an animation, select one in the Animate dropdown of the Show/Hide action.