The Axure RP environment
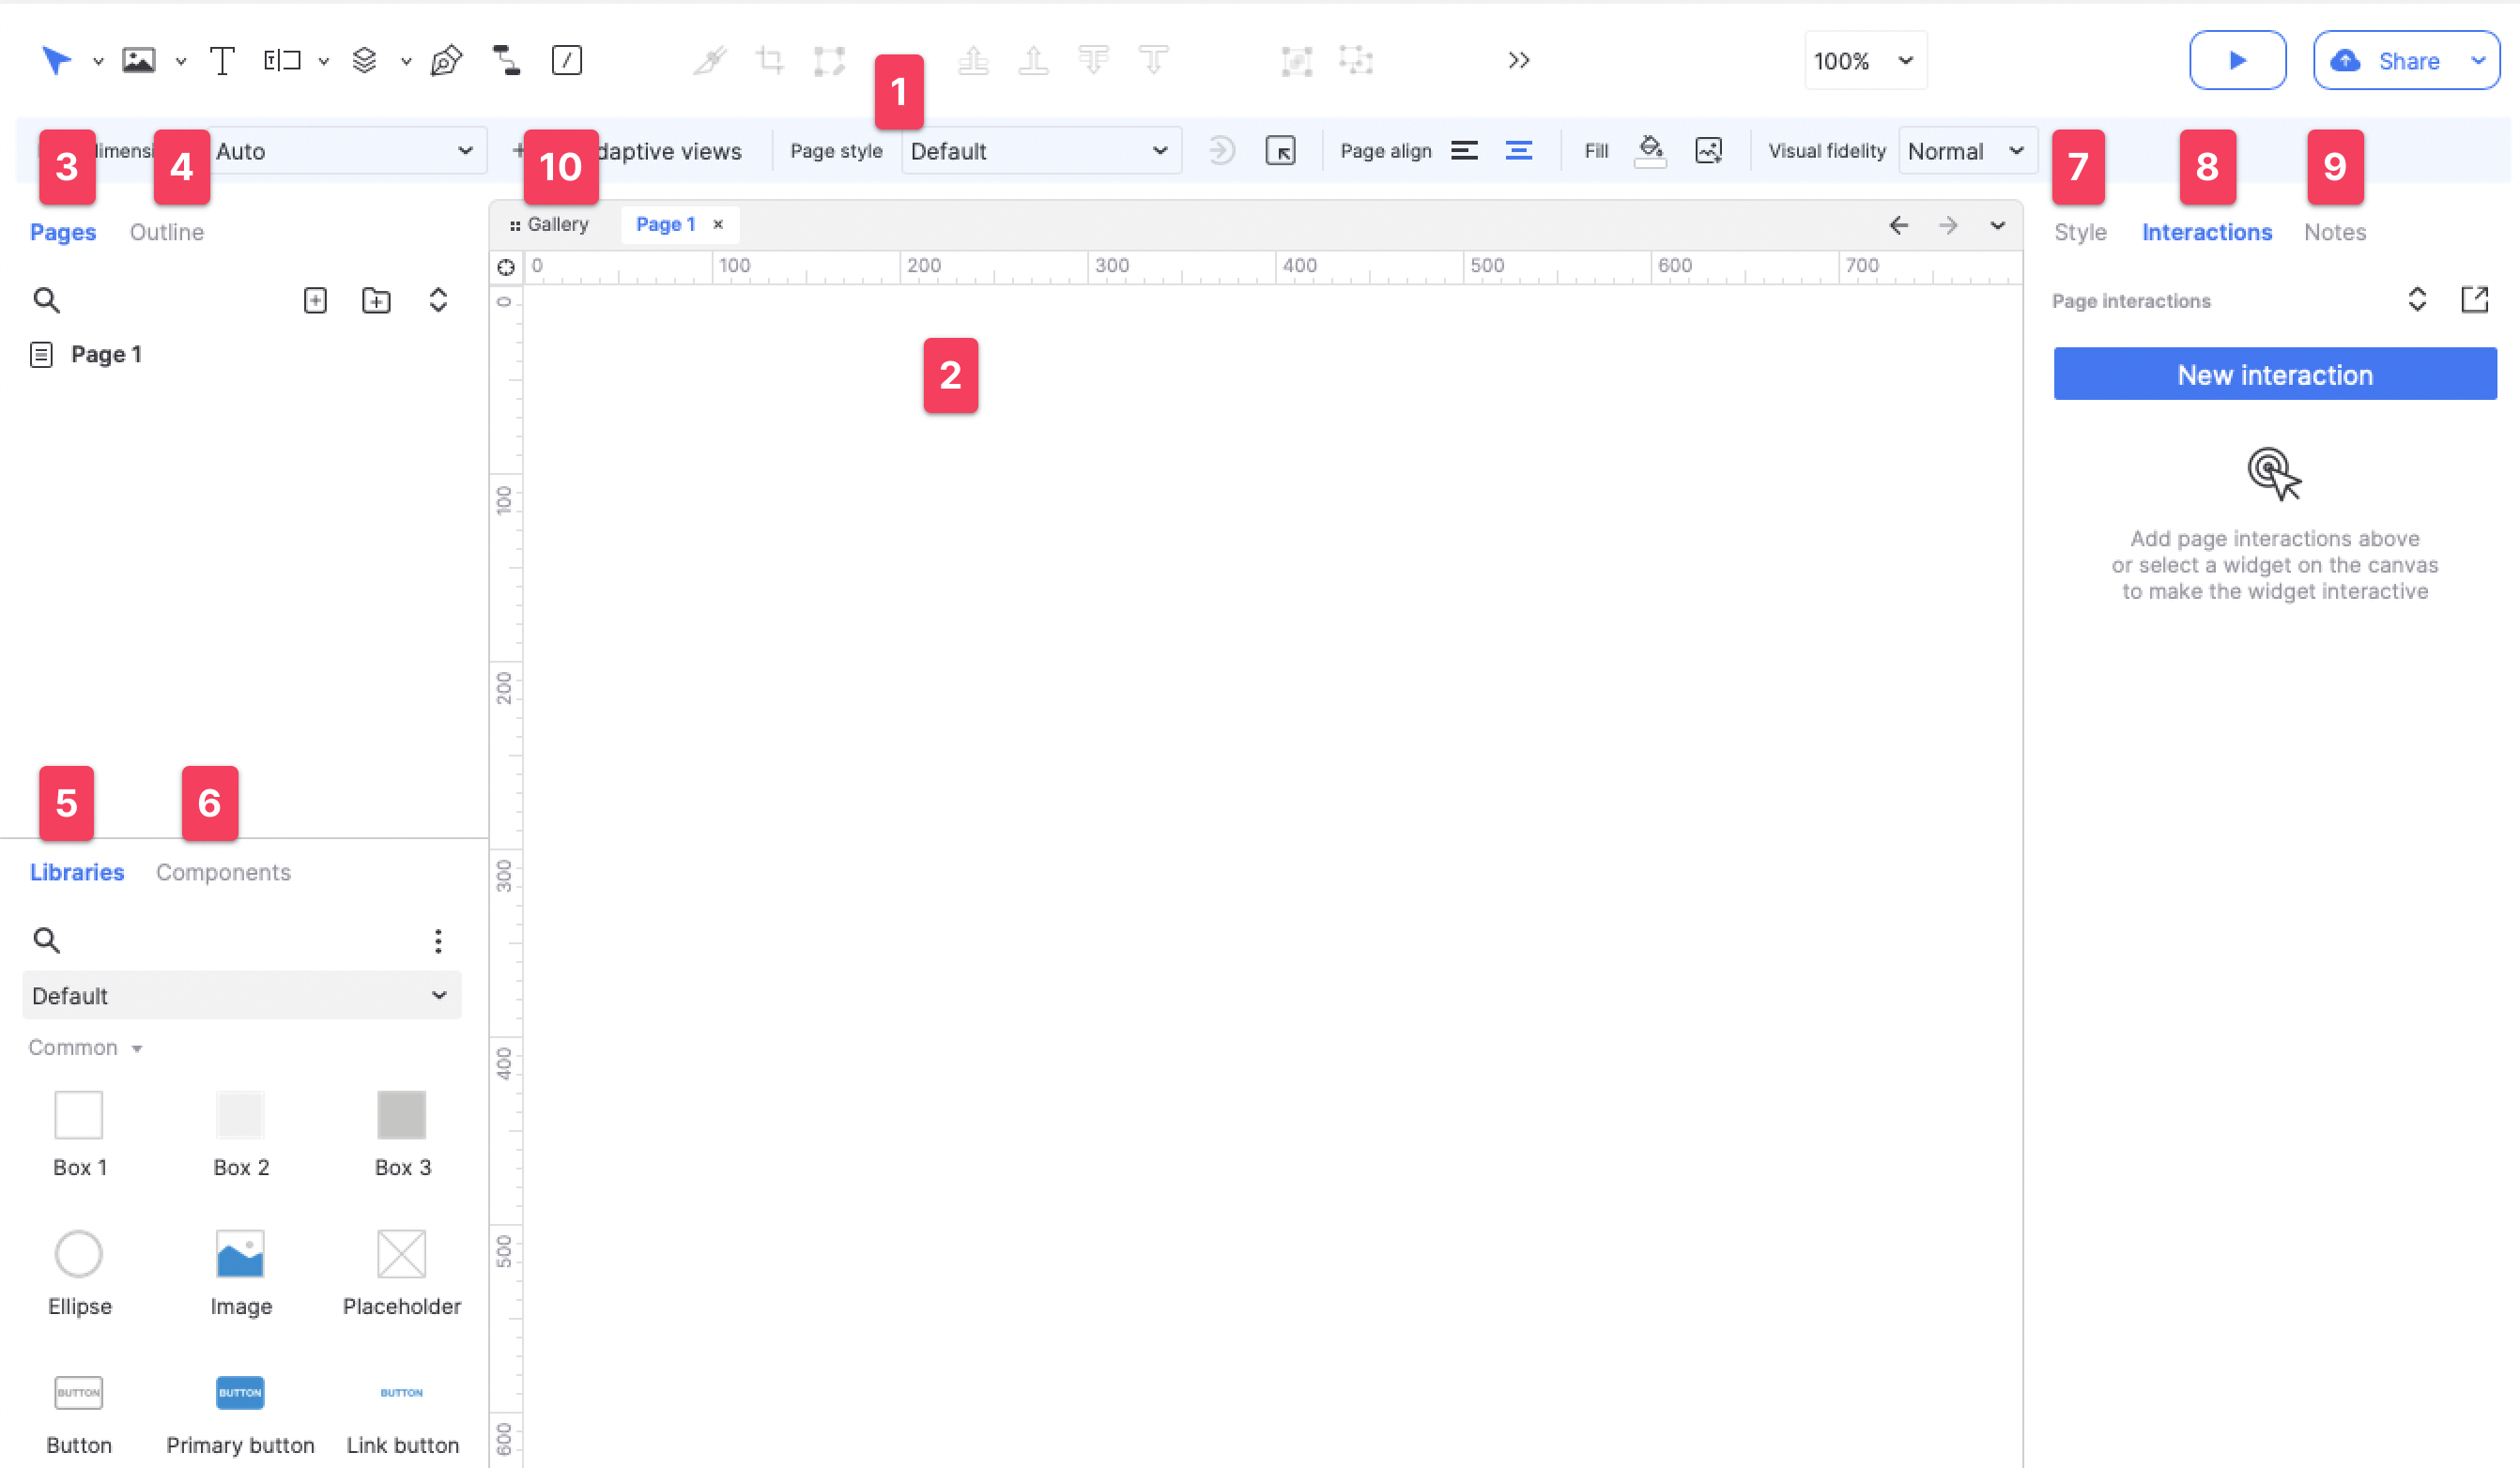
At the center of the Axure RP interface is the canvas, where you create your diagrams by arranging widgets. Surrounding the canvas are toolbars and instrument panes that allow you to customize the look and behavior of your diagrams and to share them with others.
You can toggle the interface's panes and toolbars in the View menu.
A map of the environment
-
Main toolbar and style toolbar: Perform common actions like arranging widgets, styling widgets, and publishing. Change the cursor tool between selection modes, connector mode, and drawing tools.
-
Canvas: Lay out widgets on this drag-and-drop environment. You can change its color and dimensions, add a grid and guides, and toggle the visibility of the rulers.
-
Pages: Add, remove, rename, and organize the pages in your file.
-
Outline: View a searchable, sortable, and filterable list of all widgets, components, and dynamic panels on the current diagram.
-
Libraries: Resource for widgets such as buttons, images, text and shapes. Drag the widgets from the Libraries pane and drop them onto the canvas. Via the Libraries pane you can switch between libraries of widgets, load additional libraries, and create your own custom libraries. You can also load folders of images from a local drive.
-
Components: Add, remove, rename and organize components, which are centrally managed sets of widgets that you can reuse throughout your file.
-
Style: Edit widget and page styling.
-
Interactions: Add and edit interactions and other interactive properties on the page or selected widget.
-
Notes: Add and edit widget and page notes.
-
Gallery view: View an overview of all of the pages and components in your file so you can quickly see everything at once.
Customizing the environment
Customizing the panes
The interface panes can be dragged and dropped just about anywhere. Pop a pane out of the UI to make it a free-floating window, or drop it on a turquoise hot zone to anchor it to a new spot in the UI.
Anchor zones are available in a variety of locations, and we encourage you to experiment to find the configuration that works best for you.
Customizing the main toolbar
You can change which icons appear in the Main Toolbar by going to View → Toolbars → Customize main toolbar or by right-clicking a blank spot in the toolbar and selecting Customize toolbar in the context menu.
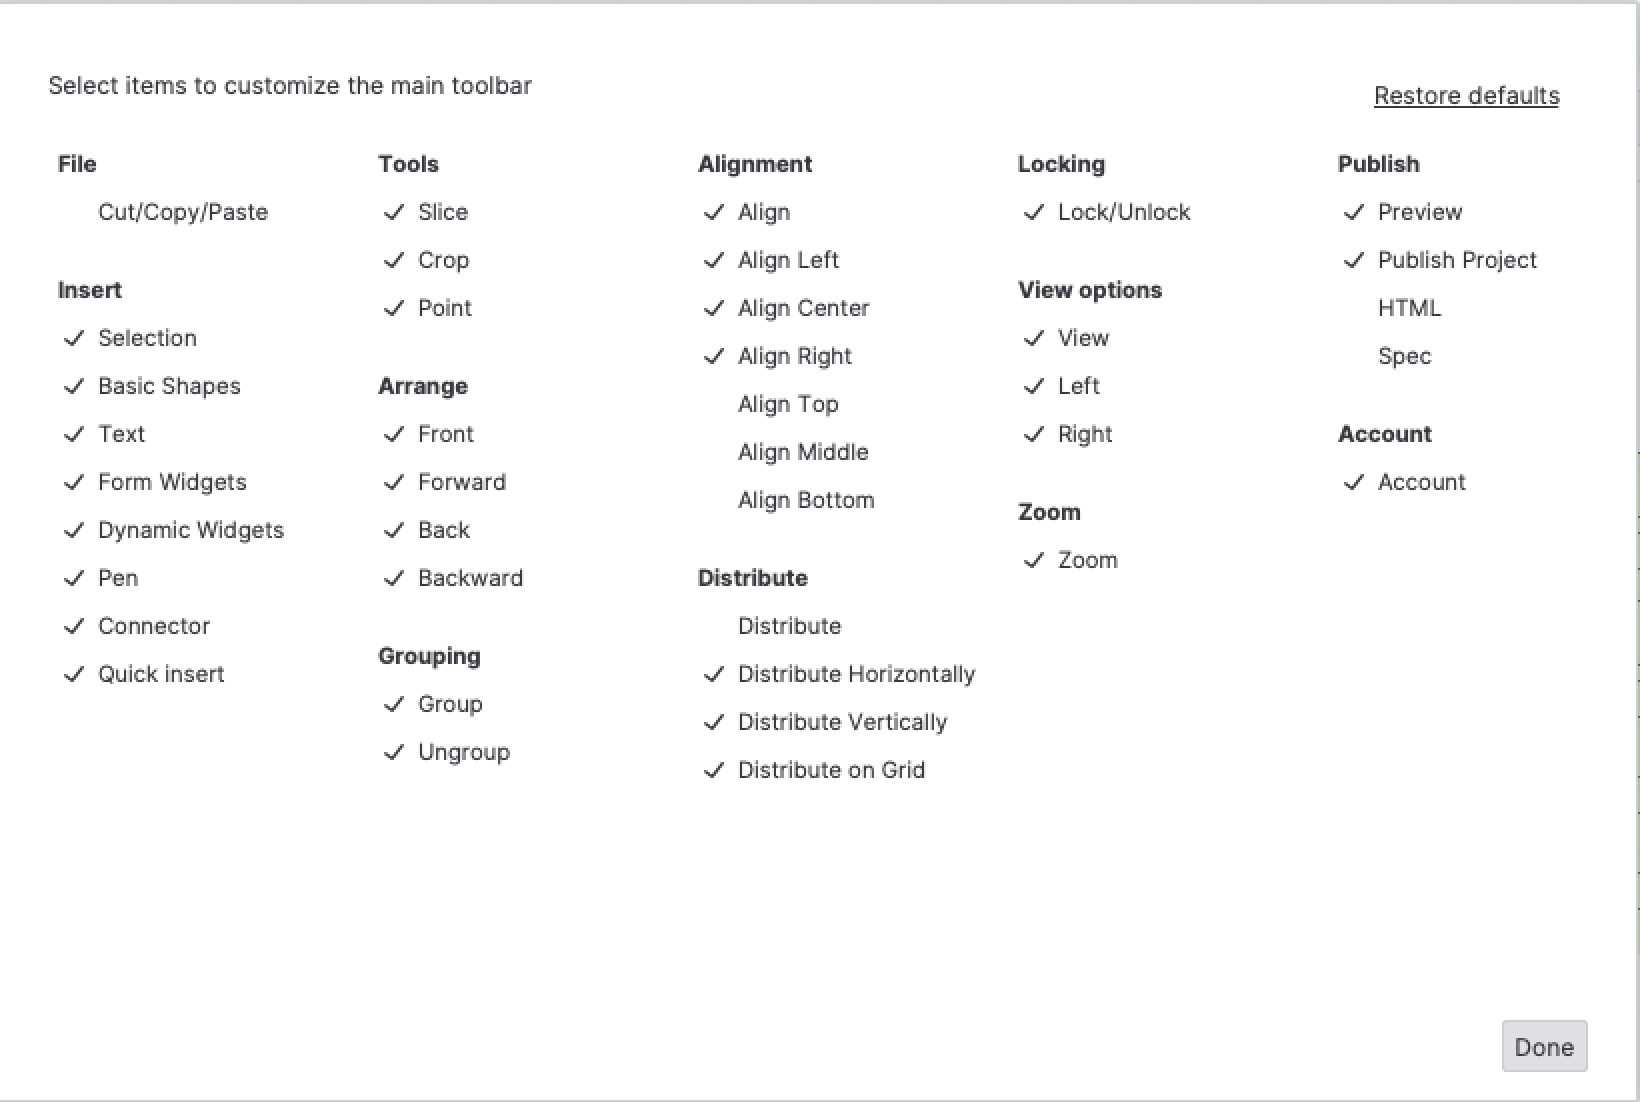
In the modal that appears, check the items you want to include in the Main Toolbar. For a minimalist interface, you can also uncheck the Show labels under icons checkbox at the bottom-right to hide the icon labels in the toolbar.
To reset the toolbar to its default state, click Restore defaults at the top-right.
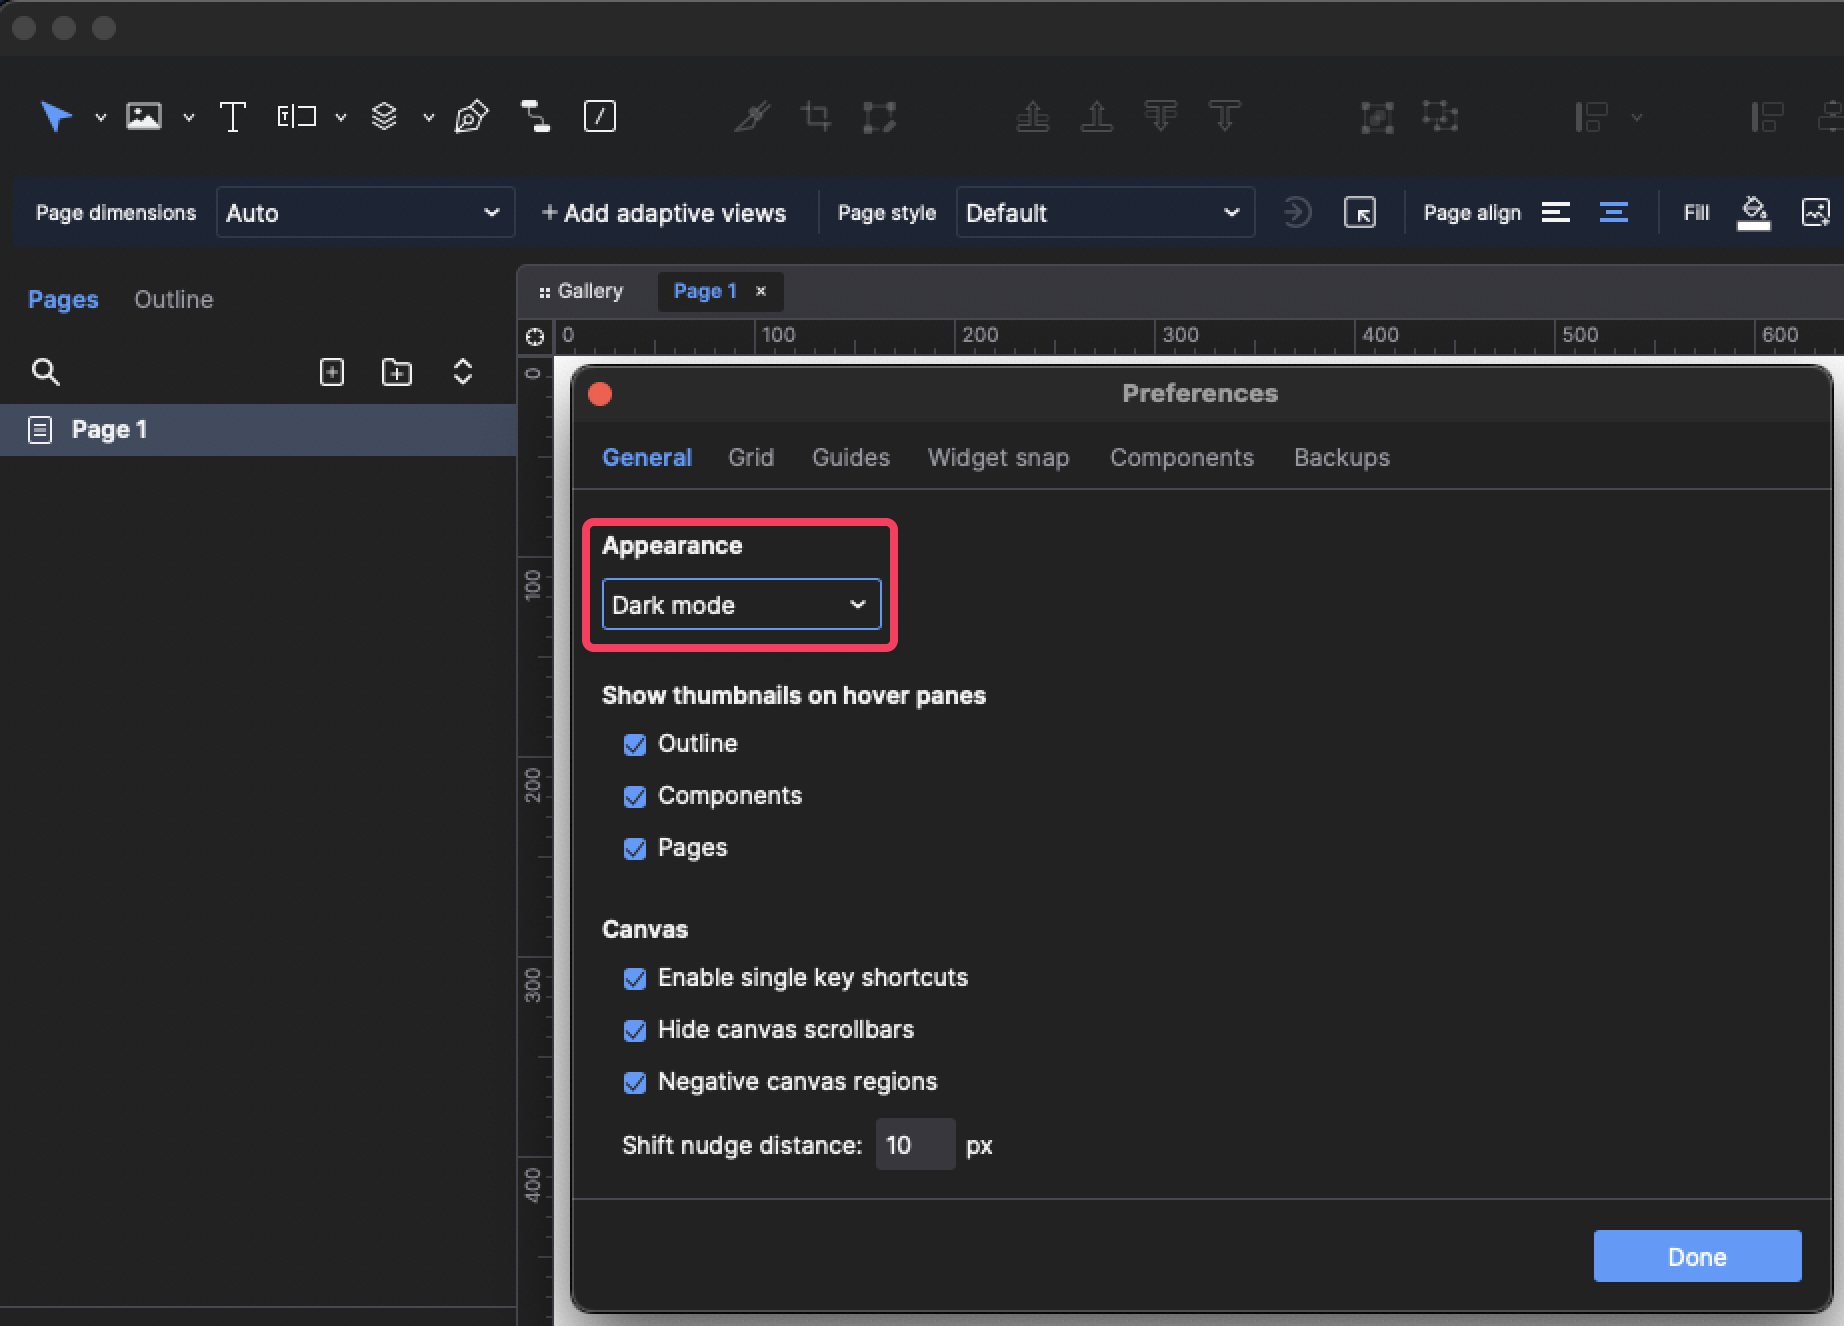
Dark mode
You can switch Axure RP to a dark UI mode in the application preferences, located at one of the following locations in the top menu, depending on your operating system:
- Mac: Axure RP 11 → Settings
- Windows: File → Preferences
Select Dark Mode in the Appearance dropdown on the General tab. Mac users may also select Use system setting to have Axure RP match the operating system's UI settings.