Set dynamic panel state on next page tutorial
In this tutorial, you'll learn how to use a global variable to set the state of a dynamic panel based on a selection made on a previous page in the prototype.
1. Widget and page setup
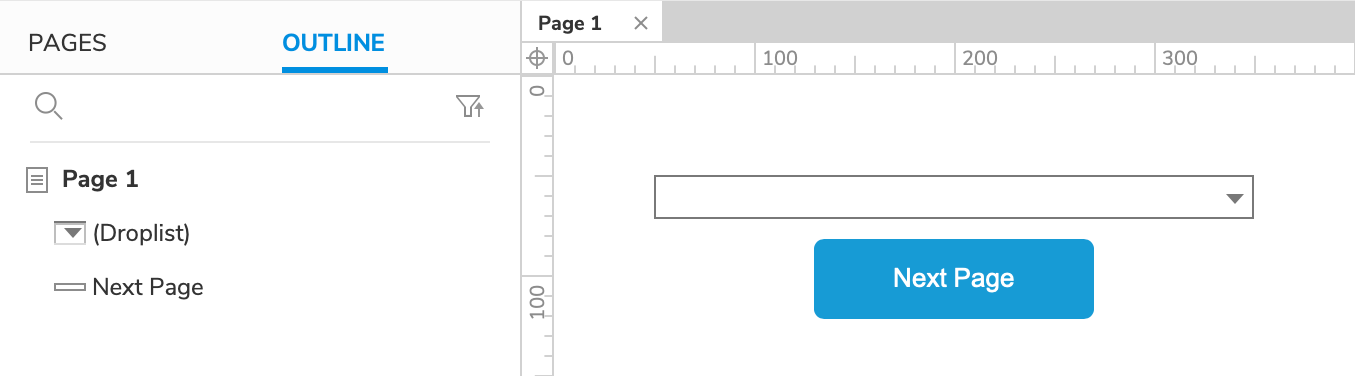
Page 1 – The selection form
-
Open a new RP file and open Page 1 on the canvas.
-
Drag a droplist widget and a button widget onto the canvas from the Libraries pane.
-
Set the button's text to
Next Page.
-
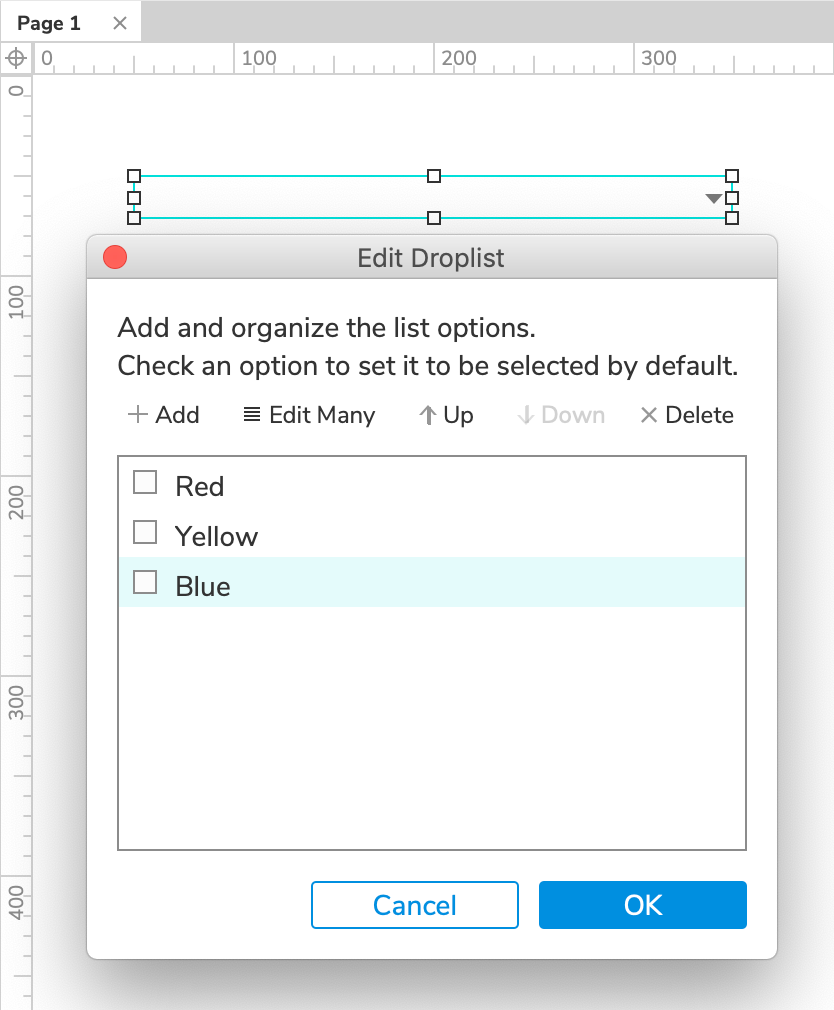
Double-click the droplist to edit its options.
-
In the dialog that appears, click Add three times to create three new options. Make one
Red, oneYellow, and oneBlue.
Page 2 – The dynamic panel
-
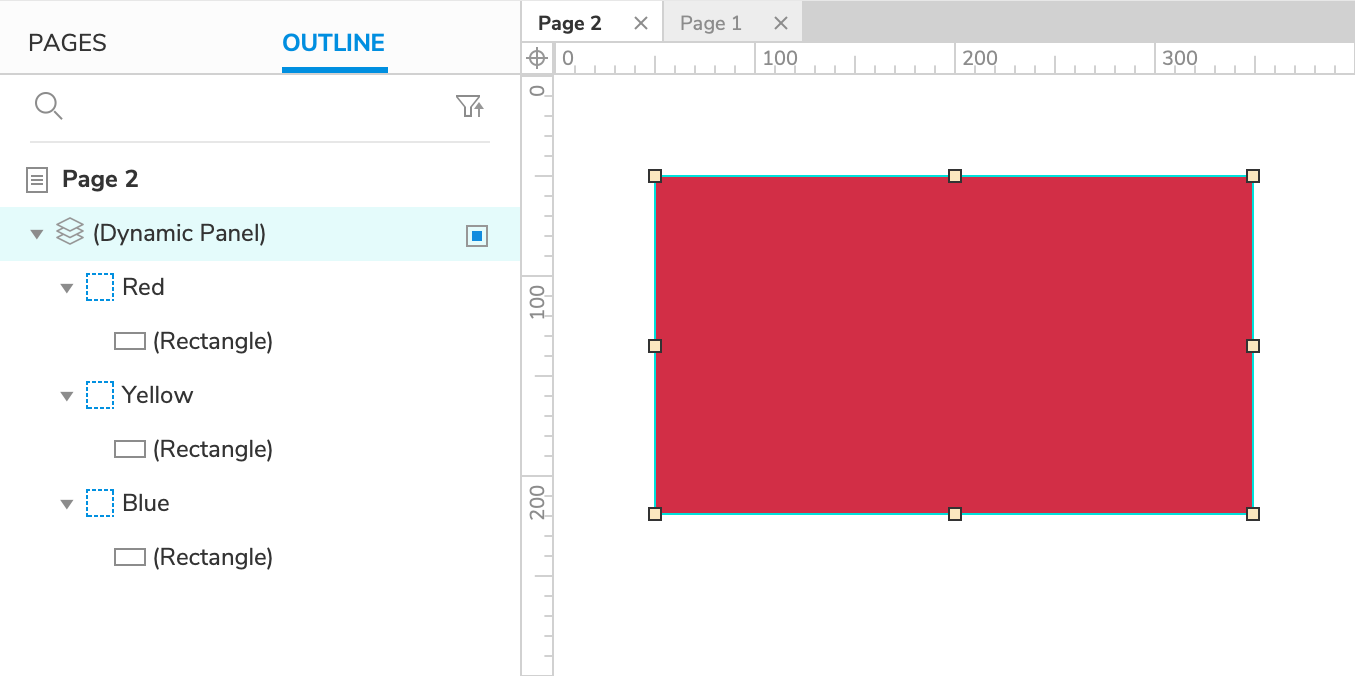
Add a new page to the project and open it on the canvas.
-
Drag three rectangle widgets onto the canvas. Give one a red fill color, one a yellow fill color, and one a blue fill color.
-
Right-click the red rectangle and select Create dynamic panel in the context menu.
-
In the Outline pane, rename the dynamic panel's first state to
Red.
The dynamic panel's state names must match the options in the droplist widget on Page 1.
-
Give the dynamic panel two new states. Name one
Yellowand the otherBlue. -
In the Outline pane, drag the yellow rectangle widget into the Yellow panel state. Then, move it to (0,0) on the canvas. Repeat this for the blue rectangle widget.
2. Create a global variable to store the user's selection
-
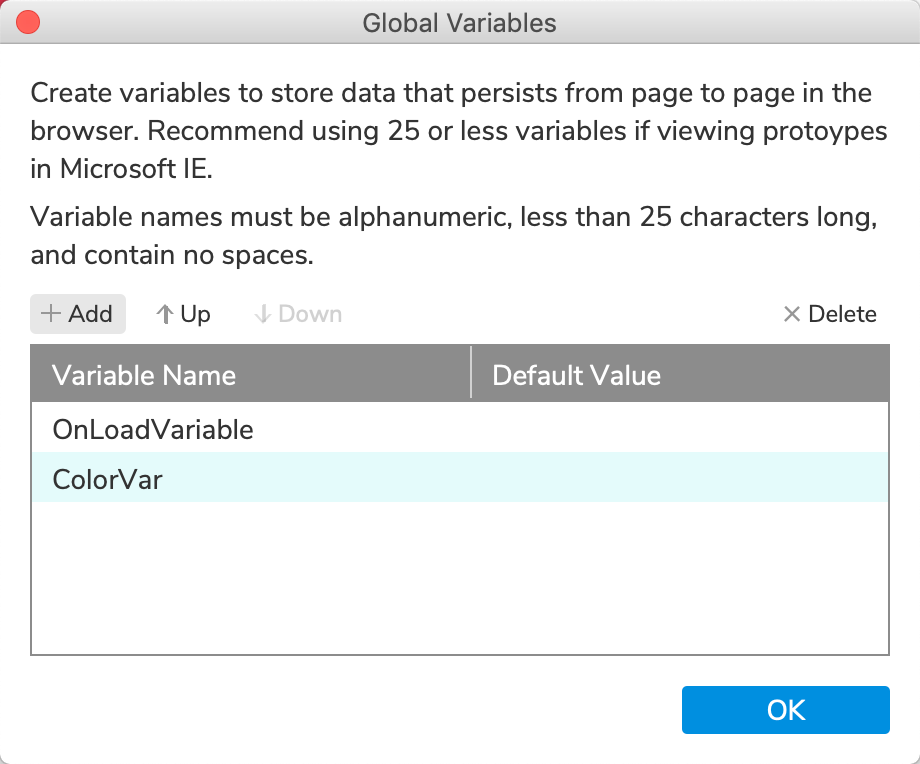
In the top menu, go to Project → Global variables.
-
In the Global Variables dialog, click Add to add a new variable. Name it
ColorVar. -
Click OK to close the dialog.
3. Capture the user's input and go to the next page
Set the variable's value to the droplist's selection
-
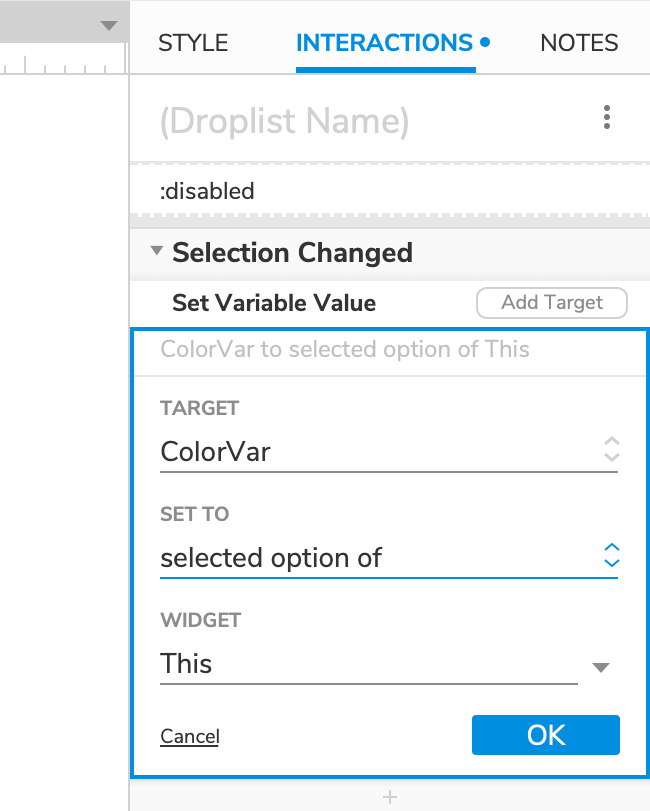
Open Page 1 on the canvas and select the droplist widget.
-
Click **New interaction in the Interactions pane.
-
Select the Selection Changed event in the list that appears, and then select the Set Variable Value action.
-
Select the ColorVar variable in the Target dropdown.
-
In the Set To dropdown, select selected option of.
-
Leave This selected in the Widget dropdown, and click OK to save the action.
Open link to page 2
-
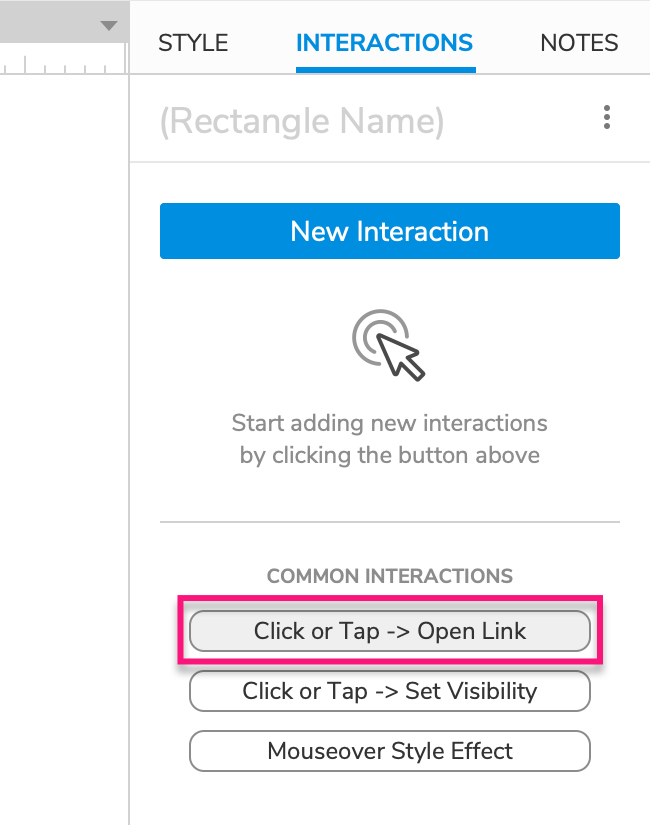
Select the button widget and click Click or Tap → Open link in the Interactions pane.
-
Select Page 2 in the Link To dropdown and click OK to save the action.
4. Set the dynamic panel's state to the variable's value
-
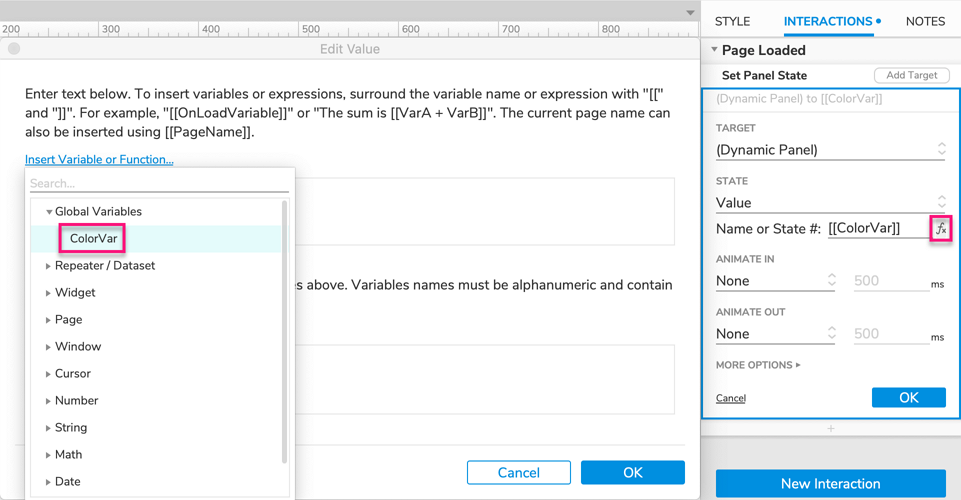
Open Page 2 and click a blank spot on the canvas to select the page itself. Then click New interaction in the Interactions pane.
-
Select the Page loaded event in the list that appears, and then select the Set panel state action.
-
Select the dynamic panel in the Target dropdown.
-
In the State dropdown, select Value. Then click the fx icon next to the field that appears to open the Edit value dialog.
-
Delete the text in the upper field of the dialog, and then click Insert variable or function.
-
In the dropdown that appears, select ColorVar under the Global Variables heading. The field at the top of the dialog should now read:
[[ColorVar]]. (This bracketed expression will be replaced by the variable's value in the web browser.)
We're able to set the state of the dynamic panel to the droplist's selected option — which is stored in the variable — because the panel's states have the same names as the droplist's options.
- Click OK to close the Edit value dialog, and then click OK to save the Set panel state action.
5. Preview the interaction
-
Preview Page 1 and select a color in the dropdown.
-
Click the Next Page button to navigate to Page 2. The dynamic panel should display the color you selected in the droplist.